
Welcome to an in-depth guide on mastering algorithmic trading with NinjaTrader, inspired by the expert insights of Vinny Emini. In this comprehensive tutorial, we dive into some of the most powerful strategies and tools featured on Day 6 of the Algo Futures Trading Course. Whether you’re a beginner or an experienced trader looking to sharpen your skills, this step-by-step breakdown will help you understand and apply key concepts like the Ignition Bar, J Hook strategy, Masher reversals, Enigma with AudioBox, Enigma cadence, Double Enigmas, and the ultimate Enigma Double Cross Double Move (DCDM) setup.
Let’s reboot your trading approach with these actionable strategies that leverage high and low time frame confluences, real-time order flow, and smart risk management techniques. Ready to elevate your trading game? Let’s get started.
Table of Contents
- Step 1: Understanding the Ignition Bar – Your Directional Bias Indicator
- Step 2: Mastering the J Hook Strategy – An Advanced Structural Play
- Step 3: Using the Masher Strategy – High Time Frame Reversal Detection
- Step 4: Leveraging Enigma Plus AudioBox for Real-Time Order Flow Analysis
- Step 5: The Enigma Moonshot – Precision Entries with Confluence
- Step 6: Applying Enigma Cadence – Managing Trade Sequences for Better Results
- Step 7: Double Enigmas – Doubling the Power of Your Trades
- Step 8: The Enigma Plus Double Cross Double Move (DCDM) – The Ultimate Strategy
- Step 9: Additional Tips and Resources
- Conclusion
Step 1: Understanding the Ignition Bar – Your Directional Bias Indicator
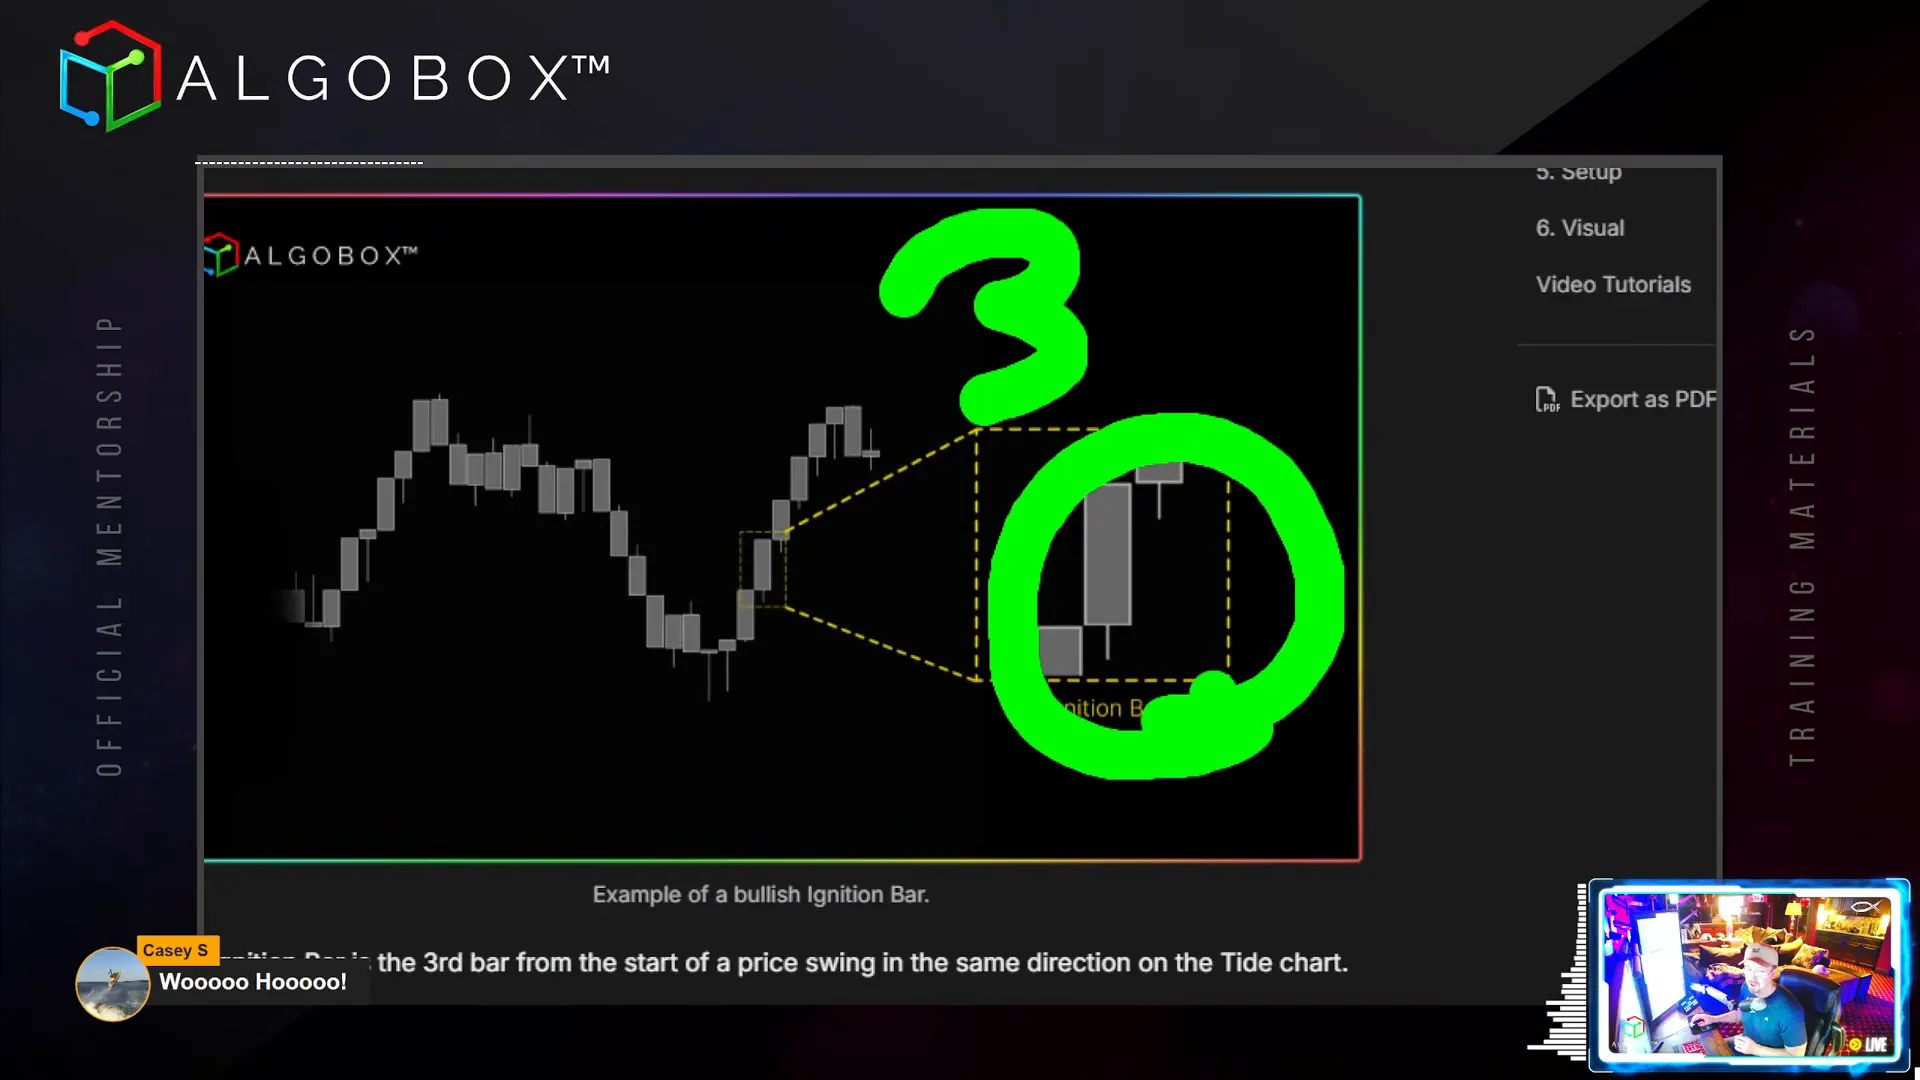
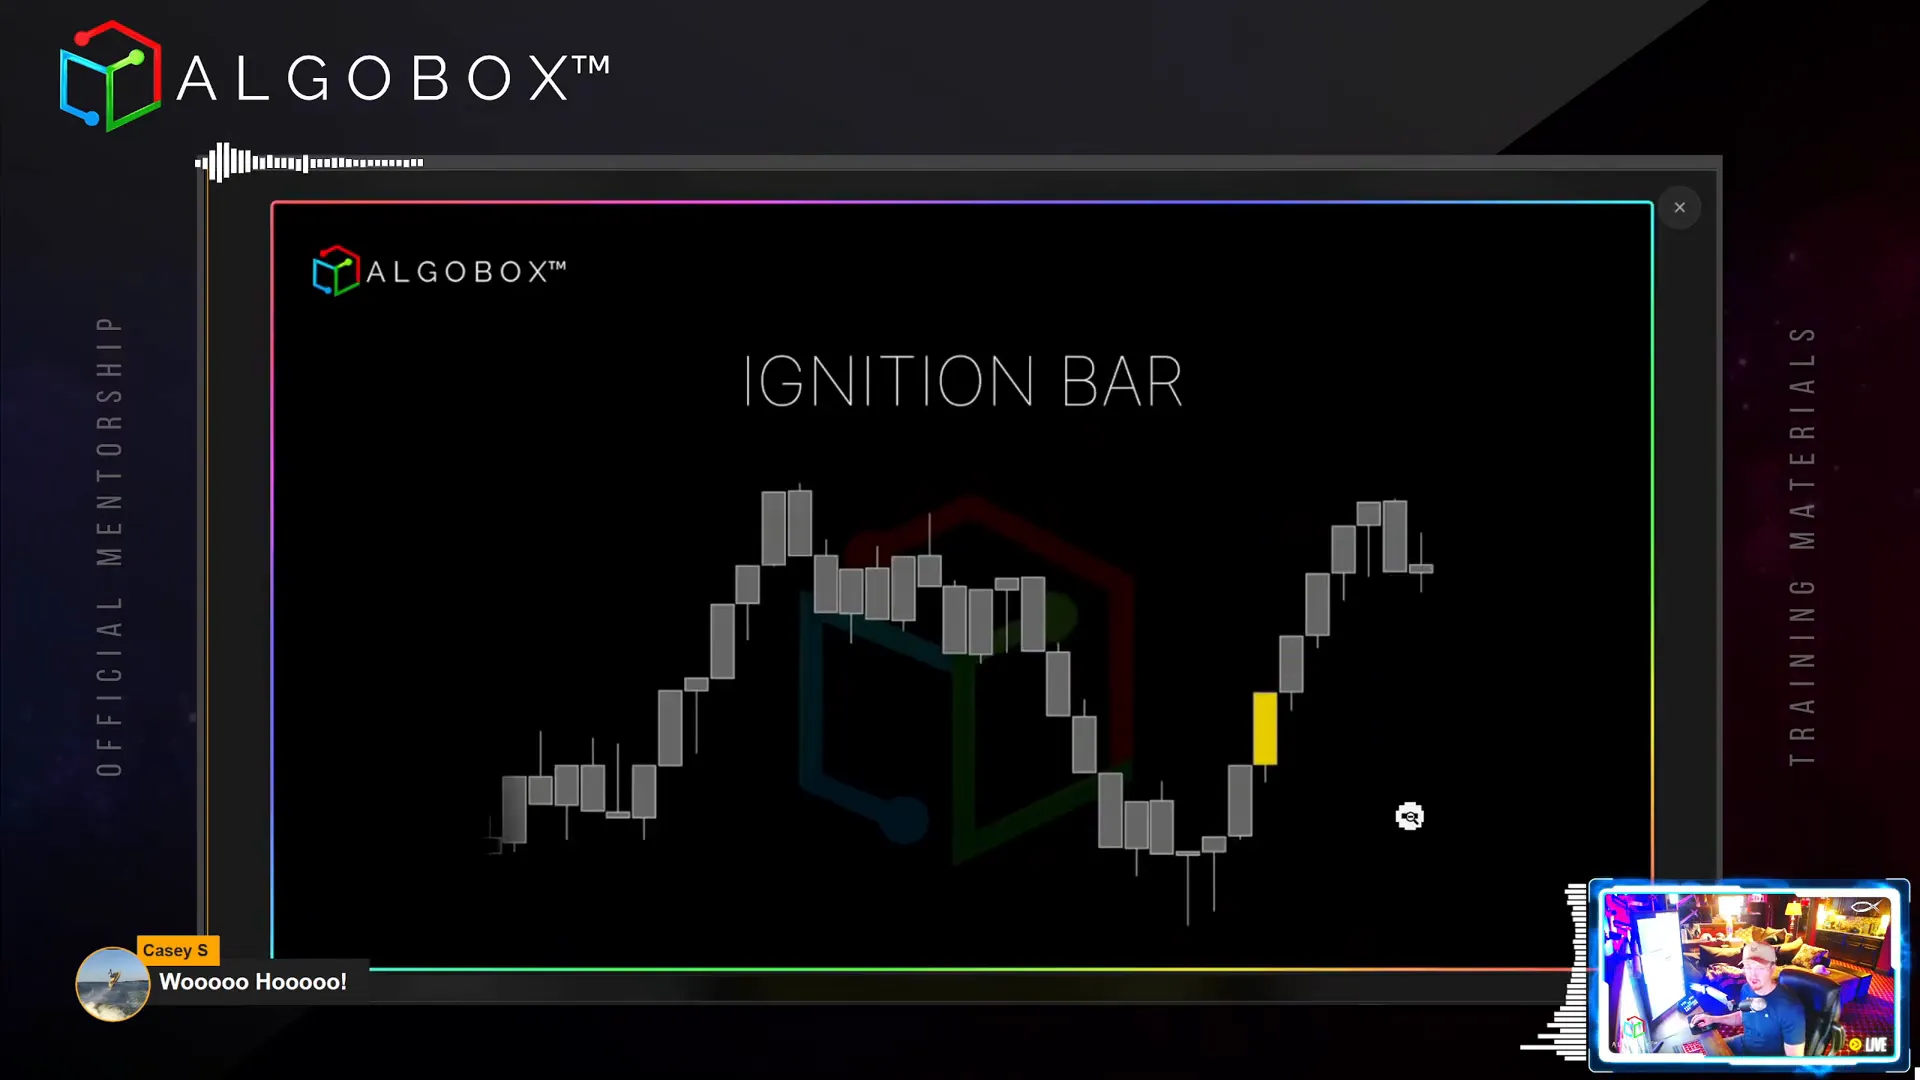
The Ignition Bar is a crucial directional bias indicator that signals strong market momentum on a high time frame. It is not exactly a standalone trading strategy but rather a powerful filter and clue to market direction.
Key takeaway: If you see an Ignition Bar, do not trade against it. This simple rule can save you from many losing trades.
So, what exactly is an Ignition Bar?
- It is a range bar that appears solid from top to bottom with minimal wick.
- It is primarily used on the 89-range Tide chart, which is part of the AlgoBox system.
- Ignition Bars typically appear as the third bar after a pivot point—referred to as “bar number three.”
When bar number three is a solid Ignition Bar—essentially a “monstrosity” of a bar—it indicates a strong directional move. The best trading practice is to play in the direction of the color of that bar once it completes.
For example, if the Ignition Bar is green (or blue, depending on your color settings), that signals a long bias. Conversely, a red Ignition Bar signals a short bias. AlgoBox provides an indicator that highlights Ignition Bars visually by turning them gold by default, and it also offers audio alerts to notify you when such bars form.
After an Ignition Bar forms, the next bar often continues the momentum about 70-80% of the time. Hence, the proper approach is to enter the trade in the direction of the Ignition Bar on the following bar, ideally confirming with a lower time frame entry for better risk management.
Remember, this is a high time frame signal, so always use lower time frame charts for precise entries and risk control. Also, note that Ignition Bars only appear on the full 5-chart layout and will not show up if you use a smaller 3-chart layout.
Step 2: Mastering the J Hook Strategy – An Advanced Structural Play
The J Hook is an advanced trading strategy designed for experienced traders due to its higher risk and larger stop requirements. It’s a structural pattern that indicates a potentially large market move and automatically plots optimal entry zones, stop levels, and three Fibonacci-based target levels on your chart.
Important: If you’re new to trading, keep the J Hook on your charts for awareness but avoid taking entries until you gain more experience.
The J Hook pattern typically forms after a “trap” where retail traders get caught offside. This trap looks like a sharp move in one direction that lures traders in, only to reverse sharply against them. The J Hook resembles an upside-down, backward “J” shape on the chart, often accompanied by a “triple crown” formation.
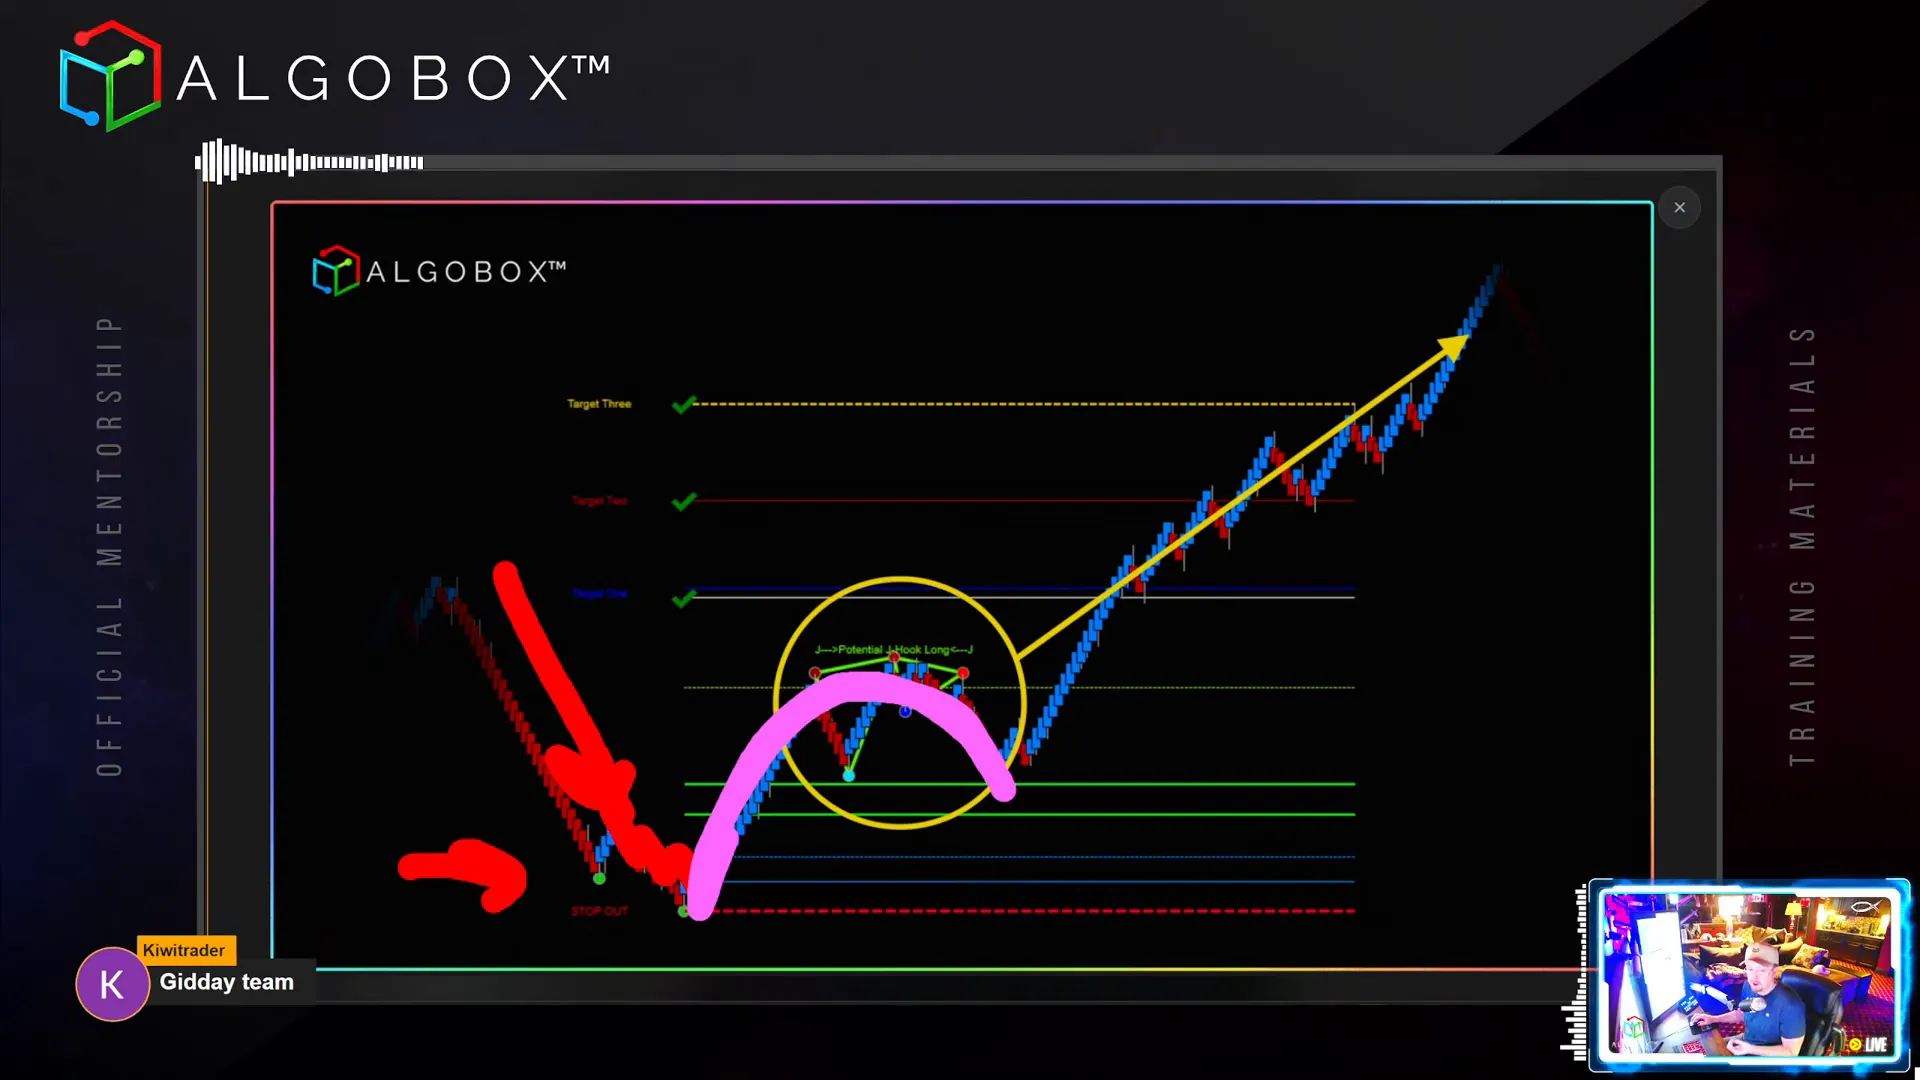
The ideal entry for a J Hook is within the 50% to 61.8% Fibonacci retracement zone of the initial trap move. AlgoBox automatically draws this for you, but you can also use the F8 hotkey in NinjaTrader to draw Fibonacci levels manually if needed.
Combining the J Hook with other signals, especially the Enigma indicator, increases the probability of success. For example, if an Enigma signal coincides with the J Hook entry zone, it often marks a precision entry point with a tighter stop.
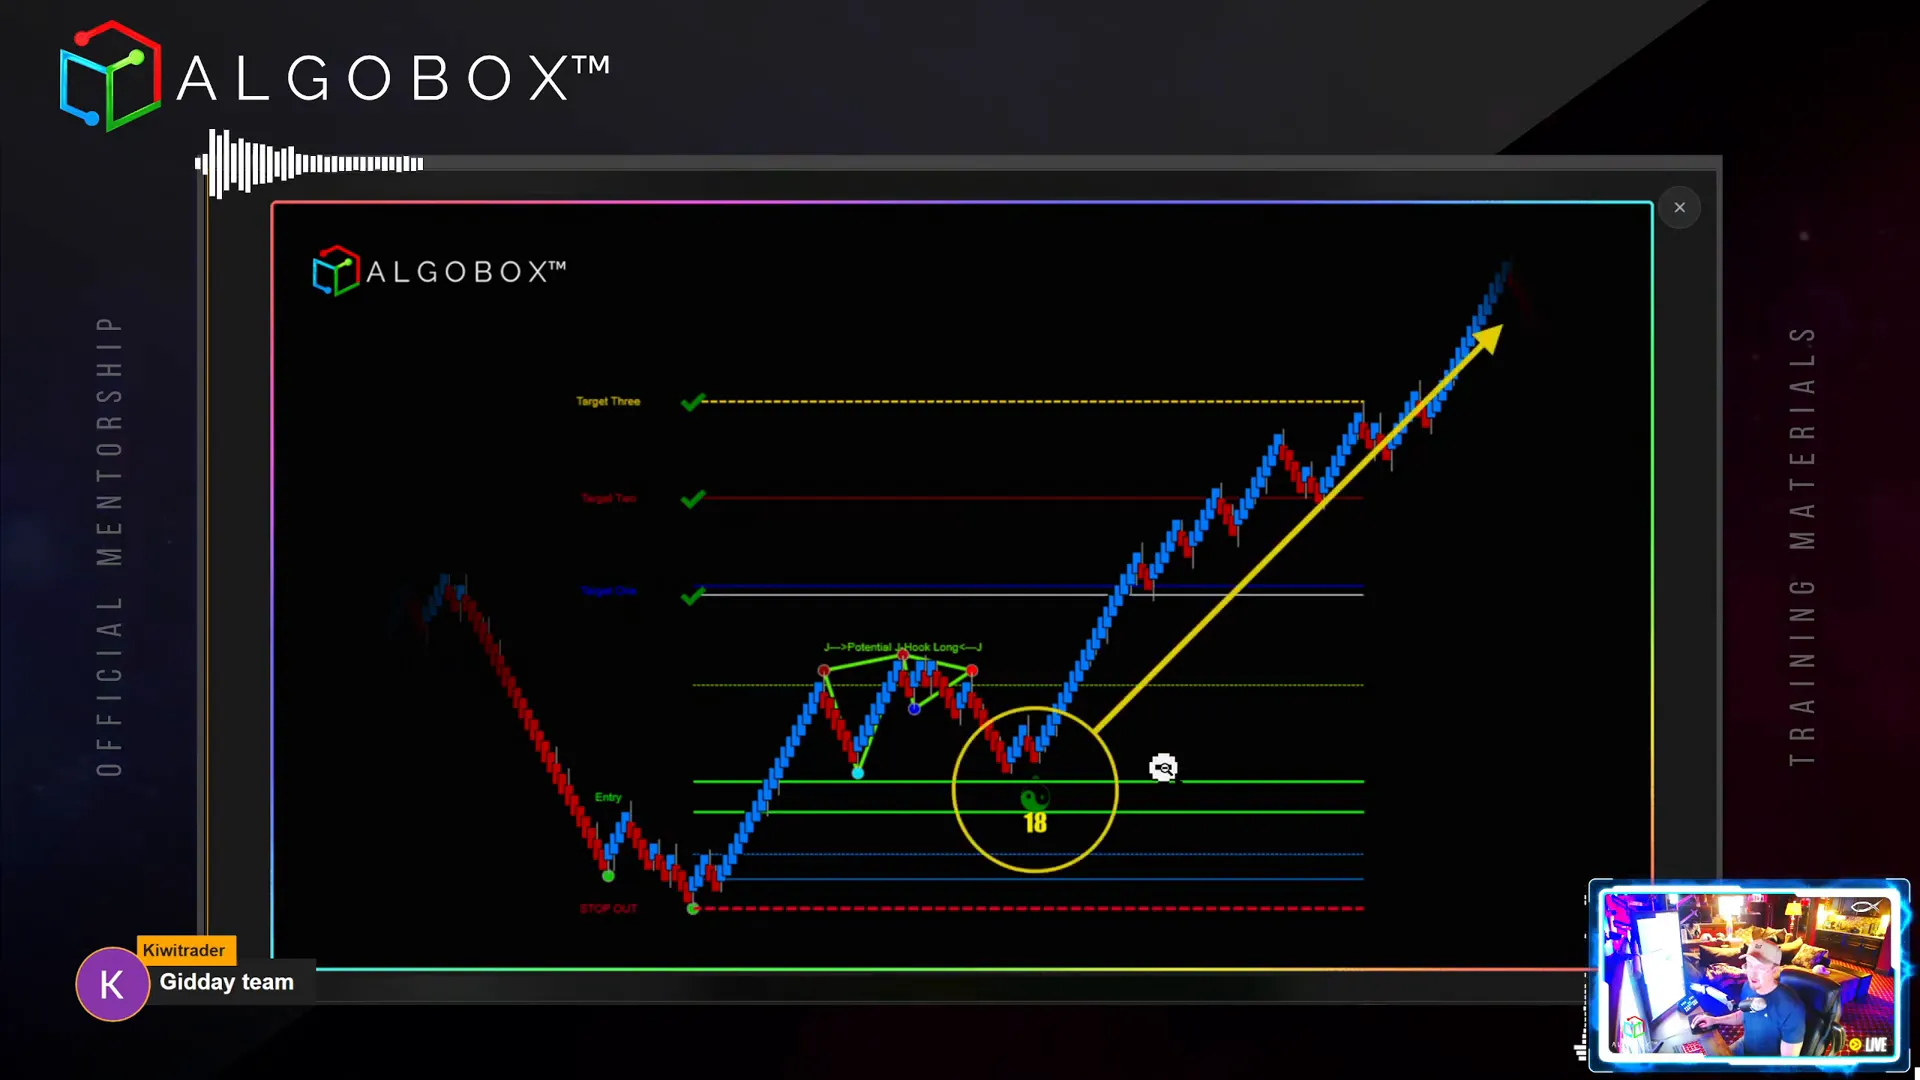
Targets are plotted as Fibonacci extensions, typically three levels where you can scale out of your position. Some traders also use the Golden Line Reversal (GLR) level for potential reversals after the third target.
J Hook works best on faster instruments like Nasdaq and YM futures. Be cautious when trading slower instruments like ES or RTY as the pattern can become less reliable and more erratic.
Because the J Hook involves a larger stop, it requires sound risk management and practice. The pattern is resource-intensive for your computer due to the calculations it performs, so you may choose to disable it if your system slows down.
Step 3: Using the Masher Strategy – High Time Frame Reversal Detection
The Masher is a favorite reversal detection filter based on the MACV chart, designed to identify significant reversal opportunities on smaller time frames.
This strategy focuses on deviation lines on the MACV histogram that mark previous peaks and troughs where price reversed strongly. Unlike typical support or resistance pivots on price bars, these pivots appear in the MACV histogram and provide hidden insights.

To use the Masher effectively:
- Look to the left of your chart to identify major pivot points where price reversed previously.
- Mark these levels using the F6 hotkey (horizontal line tool) for quick reference.
- Watch for price to return to these levels for a potential reversal setup.
It’s important to note that the Masher acts as a filtering tool rather than a direct entry strategy. You want to corroborate Masher signals with higher time frame trends and lower time frame entry setups for execution.
Avoid using the Masher in markets trending at a 45-degree angle, as reversals become less reliable in these conditions.
Though examples in this guide may not fully capture ideal Masher setups due to recent market conditions, the strategy remains valuable especially on Nasdaq futures when the market is not trending steeply.
Step 4: Leveraging Enigma Plus AudioBox for Real-Time Order Flow Analysis
One of the most powerful combinations in AlgoBox is the pairing of the Enigma indicator with AudioBox, which provides real-time audio cues of aggressive buyer or seller activity.
When a green Enigma appears and AudioBox confirms with large buyer sounds, it signals a potential upward move—your cue to watch for bullish opportunities. Conversely, a red Enigma paired with AudioBox’s large seller sounds signals selling pressure and short opportunities.
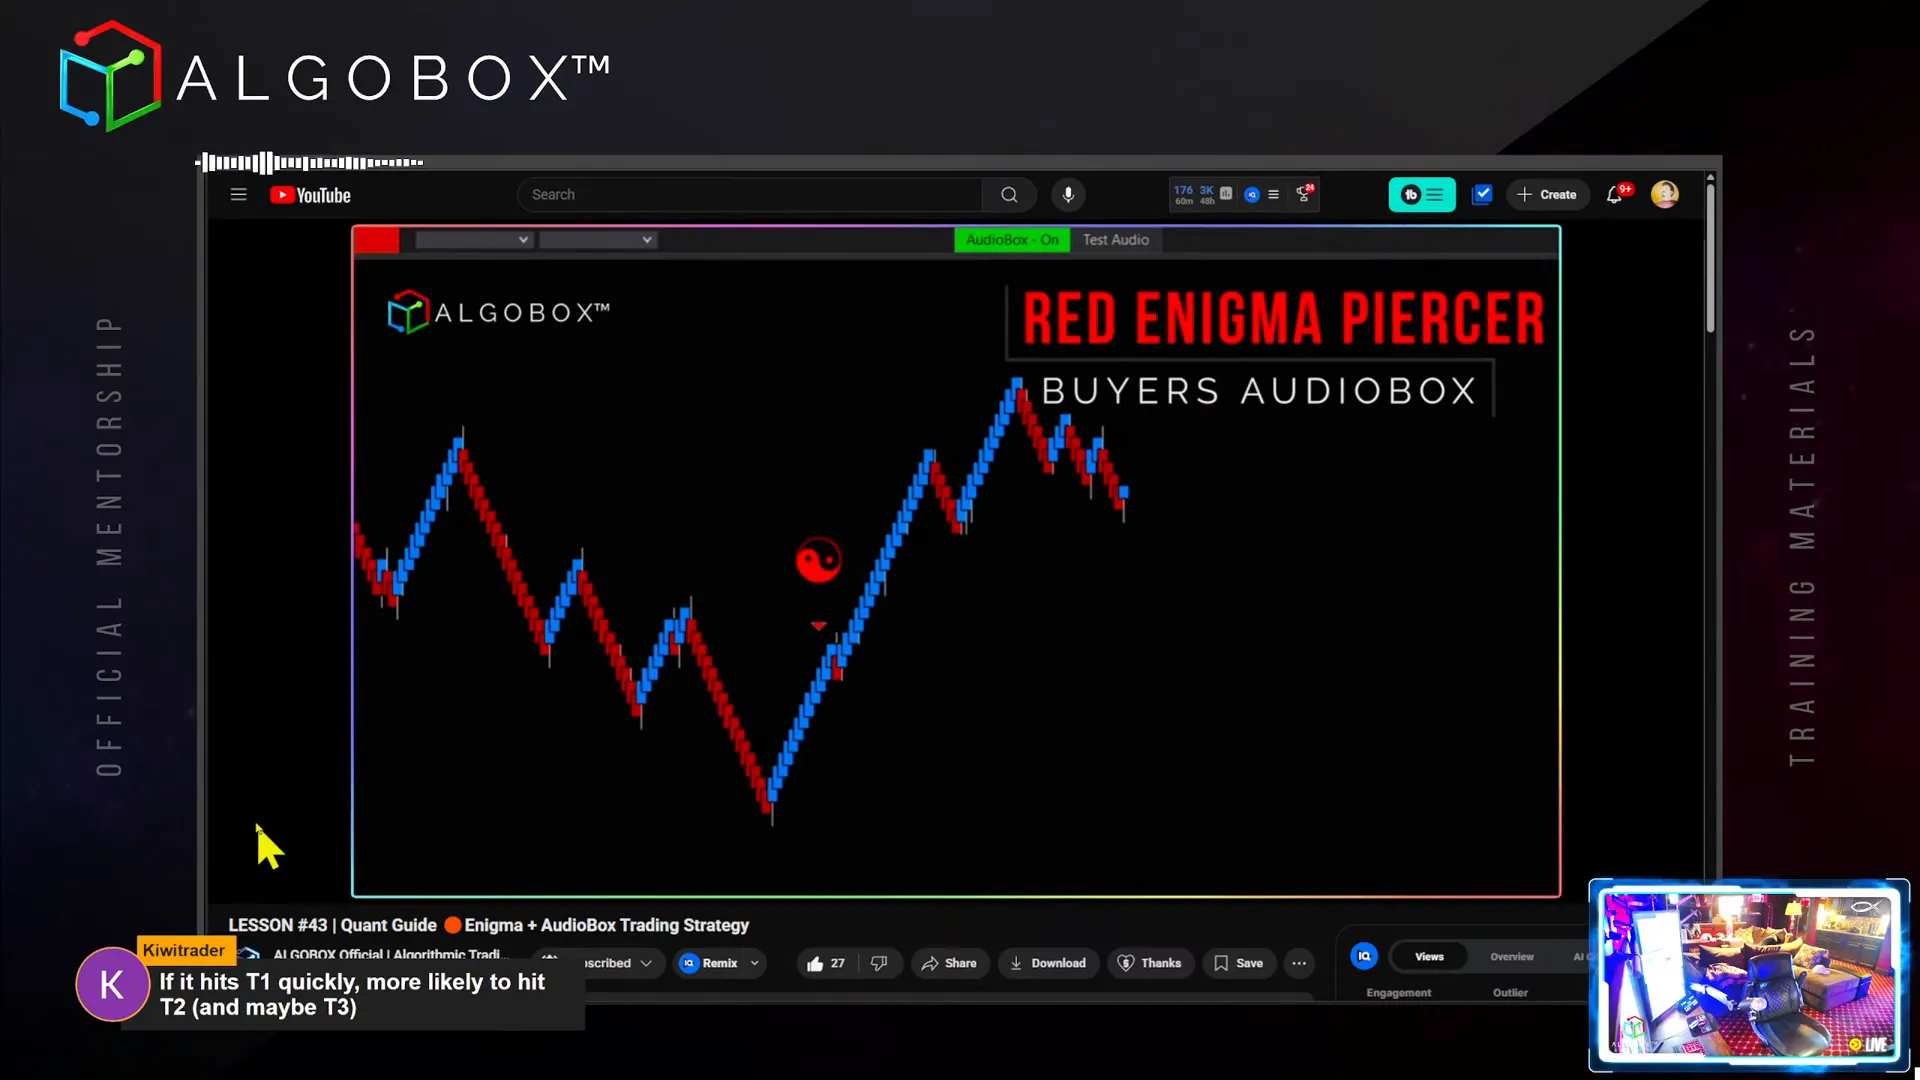
Sometimes, the Enigma and AudioBox can conflict, especially inside the “fiddle zone” (a neutral or uncertain price zone). In these cases, trust the AudioBox sound signals over the visual Enigma indicator, as they reflect actual market flow.
For example, if AudioBox indicates selling pressure while Enigma signals a buy, consider playing in the direction of AudioBox and prepare for a possible reversal trade. Stops should be placed opposite the entry signal, respecting the inverted stop logic.
A fun and effective entry method is the “Doctor Seuss” setup, which tracks the color changes of bars (red to blue for long entries, blue to red for shorts) and aligns with Enigma and AudioBox cues for precision entries.
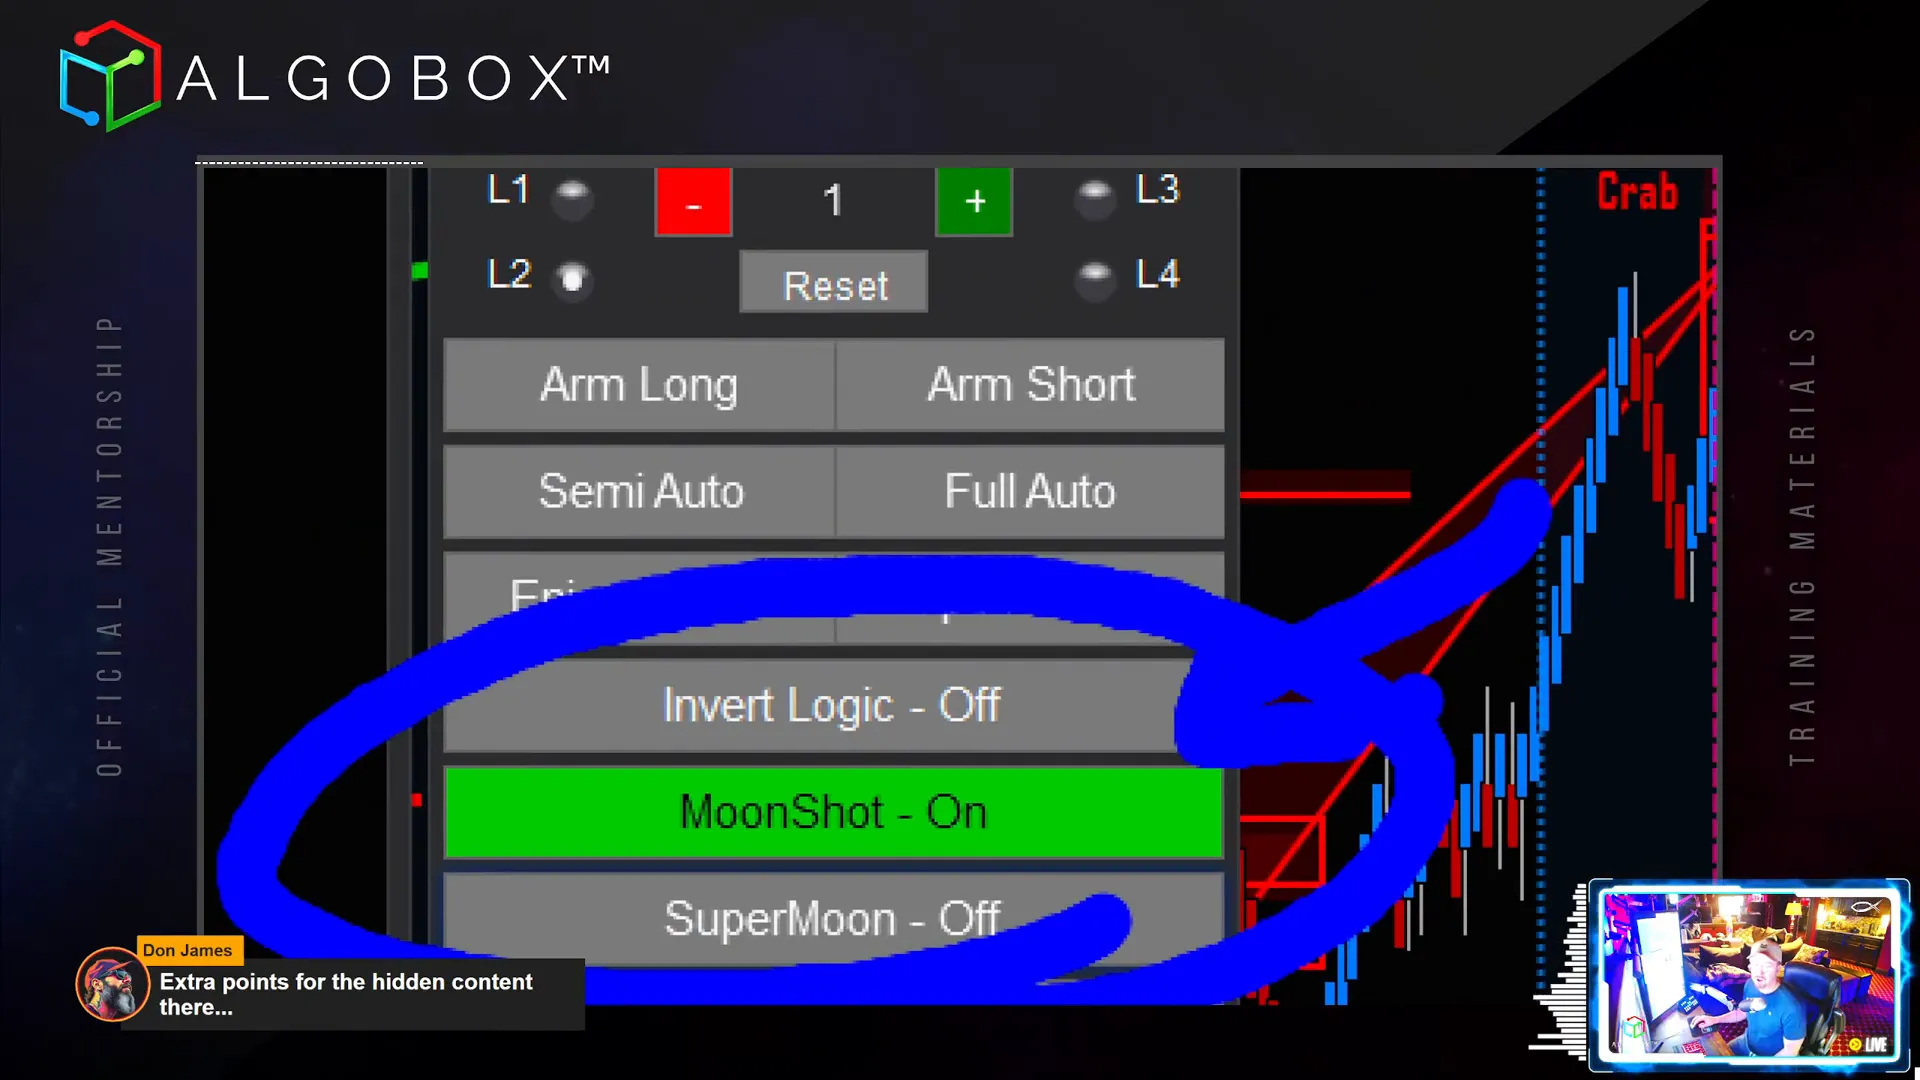
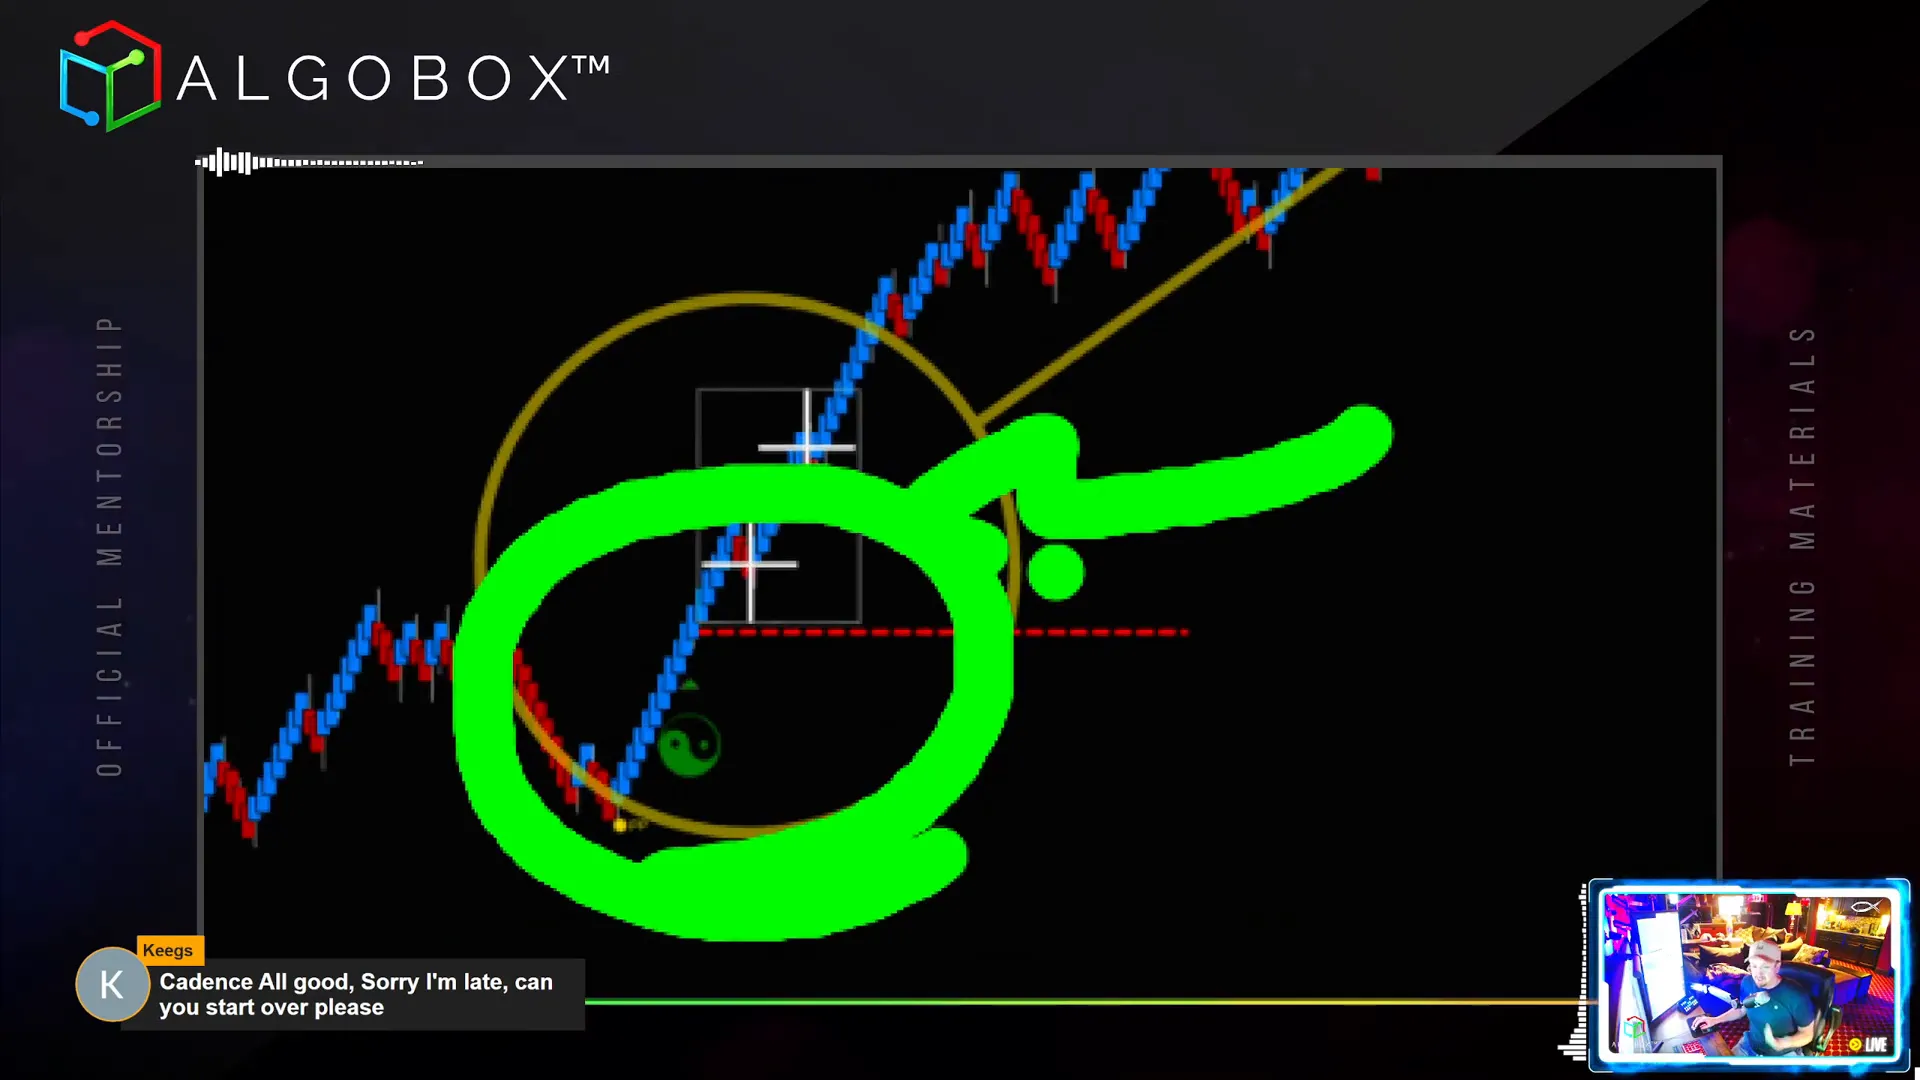
Step 5: The Enigma Moonshot – Precision Entries with Confluence
The Enigma Moonshot is a specialized filter within the Dream Panel pack that only triggers trades when an Enigma signal is flanked by a Flowmaster Cross within a set number of bars (default 20). This confluence helps pinpoint higher probability entries.
You can adjust the “moonshot cross threshold” to tighten or loosen the proximity requirement between the Enigma and Cross indicators. A tighter setting (e.g., within 5 bars) yields more precise but fewer signals, while a looser setting catches more opportunities.
For traders active in non-US sessions or lower volatility periods, lowering the threshold for Audio Oscillator strength can improve signal quality. The Enigma Moonshot is a filter, so it will only take Enigma trades that meet the cross proximity criteria.
Step 6: Applying Enigma Cadence – Managing Trade Sequences for Better Results
Cadence is a crucial concept in managing sequences of Enigma trades to avoid “black swan” events and improve expectancy. It is a simple yet effective hack for traders, especially those with smaller accounts.
Basic cadence rules:
- In the morning session, wait for two consecutive losing Enigma trades before taking the next trade.
- In the afternoon session, wait for three consecutive losing Enigma trades before entering.
This approach allows the “other guy” (the market) to get worn out before you start taking trades, increasing your chances of success.
Within a five-trade series, aim for at least two winners (“Winner Winner Chicken Dinner”), which means you want your winning trades to cover your losses and put food on the table.
Adjust your position sizing based on your risk tolerance and goals. The cadence system doesn’t require consecutive winners at the start; you might have a winner, loser, winner sequence and still be profitable.
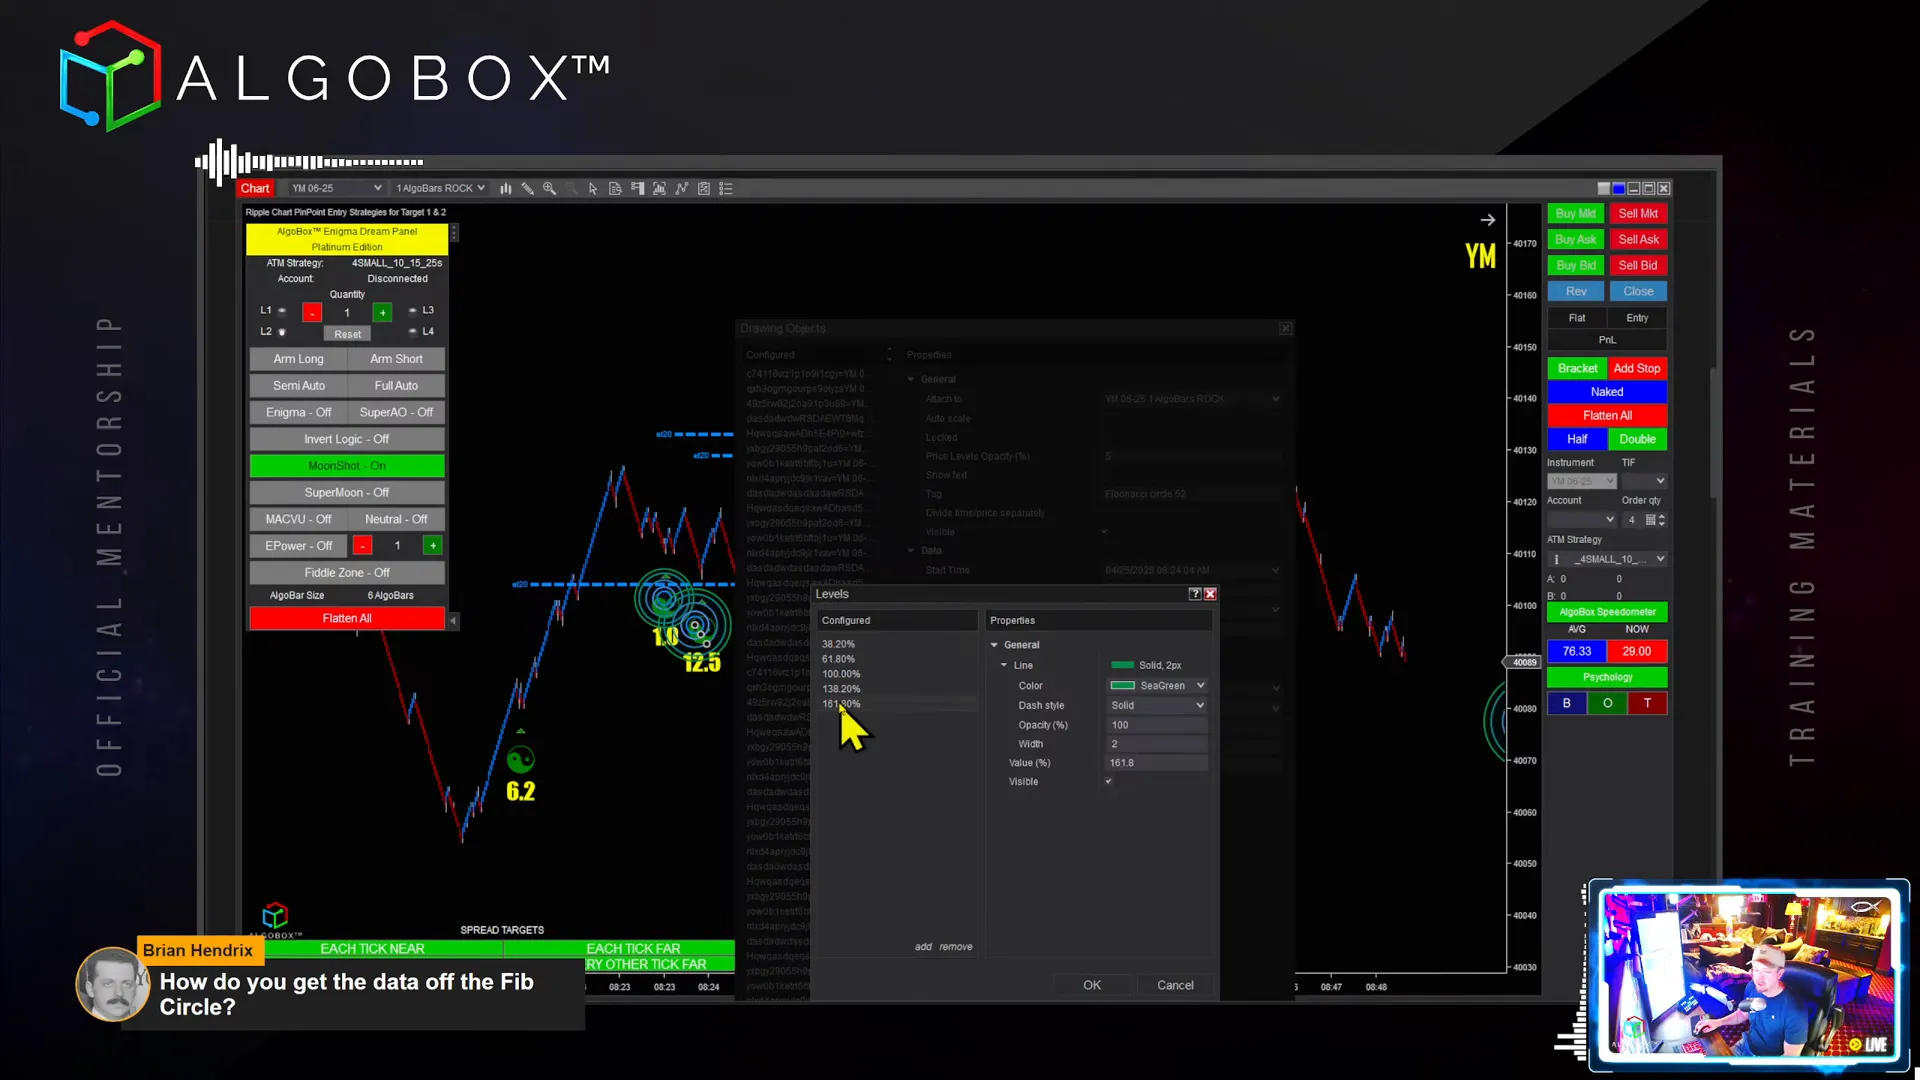
Using the Fibonacci Circle tool (F11) to mark losing trades visually helps you track your cadence and decide when to enter the next trade. Avoiding three losers in a row is key money management.
Cadence also works in reverse: if you see multiple winners in a row, be cautious anticipating a loss. However, sometimes you get long winning streaks—up to 13 winners in a row as seen in live trading sessions.
Step 7: Double Enigmas – Doubling the Power of Your Trades
A Double Enigma occurs when two Flowmaster Enigmas appear within a few bars of each other, signaling a potentially larger market move. This setup increases trade size and opportunity.
If you use the full auto mode, the system will enter both Enigmas automatically, effectively doubling your position size. Semi-auto mode only enters the first Enigma and then stops.
Important considerations:
- Use full auto only if you have the capital and risk tolerance for larger position sizes.
- Stops remain placed behind each Enigma signal to protect your trade.
- Avoid “blocking” your stops by spacing them out with the position manager tools to prevent large losses from correlated stops.

Double Enigmas amplify trade power and can lead to significant profits when managed properly.
Step 8: The Enigma Plus Double Cross Double Move (DCDM) – The Ultimate Strategy
The Enigma plus DCDM setup is one of the most powerful trades in the AlgoBox arsenal. Combining the Enigma signal with the Double Cross Double Move significantly strengthens the trade’s potential, often doubling the expected move.
Unlike a single Enigma trade targeting a 20-tick move, the DCDM setup allows you to hold for much larger targets, marked by the yellow DCDM target line.
Stops for this play are typically wider and placed behind the Enigma or the Double Cross on move, depending on your risk preference. The “two try rule” is recommended to re-enter on a Double Cross if stopped out initially.
This setup is ideal for larger traders looking to maximize gains from high probability moves.
Step 9: Additional Tips and Resources
Throughout your trading journey, remember these important points:
- Use lower time frame charts for precise entries while relying on high time frame signals for directional bias.
- Continuously practice and backtest strategies like the J Hook and Enigma Cadence to deepen your understanding.
- Leverage AlgoBox’s tools such as the Dream Panel, position manager, and AudioBox to enhance decision-making.
- Consider joining AlgoBox’s affiliate program if you want to share your knowledge and earn passive income by promoting the system.
For further learning, check out the extensive video library and documentation available from AlgoBox, including deep dives into each strategy and advanced trading tips.
Conclusion
Mastering algorithmic futures trading with NinjaTrader requires understanding and applying a combination of powerful strategies and tools. From the directional clarity of the Ignition Bar to the structural precision of the J Hook, the reversal insights of the Masher, and the real-time cues from Enigma and AudioBox, each element plays a vital role in building a winning trading approach.
Implementing Enigma cadence helps manage risk and improve trade expectancy, while Double Enigmas and the Enigma plus DCDM setups offer opportunities for significant gains. Remember to always manage your risk carefully, practice consistently, and use the confluence of signals across multiple time frames for the best results.
By following these steps and leveraging the AlgoBox system, you can reboot your trading and start capturing smarter, more consistent profits in the futures markets.
Happy trading!