I created this guide to walk you step-by-step through the LATE NATE concept inside the AlgoBox system. In the short video I published with ALGOBOX Trading I demonstrated how white Flowmaster crosses—what I call “late Nate” signals—can highlight retail exhaustion and provide a useful confluence clue that a price swing is running out of momentum. In this article I expand that lesson into a thorough, actionable tutorial you can practice on NinjaTrader using market replay or add to your live trading plan.
Table of Contents
- Outline
- Introduction
- Step 1: Understand Flowmaster Crosses and What They Represent
- Step 2: Identify the Late Nate — the White Flowmaster Cross
- Step 3: Combine Late Nate with Other AlgoBox Signals (Confluence)
- Step 4: Trade Setup Walkthrough — Entry, Stop, Target
- Step 5: Risk Management and Trade Management Rules
- Step 6: Backtesting and Practicing the Late Nate in Simulation
- Step 7: Common Pitfalls and How to Avoid Them
- Step 8: Integrating Late Nate into a Complete Trading Plan
- Conclusion
- FAQ
- Final notes and best practices
Outline
- Step 1: Understand Flowmaster Crosses and What They Represent
- Step 2: Identify the Late Nate — the White Flowmaster Cross
- Step 3: Combine Late Nate with Other AlgoBox Signals (Confluence)
- Step 4: Trade Setup Walkthrough — Entry, Stop, Target
- Step 5: Risk Management and Trade Management Rules
- Step 6: Backtesting and Practicing the Late Nate in Simulation
- Step 7: Common Pitfalls and How to Avoid Them
- Step 8: Integrating Late Nate into a Complete Trading Plan
- Conclusion
- FAQ
Introduction
When I trade, I’m constantly looking for signs that a move may be finishing. Knowing when momentum is weakening gives me an edge: I can tighten risk, choose better entries, and proactively plan for reversals or range behavior. The LATE NATE concept is simple: a specific white Flowmaster cross that tends to appear near the end of price swings and often reflects late retail participation. It is not a standalone trigger, but when it aligns with other AlgoBox signals it becomes a high-probability confluence marker.
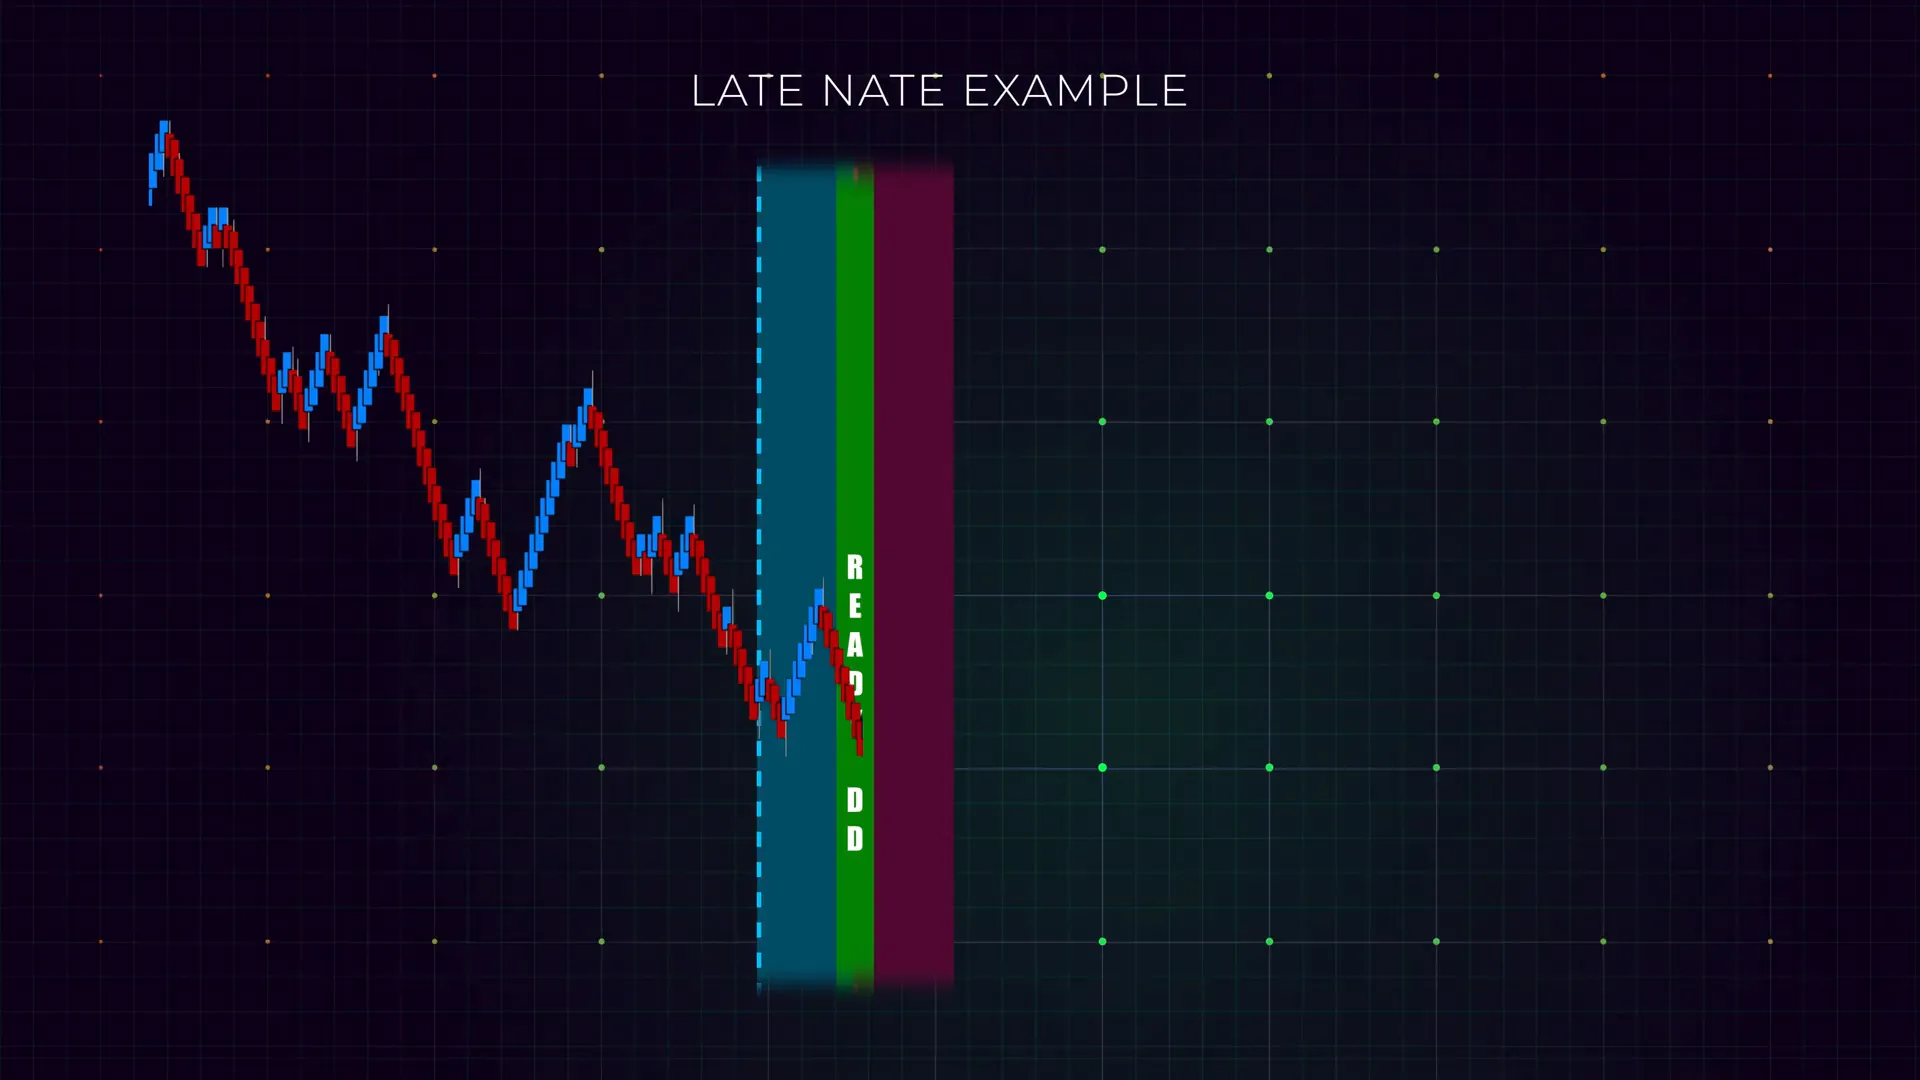
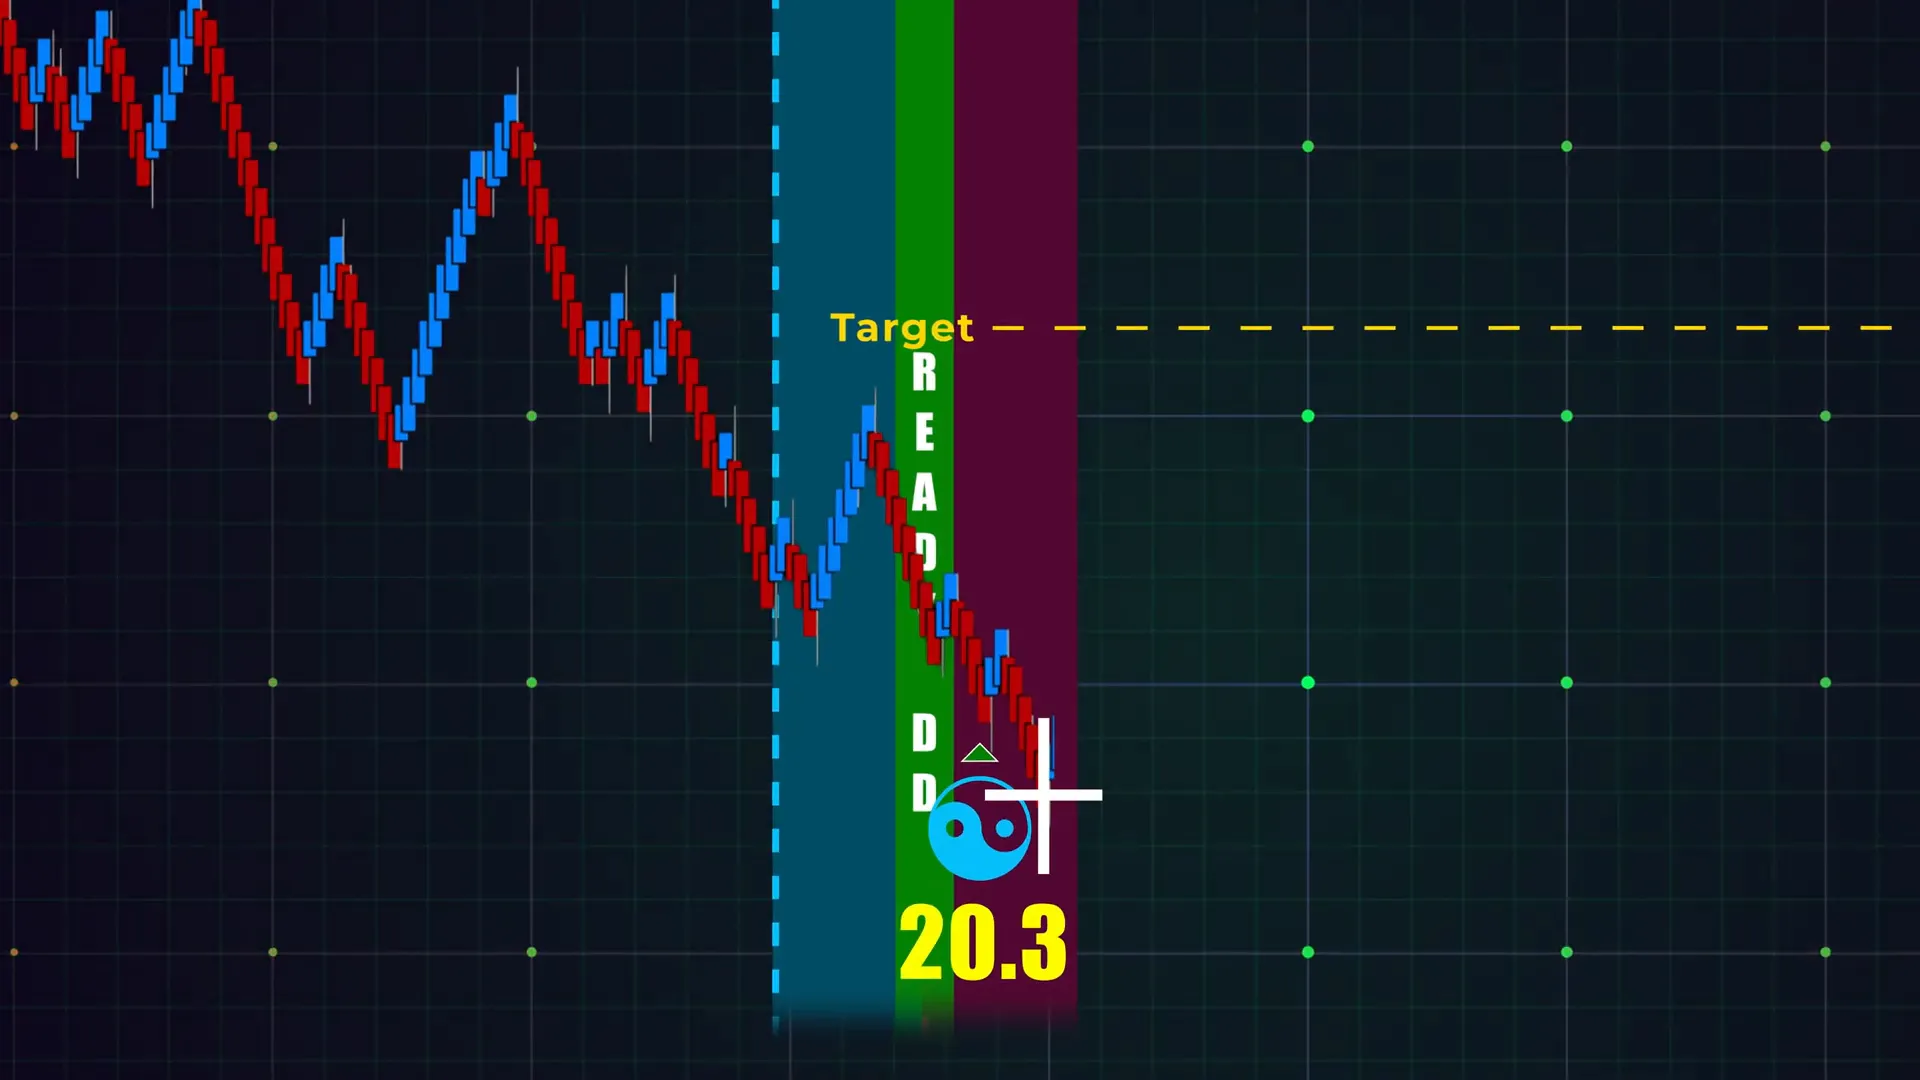
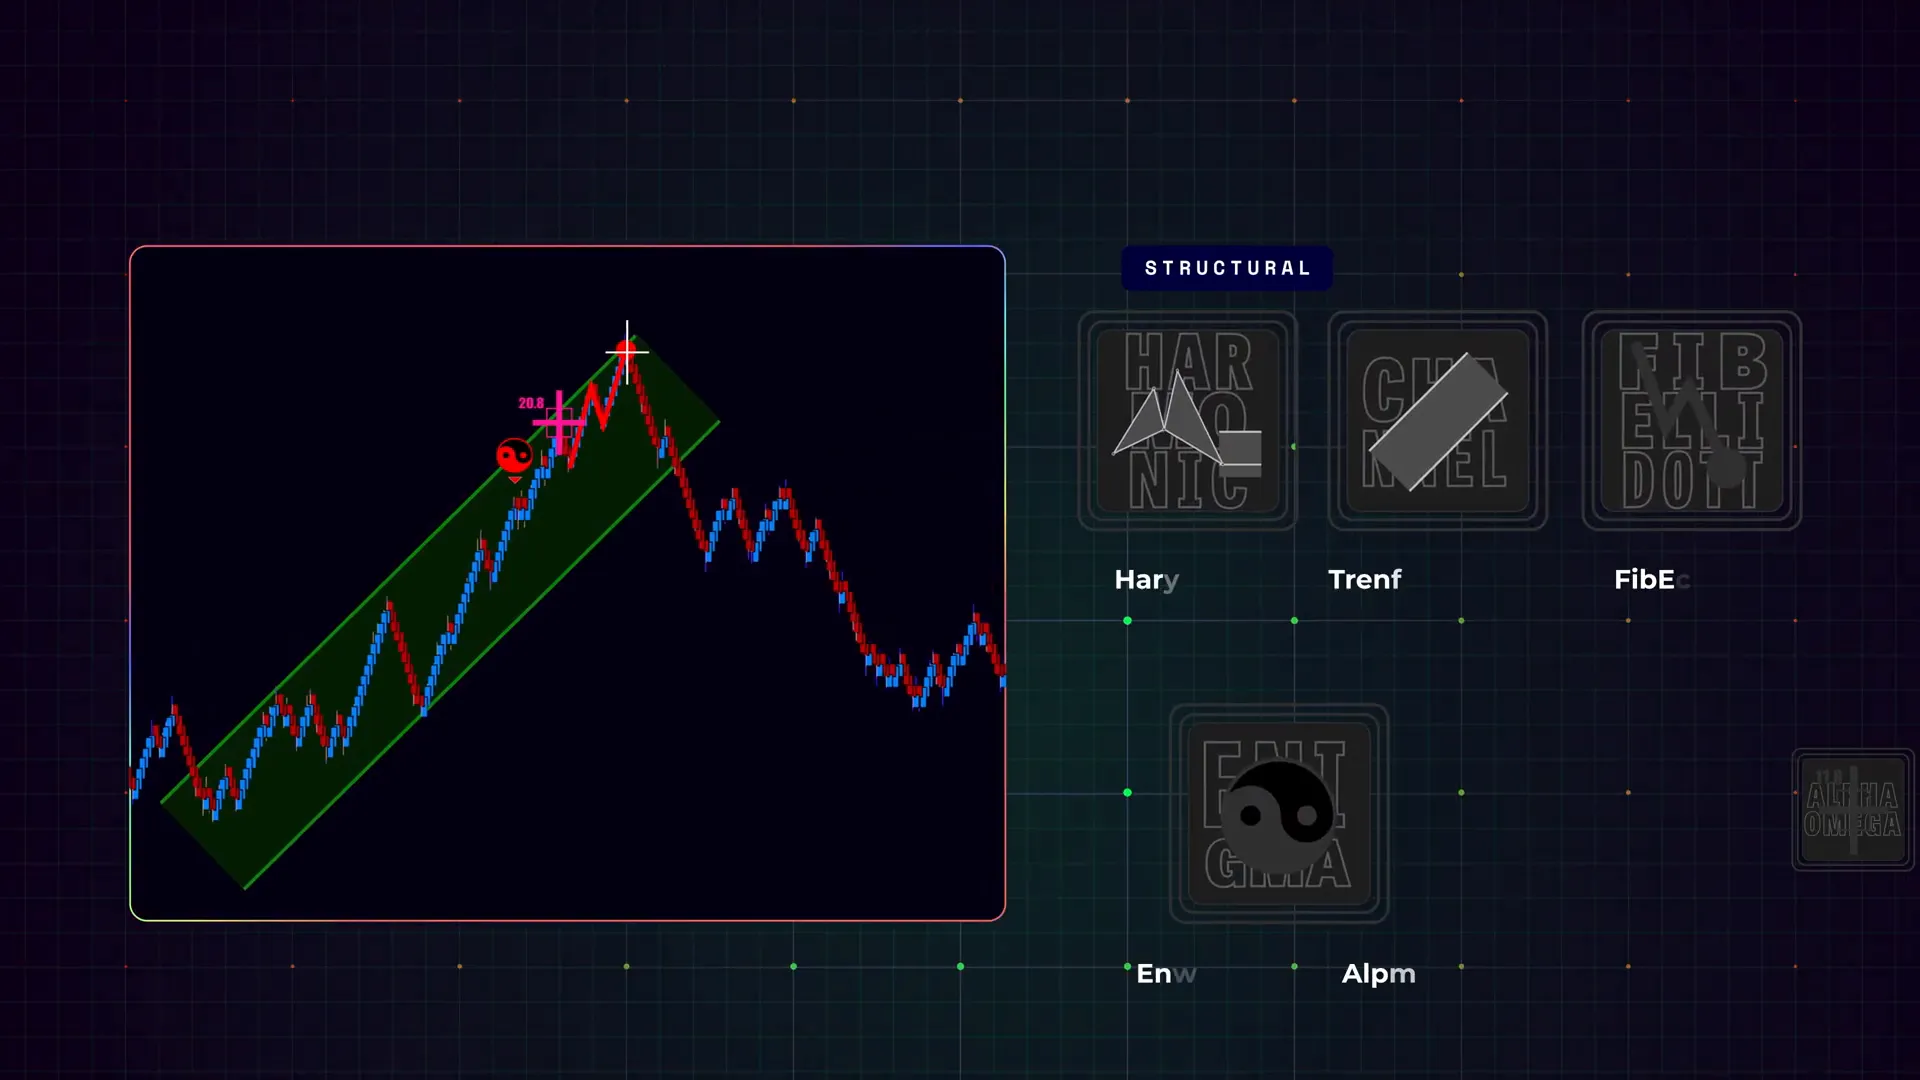
In the video I presented a quick example where a green ready DD label appeared as the initial heads-up, followed by a blue enigma at king timing reinforcing buyer momentum, and then a white Flowmaster cross—the late Nate—appeared as retail jumped in late. The setup provided a clear framework for an entry with targets and stops referenced off the enigma projection. In this article I’ll explain the why and how, the exact steps I follow, the rules I use for stops and targets, and how I practice and validate the idea using NinjaTrader market replay and AlgoBox tools.
Step 1: Understand Flowmaster Crosses and What They Represent
Before we talk about the late Nate specifically, you need to understand Flowmaster crosses in my system. Flowmaster crosses are visual markers that highlight clusters of intensified orderflow activity. The indicator looks for concentrations of aggressive buyers or sellers and marks those areas with a cross. Different colors encode different context and timing.
Here’s how I think about them:
- Flowmaster cross = attention point: It highlights where a lot of trading volume and aggression occurred in a compact area.
- Color matters: In AlgoBox the cross colors are mapped to timing and behavior—blue and green crosses often appear in early-to-mid swing contexts when directional participants are active, and white crosses frequently show up later as retail traders chase a move.
- Cluster interpretation: One cross is a signal to look closer; multiple crosses in the same zone increase the probability of a meaningful inflection, or at least a pause in momentum.
Flowmaster crosses do not tell you whether price will reverse. Instead, they show where participants concentrated activity. I use them to contextualize trade ideas—particularly to spot areas where momentum could be losing steam.
Step 2: Identify the Late Nate — the White Flowmaster Cross
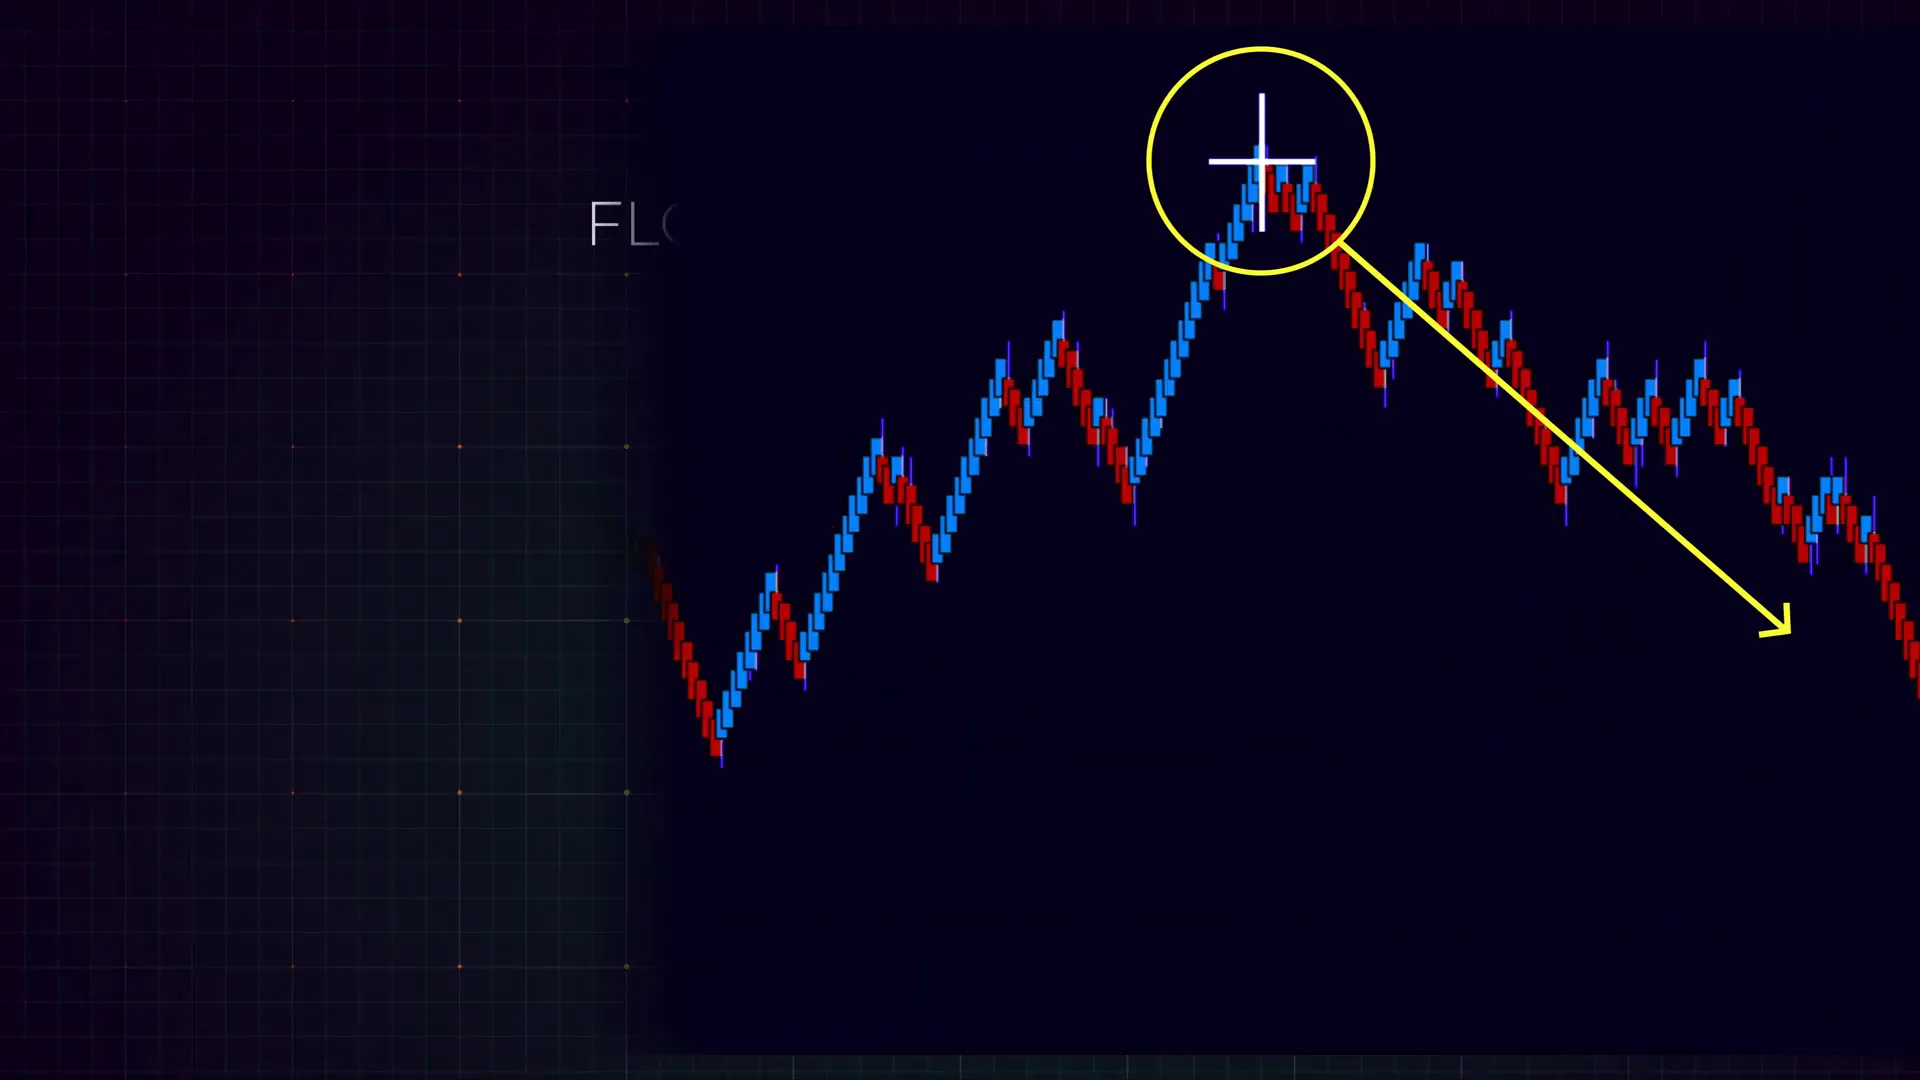
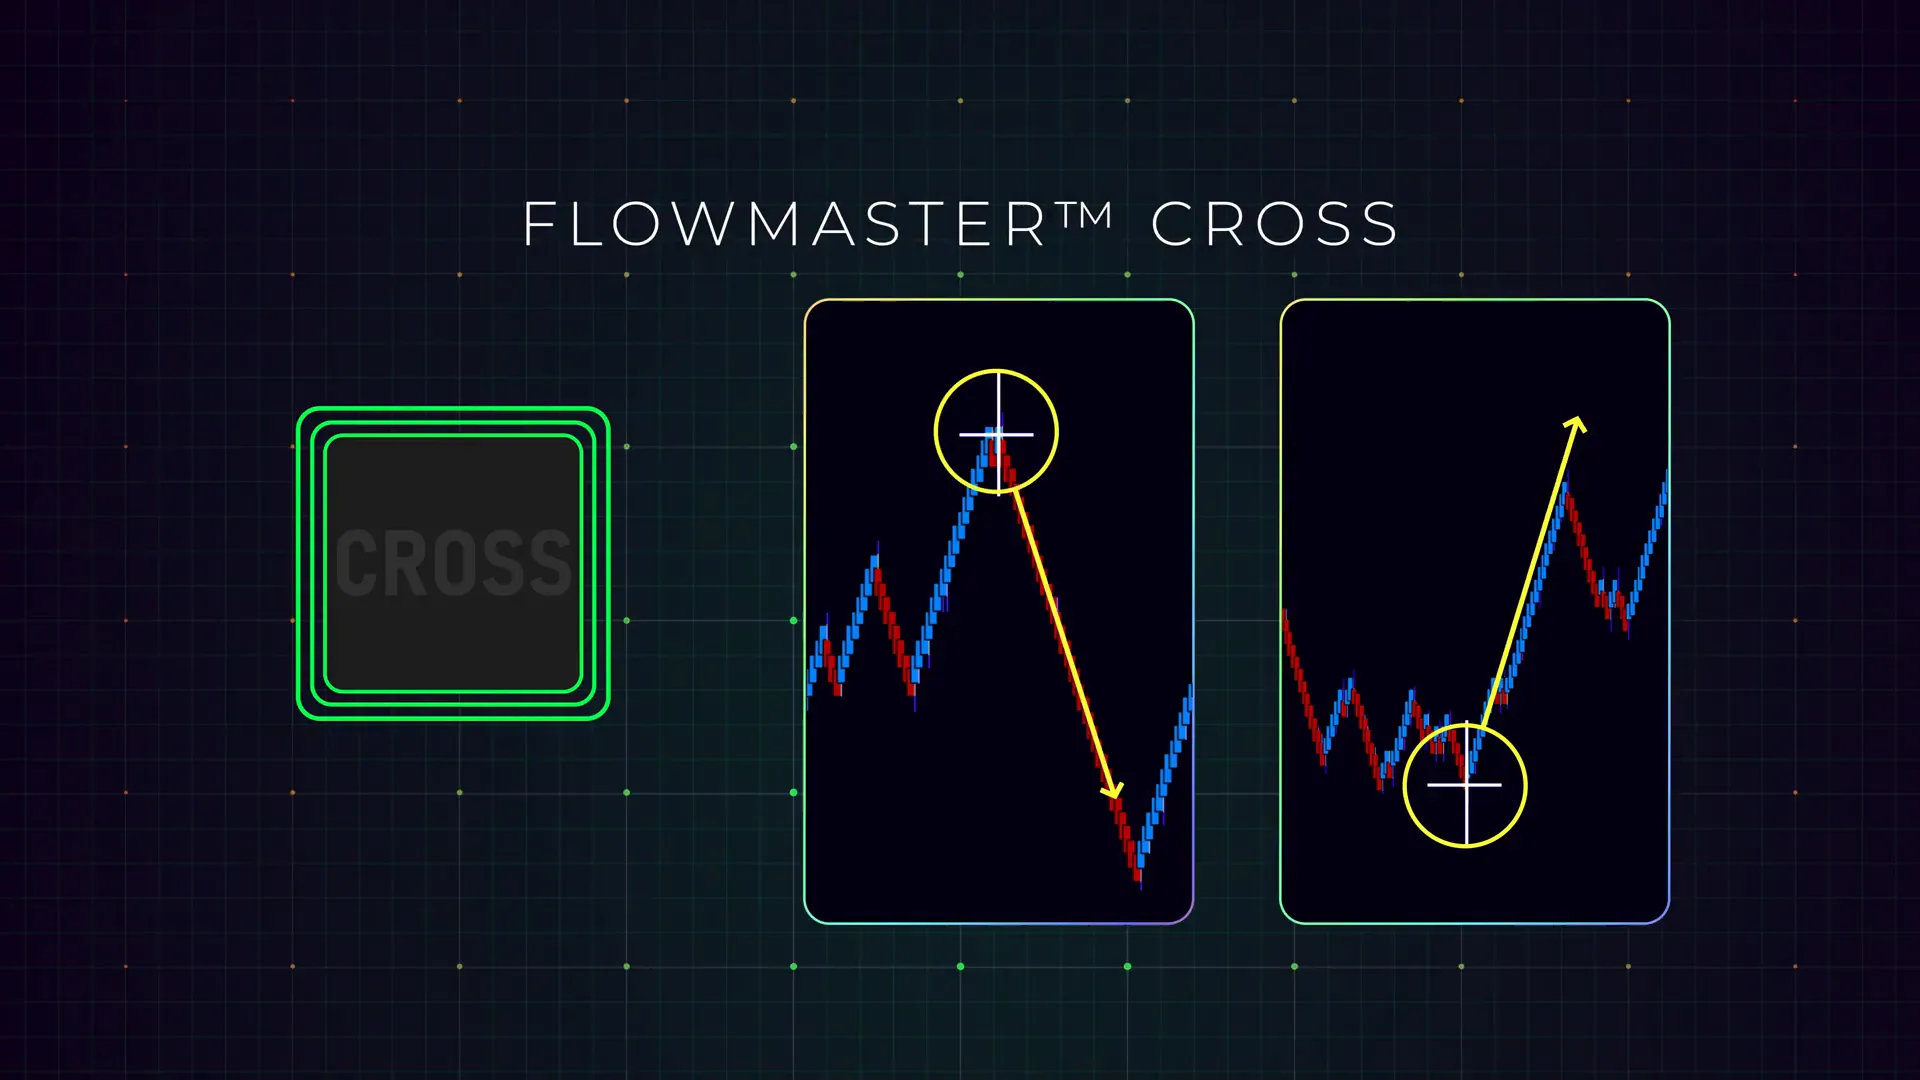
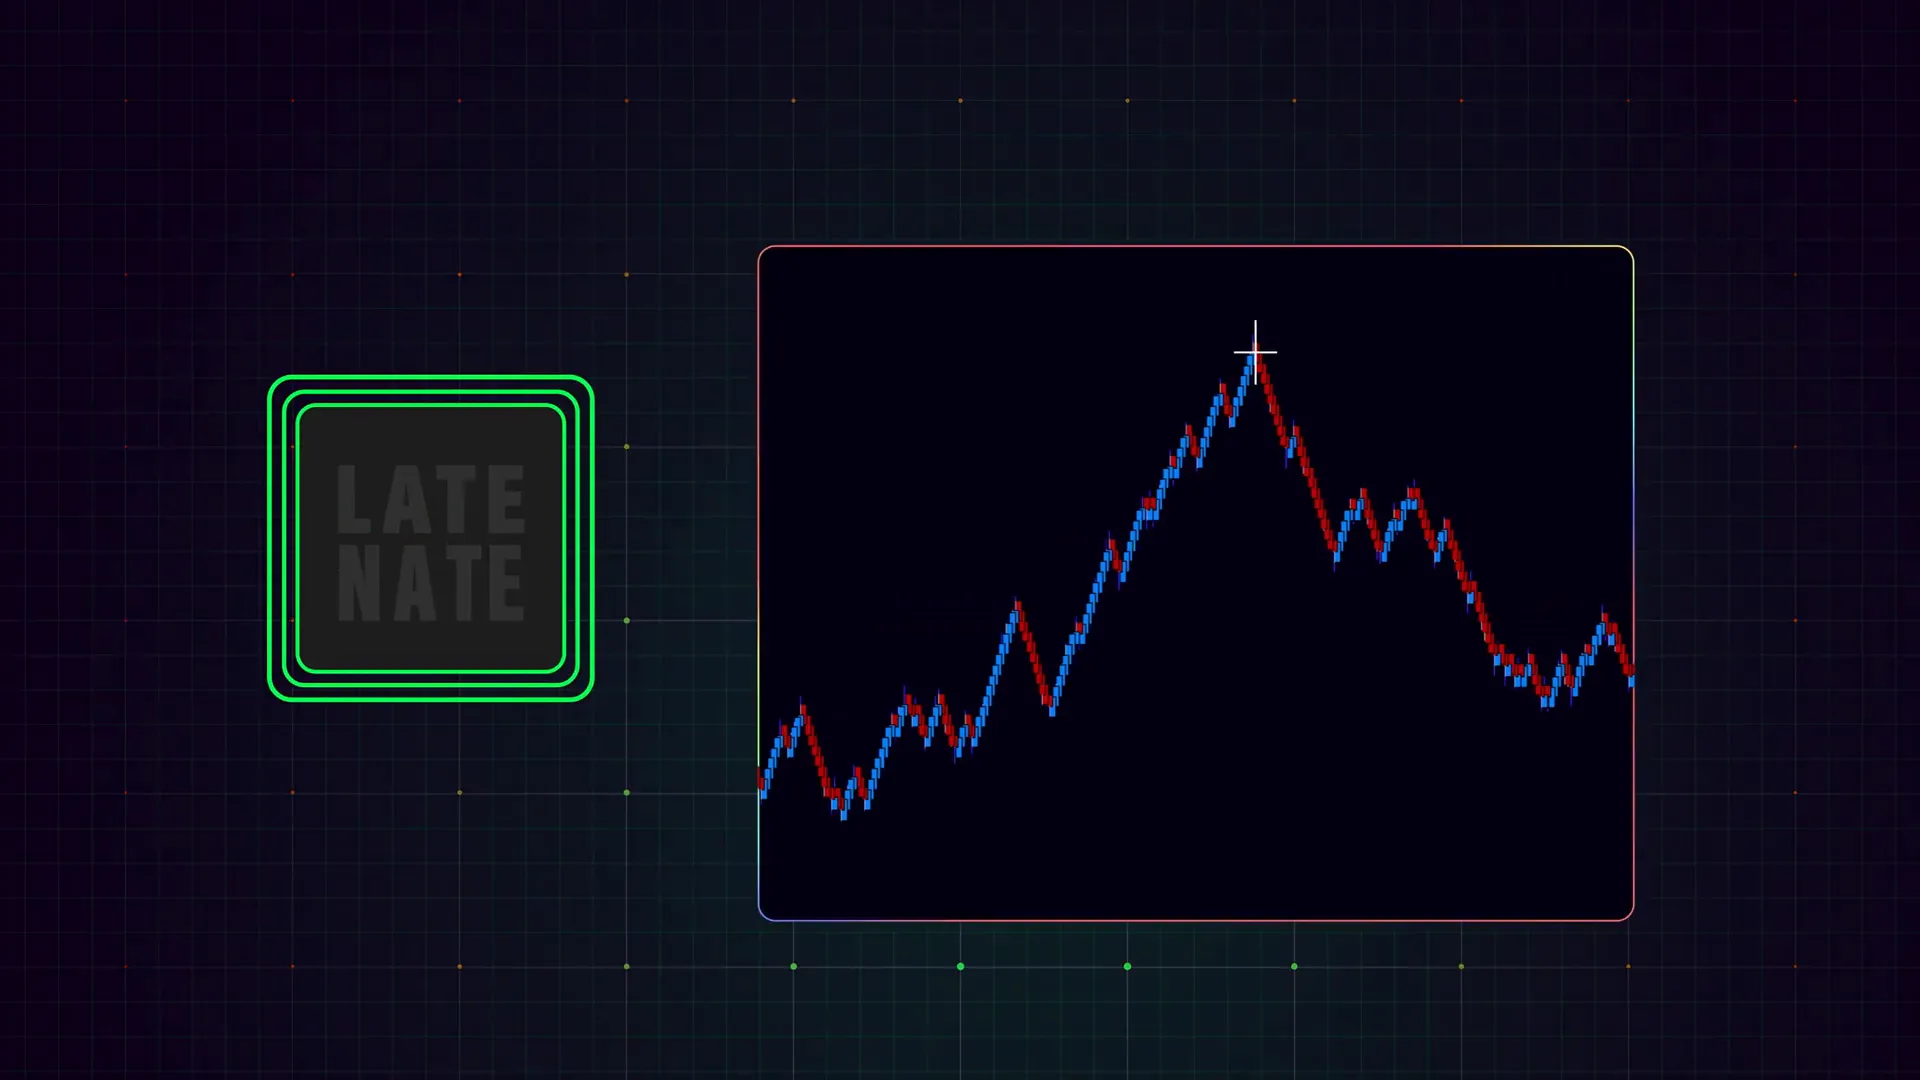
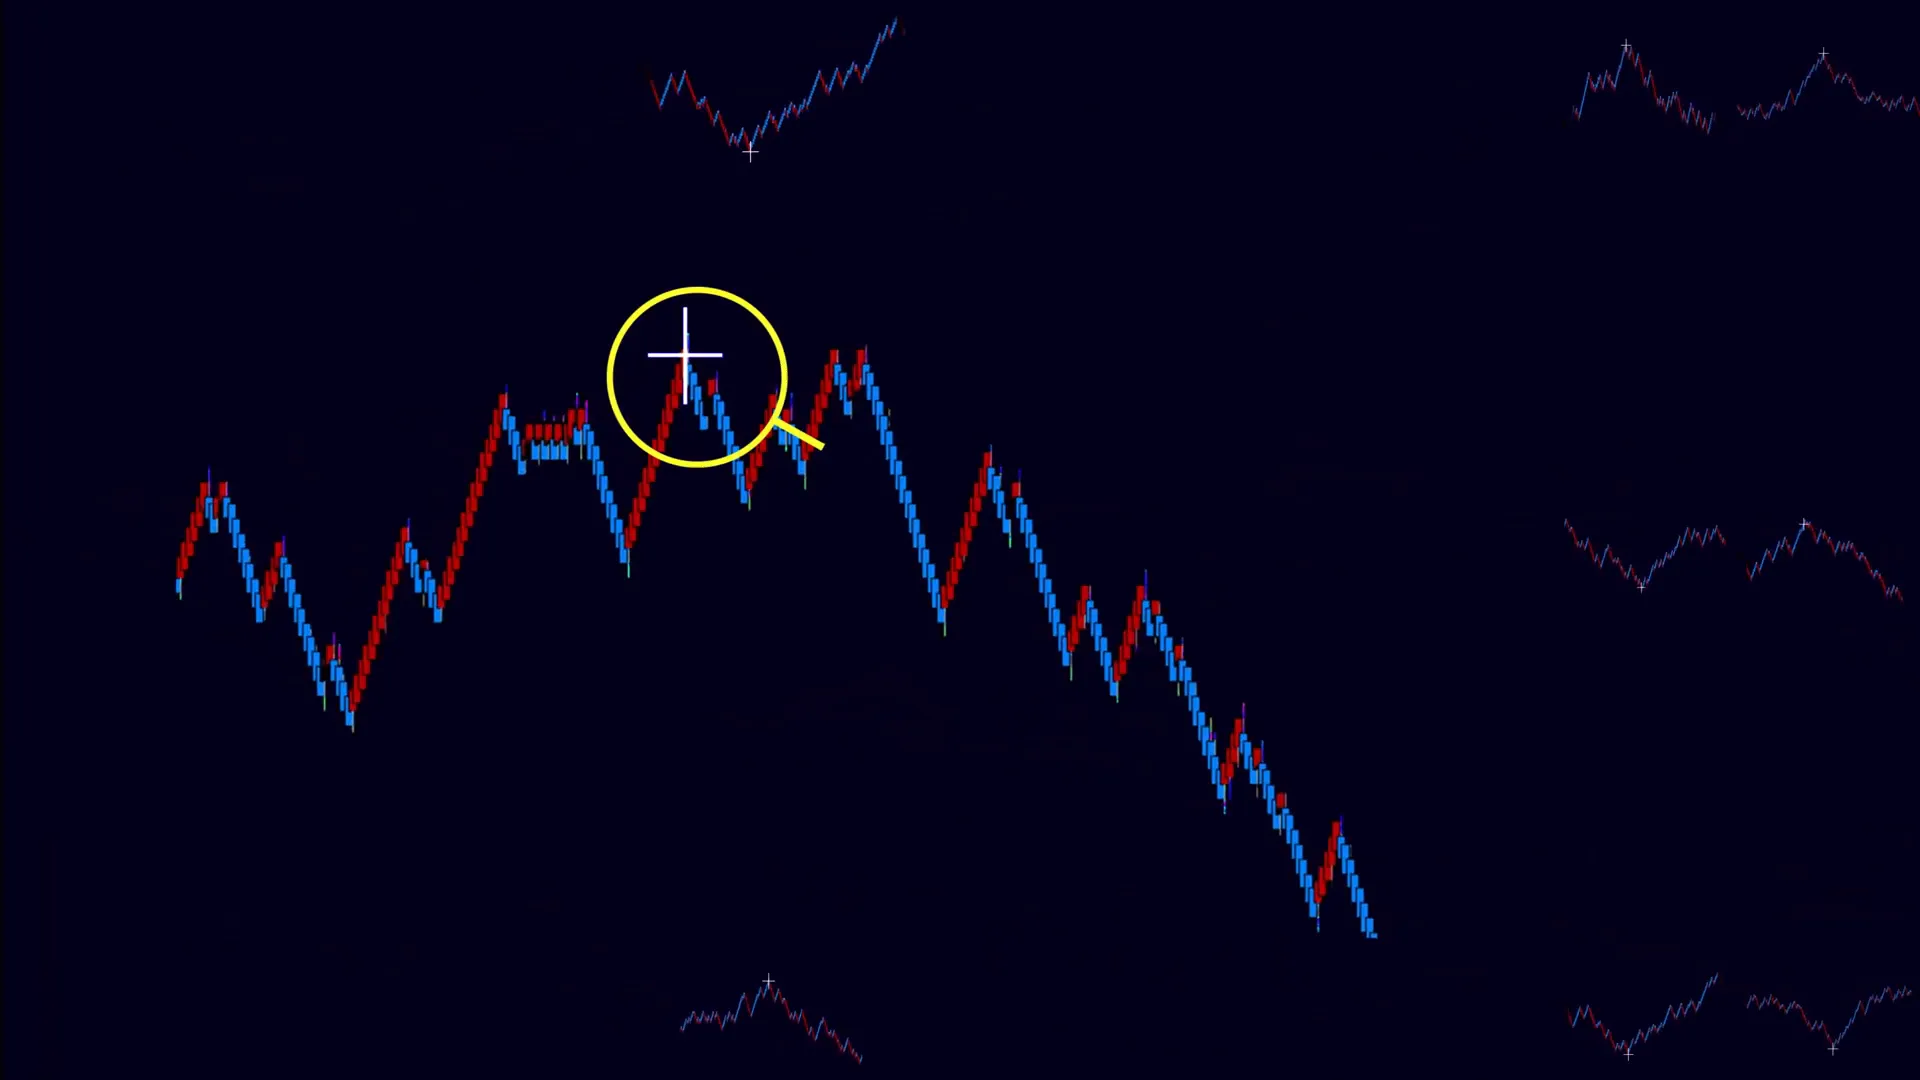
Now for the LATE NATE itself. The late Nate is a specific white Flowmaster cross that tends to appear near the end of price swings. I call it “late” because it commonly marks where retail participants have jumped into a trend after the high-probability portion of that move has already happened. That creates a situation where momentum is often exhausted, and any continuation is less likely without fresh institutional follow-through.
Key characteristics I look for in a proper late Nate identification:
- White color: The cross must be white—a color associated in my system with late-stage retail activity.
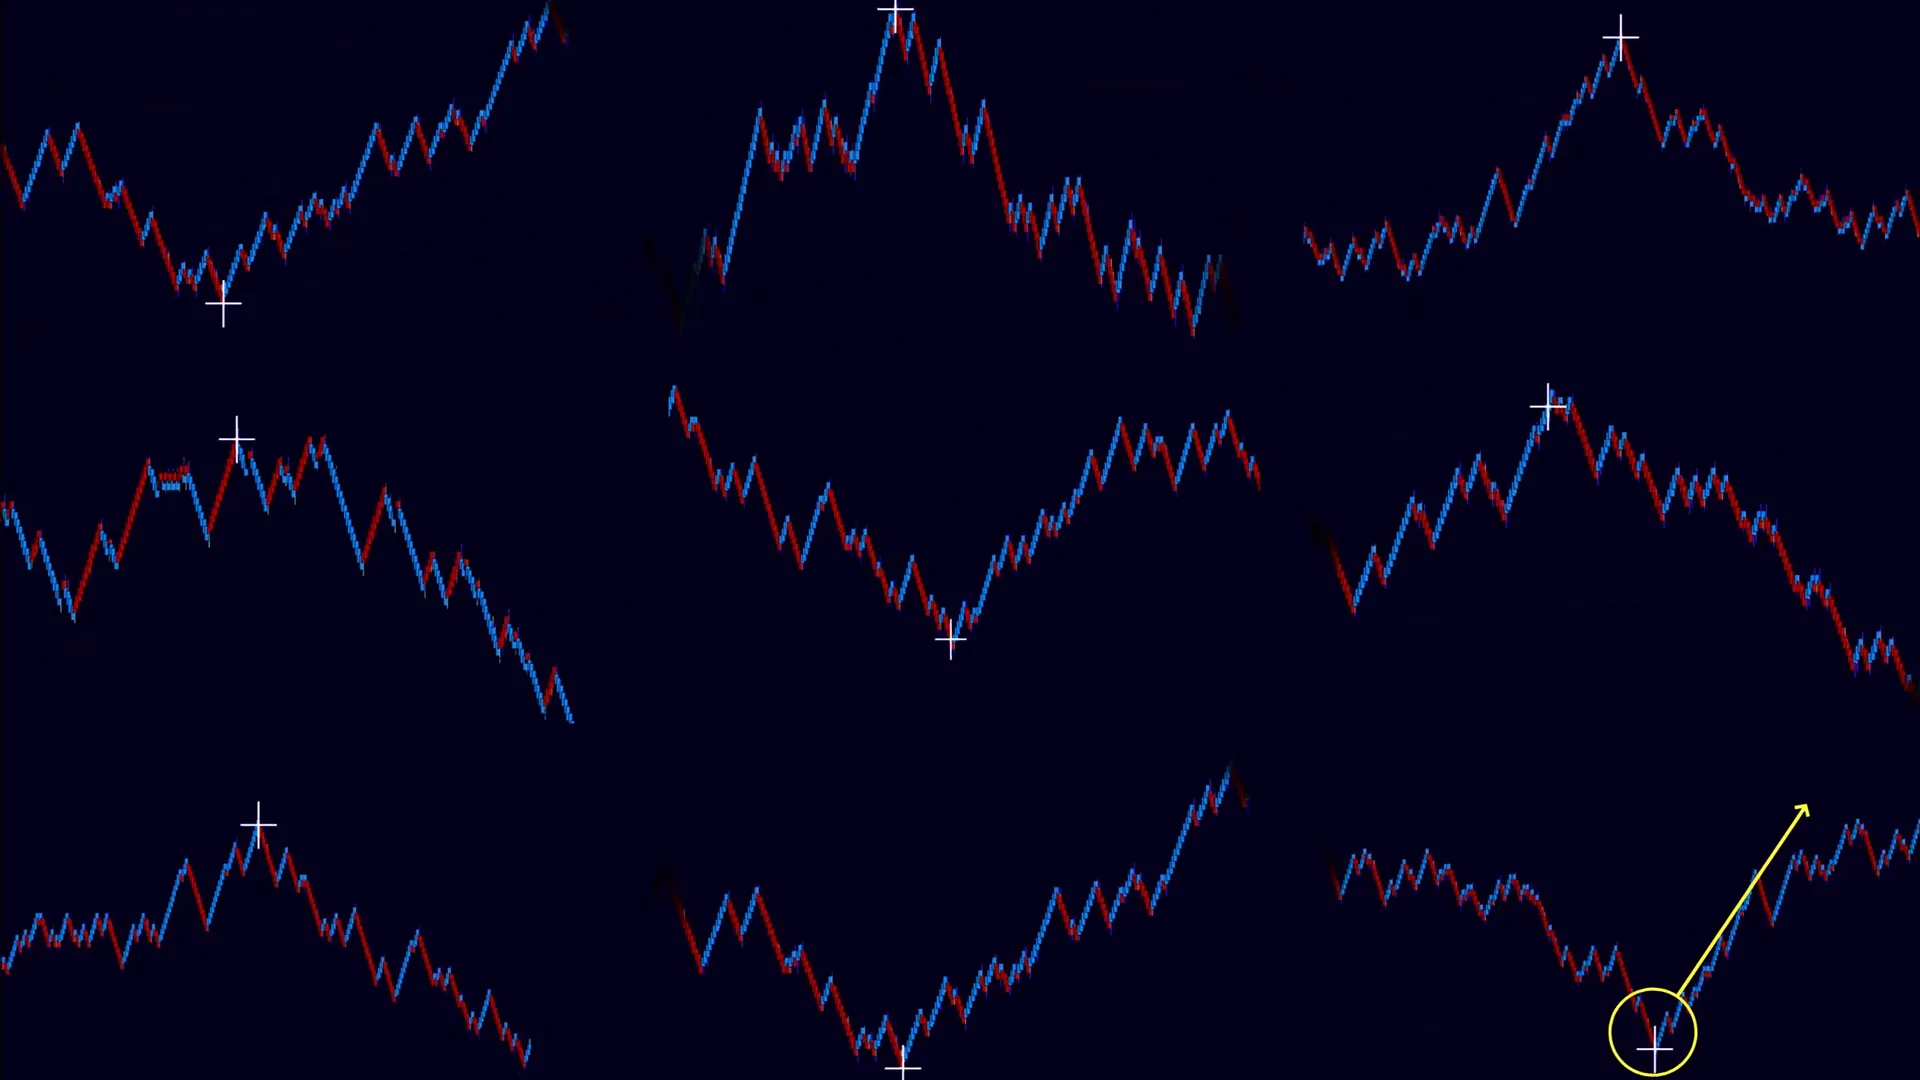
- Location at swing extremes: It tends to appear near recent swing highs or lows or at behavioral extremes during a trending move.
- Volume/aggression cluster: The cross sits inside a visible cluster of volume or aggressive trades—this isn’t a single chop tick; it’s a compact area of activity that’s recognizable on the Flowmaster overlay.
- Timing relative to other signals: The late Nate becomes meaningful when it follows or aligns with other AlgoBox signals suggesting a shift in short-term direction.
“The late Nate is a specific white Flowmaster cross that tends to appear near the end of price swings, often reflecting late retail participation.”
I want to emphasize that I never treat the late Nate as a standalone entry signal. On its own it’s a hint—useful, but incomplete. I only give it proper weight when it arrives in a context that supports diminished continuation.

Step 3: Combine Late Nate with Other AlgoBox Signals (Confluence)
The real power of the late Nate is in confluence. When it lines up with other AlgoBox clues, the probability of a short-term reversal or at least a meaningful pause increases. Here are the key AlgoBox elements I combine with the late Nate:
- Ready DD label (green): A readiness or setup label that gives me an early heads-up that a potential trade setup is forming. When I see a green ready DD in the zone, I start preparing my checklist.
- Enigma (blue): An enigma forms as a stronger directional bias with a projected line for targets. A blue enigma at king timing suggests strong buyer momentum in the example I provided.
- King timing and market context: I watch session structure, auction profile highs/lows, and premarket or overnight behavior. If the late Nate appears at an important session pivot, it carries more weight.
- Other Flowmaster crosses: Multiple crosses—especially if different colors cluster in the same zone—create a stronger confluence picture.
Here’s the mental checklist I run when a late Nate appears:
- Is there an existing enigma or ready DD in the same zone? If yes, note target projection and stop region provided by the enigma.
- Does the session context support a reversal (e.g., market profile extreme, VWAP deviation, or structural resistance/support)?
- Are there multiple Flowmaster crosses clustered? How recent are they?
- Do other orderflow clues (such as exhaustion bars, large single prints, absorption footprints) corroborate the idea of waning momentum?
Step 4: Trade Setup Walkthrough — Entry, Stop, Target
Now I’ll walk through a complete trade scenario using the signals discussed. This is the same sequence I used in the video example and the one I practice in simulation when refining my execution.
Scenario Outline
Imagine price is in an up swing. I get a green ready DD label, then a blue enigma forms at king timing in the same area, suggesting strong buyer momentum. Later, a white Flowmaster cross (late Nate) appears in that same zone—potential exhaustion by late retail buyers. I want to trade the possible short-term reversal or a pullback that follows.
Step-by-step execution
- Preparation and watch: When the green ready DD appears I prepare. That label tells me to watch this zone closely for further reinforcement or rejection. I already pull up the enigma projection if it forms; I note its projected target lines and the enigma marker so I can reference stops and targets later.
- Confirm the enigma: When the blue enigma forms at king timing, I take it as the primary directional context. This is my “bias anchor.” In my example, the enigma projects a higher target, indicating buyer interest.
- Late Nate arrives: When the white Flowmaster cross appears, I mentally mark this as potential retail exhaustion—they’re jumping in late. I don’t automatically short or reverse against the enigma. Instead, I look for an entry that uses the enigma projection and the late Nate to define risk and target.
- Entry trigger: I wait for a price reaction after the late Nate—typically a corrective candle, a break of a short-term low/high, or a failure to push above a recent swing high. The entry can be one of these:
- Enter on a pullback into the enigma zone after the late Nate confirms exhaustion.
- Enter on a price pattern breakout in the opposite direction after the late Nate (e.g., head-fake followed by follow-through).
- Use a limit order just past a local structure point to capture a better price if an immediate reversal starts.
- Stop placement: I often place stops behind the enigma marker or slightly beyond the high/low created by late retail activity. The enigma marker is a sensible mechanical anchor because it represents a point where the enigma’s projected expectation is invalidated.
- Targets: Primary targets are referenced off the enigma’s projected line. The enigma often provides a realistic projected move length that I use to size targets. Depending on my risk-reward and strategy, I may scale out in increments or use a single target aligned with the enigma projection.
- Trade management: If price moves in my favor I trail stops to breakeven quickly and then to logical micro-structure levels. If I see fresh institutional follow-through in the opposite direction of my original trade, I reduce size or exit early.
One of the key takeaways: the late Nate tells me “retail is late.” If institutional buyers (or sellers) don’t follow, that move is at risk. Using the enigma projection gives me a disciplined reference for where that move might complete and where to place my stops.

Step 5: Risk Management and Trade Management Rules
Having a clear set of risk rules is the single biggest determinant of long-term success for me. The late Nate provides a clue about timing and psychology, but your position sizing and stop discipline must be pre-defined.
Position sizing
I size positions based on a fixed percentage of my account that I’m willing to risk on a single trade—typically 0.25% to 1% depending on account size and confidence. Calculate position size using:
- Account risk per trade (dollar amount you can lose)
- Stop distance in ticks or points from your entry to the stop
- Tick or point value for the instrument being traded
Example: If I’m willing to risk $200 and my stop is 4 ticks at $12.50 per tick, my position size would be 200 / (4 * 12.50) = 4 contracts. Always round down to the nearest whole contract you can trade.
Stop placement rules
Stops should be mechanical and consistent. Here are common stop placements I use when trading a Late Nate confluence setup:
- Behind the enigma marker: The enigma marker is my primary structural anchor in the example. If price moves beyond this marker, the enigma context is invalidated.
- Beyond recent swing high/low: For extra space in volatile instruments, place the stop a few ticks beyond the recent extreme created by retail exhaustion.
- ATR buffer: On particularly noisy days, apply a small ATR multiplier (e.g., 0.25–0.5 ATR) to avoid being whipsawed by normal volatility.
Target and scaling rules
The enigma projection provides target guidance. I typically employ one of these approaches:
- Single target: Capture the enigma projected line as my full target. This is simple and disciplined.
- Scale-out: Take partial profits at intermediate structure and carry a smaller remaining size to the enigma projection.
- Trail to break-even then trail to structure: Move stop to break-even after the first target, then use a trailing method tied to swing structure for the remainder.
Trade management checklist
- Entry follows my pre-defined trigger (pullback, breakout, or limit fill).
- Initial stop is placed behind enigma or structure as defined.
- Position size equals my risk rule calculation.
- Primary target aligns with enigma projection; scale plan is pre-decided.
- If price shows contrarian institutional flow (e.g., large footprint prints against me), exit early or reduce size.
Step 6: Backtesting and Practicing the Late Nate in Simulation
I cannot stress enough how important practice in simulation is. The late Nate is a subtle signal: it’s easy to overtrade or misinterpret without seeing many examples. NinjaTrader’s market replay mode is my go-to for practice because it lets me replay intraday action at different speeds, test entries and exits, and log outcomes.
How I practice
- Set up the replay session: Choose a period with diverse conditions—trending, choppy, and news days. I like two to four weeks of intraday replay across multiple instruments (ES, NQ, CL, 6E) to get a feel for how late Nates behave in different markets.
- Load AlgoBox overlays: Run the Flowmaster and enigma indicators on the replay chart so the crosses and enigma markers draw in real time.
- Document every occurrence: Each time a white Flowmaster cross appears, log the timestamp, instrument, timeframe, confluence signals present, entry method used, stop, target, and outcome. Capture a screenshot and notes.
- Analyze results: After a session I compute win-rate, average profit/loss, average risk-reward, and maximum drawdown for the sample of late Nate setups.
- Refine rules: Adjust the conditions—e.g., require an enigma, require ready DD, adjust stop placement—and retest until I see statistically robust improvements.
Metrics I pay attention to:
- Win rate with enigma + late Nate vs. late Nate alone
- Average R per trade
- Drawdowns and worst run of losses
- Behavior across timeframes (e.g., 1-minute vs. 5-minute)
- Performance during different volatility regimes
Practice tip: Don’t cherry-pick the best-looking setups. Test a continuous sample and treat the learning process like research. The late Nate will fail sometimes—learning the failure modes is as important as learning the successes.
Step 7: Common Pitfalls and How to Avoid Them
Every tool has limitations, and the late Nate is no exception. Here are common mistakes I see traders make, plus how I avoid them.
Pitfall: Treating Late Nate as a Standalone Signal
Some traders see the white cross and immediately enter a reversal. This approach produces many small losses because a late retail cross is often just a noisy extension of the trend. The remedy is to insist on confluence—enigma, ready DD, or other signs of institutional failing.
Pitfall: Ignoring Market Regime
Late Nates behave differently in trending vs. choppy regimes. In strong trending markets, a late Nate may appear repeatedly and price can keep grinding. In choppy markets, it may be followed by quick fade. I always evaluate the broader session context—are we in a trend day, a range day, or a low-liquidity session?
Pitfall: Poor Stop Placement
Placing a stop too tight to avoid losses often results in being stopped out on noise. Conversely, placing a stop too wide increases risk unnecessarily. I use the enigma marker and structure extremes as mechanical anchors, and if I do apply an ATR buffer I keep it modest.
Pitfall: Over-leveraging Based on a Single Confluence
Even with confluence, no setup is certain. I manage position size conservatively and never risk more than my defined percentage per trade.
Pitfall: Not Accounting for Spread/Slippage
When trading futures on NinjaTrader, commissions and slippage matter. I model expected slippage into my backtests and practice entries with realistic fills in the simulator.
Pitfall: Ignoring News and Session Structure
Events like major economic releases can overwhelm technical confluence. If a high-impact event is imminent, I either reduce risk or avoid taking new late Nate setups until the volatility subsides.

Step 8: Integrating Late Nate into a Complete Trading Plan
The late Nate becomes most effective when incorporated into a complete plan that covers pre-session preparation, setup criteria, entry and exit rules, risk management, and post-session review. Here is how I integrate it into my routine.
Pre-session checklist
- Review economic calendar and mark high impact events.
- Identify overnight and premarket structure for primary support/resistance levels.
- Load AlgoBox overlays: Flowmaster, enigma, ready DD labels.
- Define risk per trade for the day and maximum daily drawdown to stop trading.
Setup criteria (to consider a trade using late Nate)
- White Flowmaster cross (late Nate) appears near a swing extreme.
- At least one additional AlgoBox signal (e.g., enigma or ready DD) exists in the same zone.
- Session structure supports a reversal or corrective move (profile extreme, opening imbalance, etc.).
- Planned stop and target are determined prior to entry, using enigma projection for target and enigma marker for stop.
- Position size calculated and logged.
Entry and exit rules
- Entry type: limit or market depending on context; I prefer limit fills when a reliable pullback forms.
- Primary stop: behind enigma marker or recent structural extreme.
- Primary target: enigma projection.
- Scale method: take partial at intermediate structure and carry remainder to full projection.
- Exit triggers: invalidation (stop), price hits target, or clear institutional flow against the trade.
Post-session review
I journal every trade with the following fields:
- Date/time
- Instrument/timeframe
- Setup description (what confluence existed)
- Entry type and execution price
- Stop and target
- Result and P&L
- Notes: what went right/wrong, emotions, slippage
Weekly I aggregate results and look for performance patterns. For example, I may discover that late Nate trades work best on 5-minute charts in ES but are weak on 1-minute charts in low volatility sessions. Regular review lets me adapt and refine.

Conclusion
The LATE NATE is a powerful confluence tool when used correctly. It highlights late retail involvement in a move and therefore often coincides with waning momentum. I use it as an added clue—never as a sole trigger. When a white Flowmaster cross lines up with an enigma, ready DD, session structure, or other orderflow clues, I treat it as a higher-probability signal and follow my pre-defined rules for entry, stop, and target based on the enigma projection.
To master this approach I recommend consistent practice in NinjaTrader market replay, disciplined journaling, and patience. If you want to accelerate the learning curve, AlgoBox offers training resources and boot camp sessions that walk through these interactions in detail and in real time. My trading edge comes from combining clear mechanical rules with regular feedback loops—practice, measure, and refine.

FAQ
Q: What exactly is a late Nate and how does it differ from other Flowmaster crosses?
A: The late Nate is a white Flowmaster cross that I’ve observed consistently appearing near swing extremes, frequently when retail traders jump in late. Other crosses (blue, green, etc.) might indicate early or institutional participation. The color and placement matter—white suggests a late-stage retail response rather than fresh institutional buying or selling.
Q: Can I trade the late Nate on any timeframe?
A: You can observe late Nates on multiple timeframes, but I recommend testing across the specific timeframe you intend to trade. In my experience the late Nate is most actionable on intraday timeframes (1–15 minute charts) when combined with enigma and ready DD signals. Longer timeframes may show the cross but its signal-to-noise characteristics differ.
Q: Is late Nate a standalone entry signal?
A: No. I never use the late Nate by itself to enter a trade. It is a confluence marker. Treat it as an expression of late retail participation and look for supporting signals—enigma, ready DD, structural context—before executing.
Q: Where should I place my stop when trading a late Nate setup?
A: My primary mechanical stop anchor is the enigma marker. If no enigma exists, use the recent swing high/low beyond the late Nate cluster and add a small buffer (or ATR-based buffer) to account for normal volatility. The key is to make the stop logical and consistent with your risk rules.
Q: How do I determine the target for a late Nate trade?
A: Use the enigma’s projected line as the main target. If you don’t have an enigma, identify nearby structure levels or measure potential move length using recent swing structure, and set a target with a favorable risk-reward. Many traders scale out at multiple structure points and carry a portion to the main projection.
Q: How should I practice the late Nate strategy?
A: Use NinjaTrader market replay to replay intraday sessions. Load AlgoBox indicators, log every occurrence of a white Flowmaster cross, and record entries, stops, outcomes, and context. Run backtests across different volatility regimes and instruments. Keep a disciplined journal and refine your entry and risk rules based on empirical performance.
Q: Does the late Nate work better in certain instruments?
A: I’ve found it to be robust on major futures like ES and NQ because of consistent liquidity and participant behavior, but it can appear in many instruments. The strength of the setup depends on liquidity and the presence of institutional flow. Test it on your instrument of choice and track results.
Q: How do I handle news or high volatility events when the late Nate appears?
A: I either reduce risk considerably or avoid new trades when high-impact news is due, since event-driven volatility can overwhelm orderflow signals. If a late Nate forms shortly before a scheduled release, I typically step aside or trade very small size with wide stops to account for increased slippage.

Final notes and best practices
To summarize my practical rules for trading with the late Nate:
- Use late Nate as a confluence marker, not a standalone signal.
- Require at least one other AlgoBox signal (enigma or ready DD) in the same zone.
- Place stops behind the enigma marker or a recent structural extreme.
- Reference targets to the enigma’s projected line and scale out logically.
- Practice in NinjaTrader replay and log every setup to refine your edge.
- Keep position sizing conservative and consistent with your risk limits.
If you follow these steps and maintain a consistent practice routine, you’ll build familiarity with the appearance and behavior of late Nates across market conditions. The combination of visual orderflow cues (Flowmaster crosses), structural anchors (enigma projections), and disciplined risk rules is what turns a helpful hint into a tradable edge. I encourage you to test the idea thoroughly, document your outcomes, and gradually integrate it into your broader trading methodology.
Thanks for reading—I’ll be posting more detailed strategy breakdowns and session walk-throughs as I expand the AlgoBox training library. Practice intentionally, trade responsibly, and let measured data guide your refinements.
This article was created from the video LATE NATE Strategy 🟪 NinjaTrader Futures | AlgoBox Training with the help of AI.