I’m Vinny from ALGOBOX PRO, and in this article I walk you through the MOONSHOT confluence strategy I teach in our training and demonstrate in our NinjaTrader setups. If you want to catch powerful market moves using order flow and proprietary AlgoBox tools, this step-by-step guide lays out how I look for, validate, enter, manage, and exit MOONSHOT setups using the Flowmaster Enigma and Flowmaster Cross indicators. I’ll also show you how to practice the strategy in NinjaTrader’s market replay, manage risk, and build confidence through repetition.
Before we dive in, here’s a short mission statement I use when hunting for moonshots: identify significant order flow activity, wait for corroborating order flow events in close proximity, align with the directional bias, and manage risk tightly. When those conditions line up, we increase the odds of catching a strong, fast move — what we call a MOONSHOT.
Table of Contents
- Outline
- Step 1: Understand the core tools — Flowmaster Enigma and Flowmaster Cross
- Step 2: Recognize the confluence rules (timing and direction)
- Step 3: Spot a live MOONSHOT setup on your chart
- Step 4: Entry planning — where and when to enter
- Step 5: Targeting — the Enigma target line and visual guides
- Step 6: Risk management — stops, invalidation, and sizing
- Step 7: Practice routine — how to use NinjaTrader market replay
- Step 8: Tools, resources, and next steps (trial & bootcamp)
- Conclusion: Summary, common pitfalls, and habits for success
Outline
- Step 1: Understand the core tools — Flowmaster Enigma and Flowmaster Cross
- Step 2: Recognize the confluence rules (timing and direction)
- Step 3: Spot a live MOONSHOT setup on your chart
- Step 4: Entry planning — where and when to enter
- Step 5: Targeting — the Enigma target line and visual guides
- Step 6: Risk management — stops, invalidation, and sizing
- Step 7: Practice routine — how to use NinjaTrader market replay
- Step 8: Tools, resources, and next steps (trial & bootcamp)
- Conclusion: Summary, common pitfalls, and habits for success
Throughout this article I’ll include screenshots keyed to timestamps for each section so you can match the visual cues I discuss with exact moments in the original demonstration.
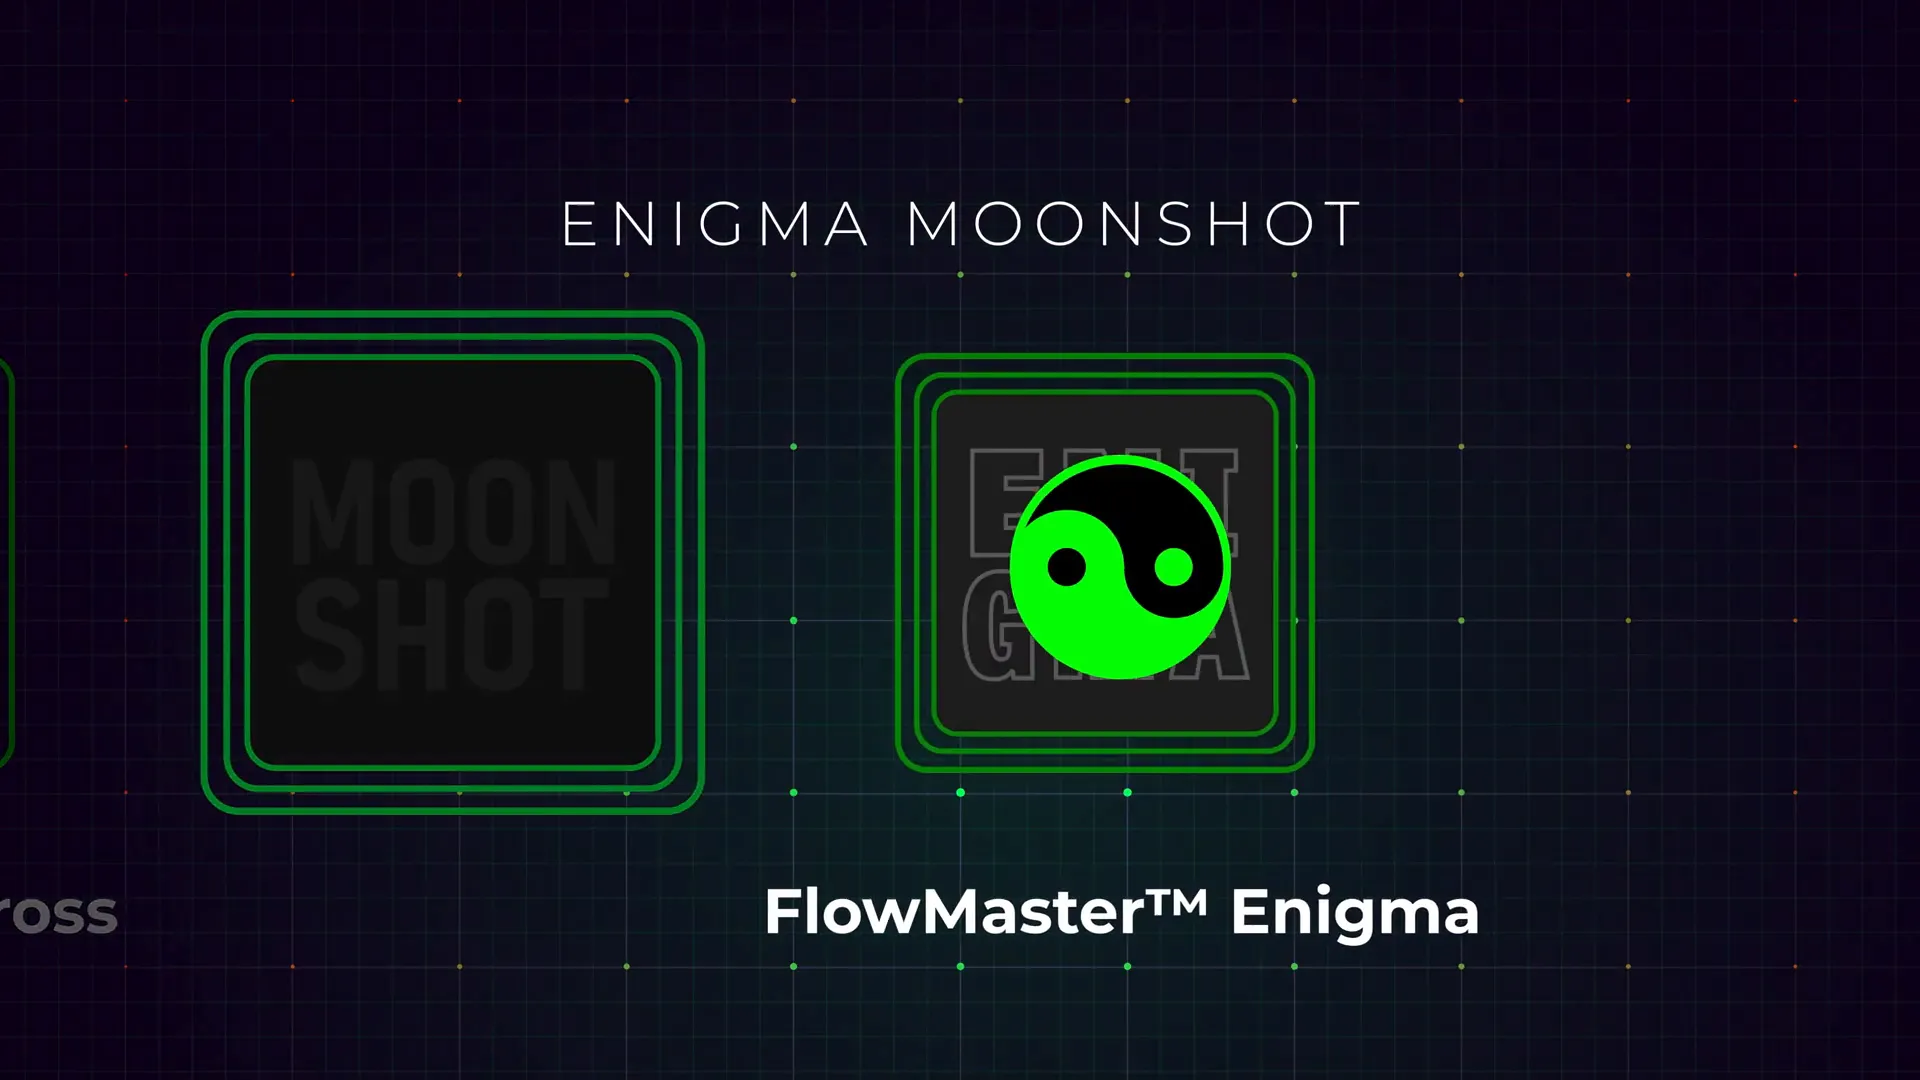
Step 1: Understand the core tools — Flowmaster Enigma and Flowmaster Cross
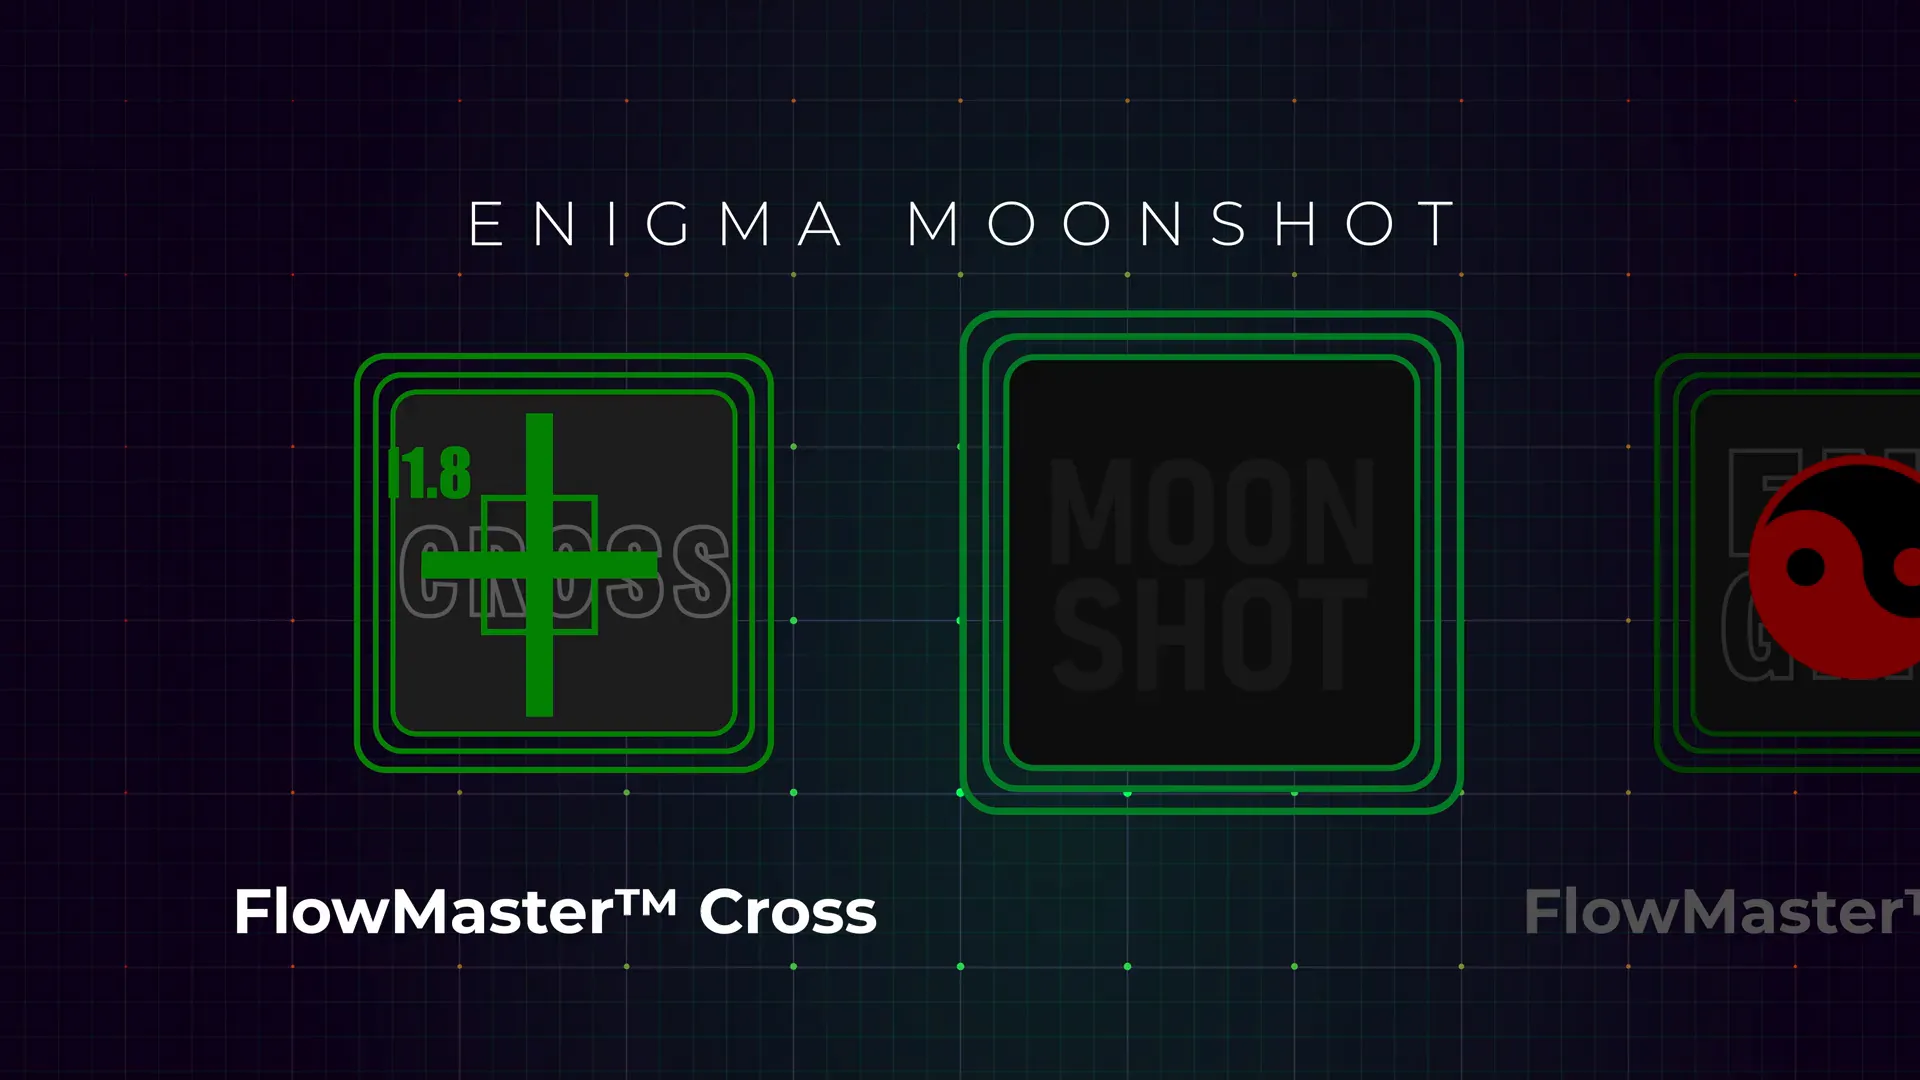
The MOONSHOT strategy relies on two AlgoBox tools: the Flowmaster Enigma and the Flowmaster Cross. These are not generic indicators — they are purpose-built order flow analytics that run in real time and flag significant market dynamics. I use them together because each tool offers a different perspective on order flow shifts and momentum potential.
Flowmaster Enigma — what it detects
The Flowmaster Enigma monitors real-time order flow and identifies high-impact activity that often precedes aggressive price moves. Think of the Enigma as a high-sensitivity detector for unusual market participation: it highlights where significant buying or selling pressure is concentrated and where the order flow pattern suggests an elevated probability for a follow-through move.
Key points about the Enigma:
- It’s based on proprietary real-time order flow analysis, not just price or volume alone.
- When it appears, it signals a concentrated shift in supply/demand — a point worth paying attention to.
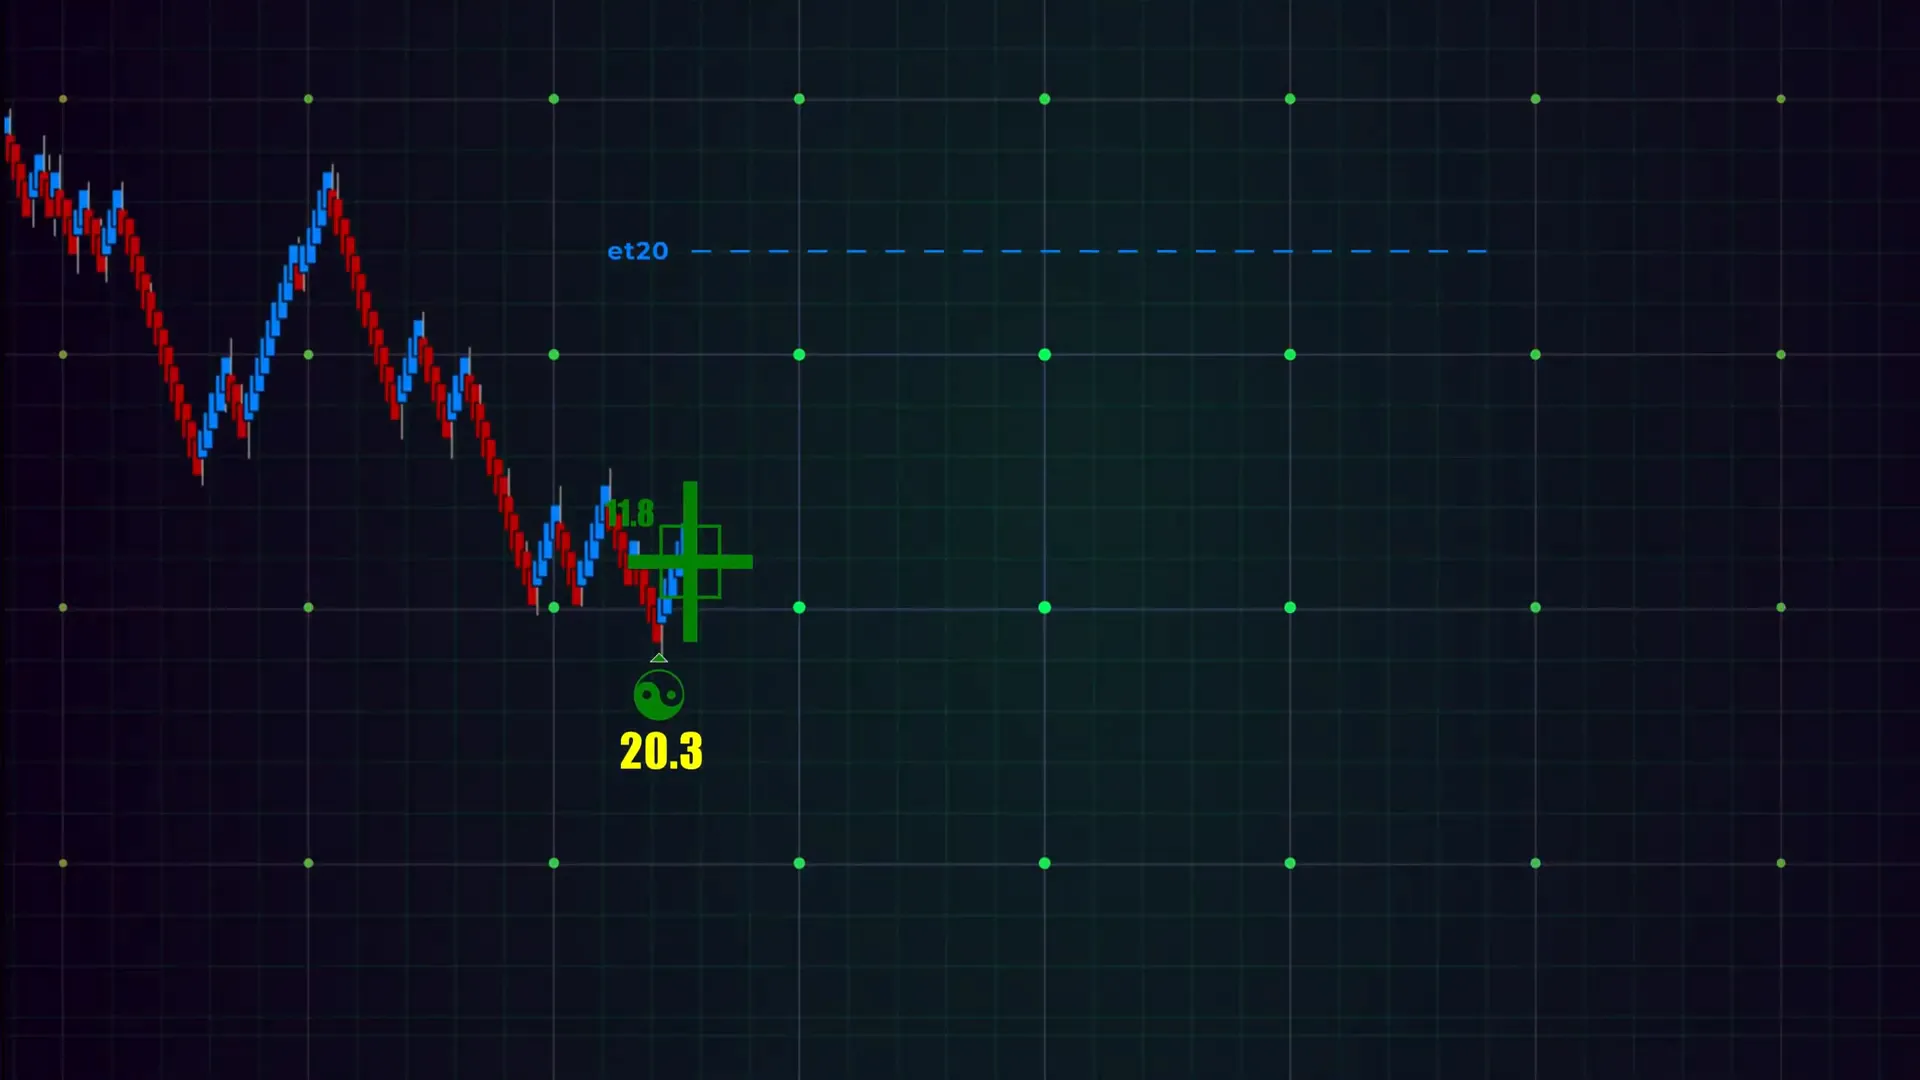
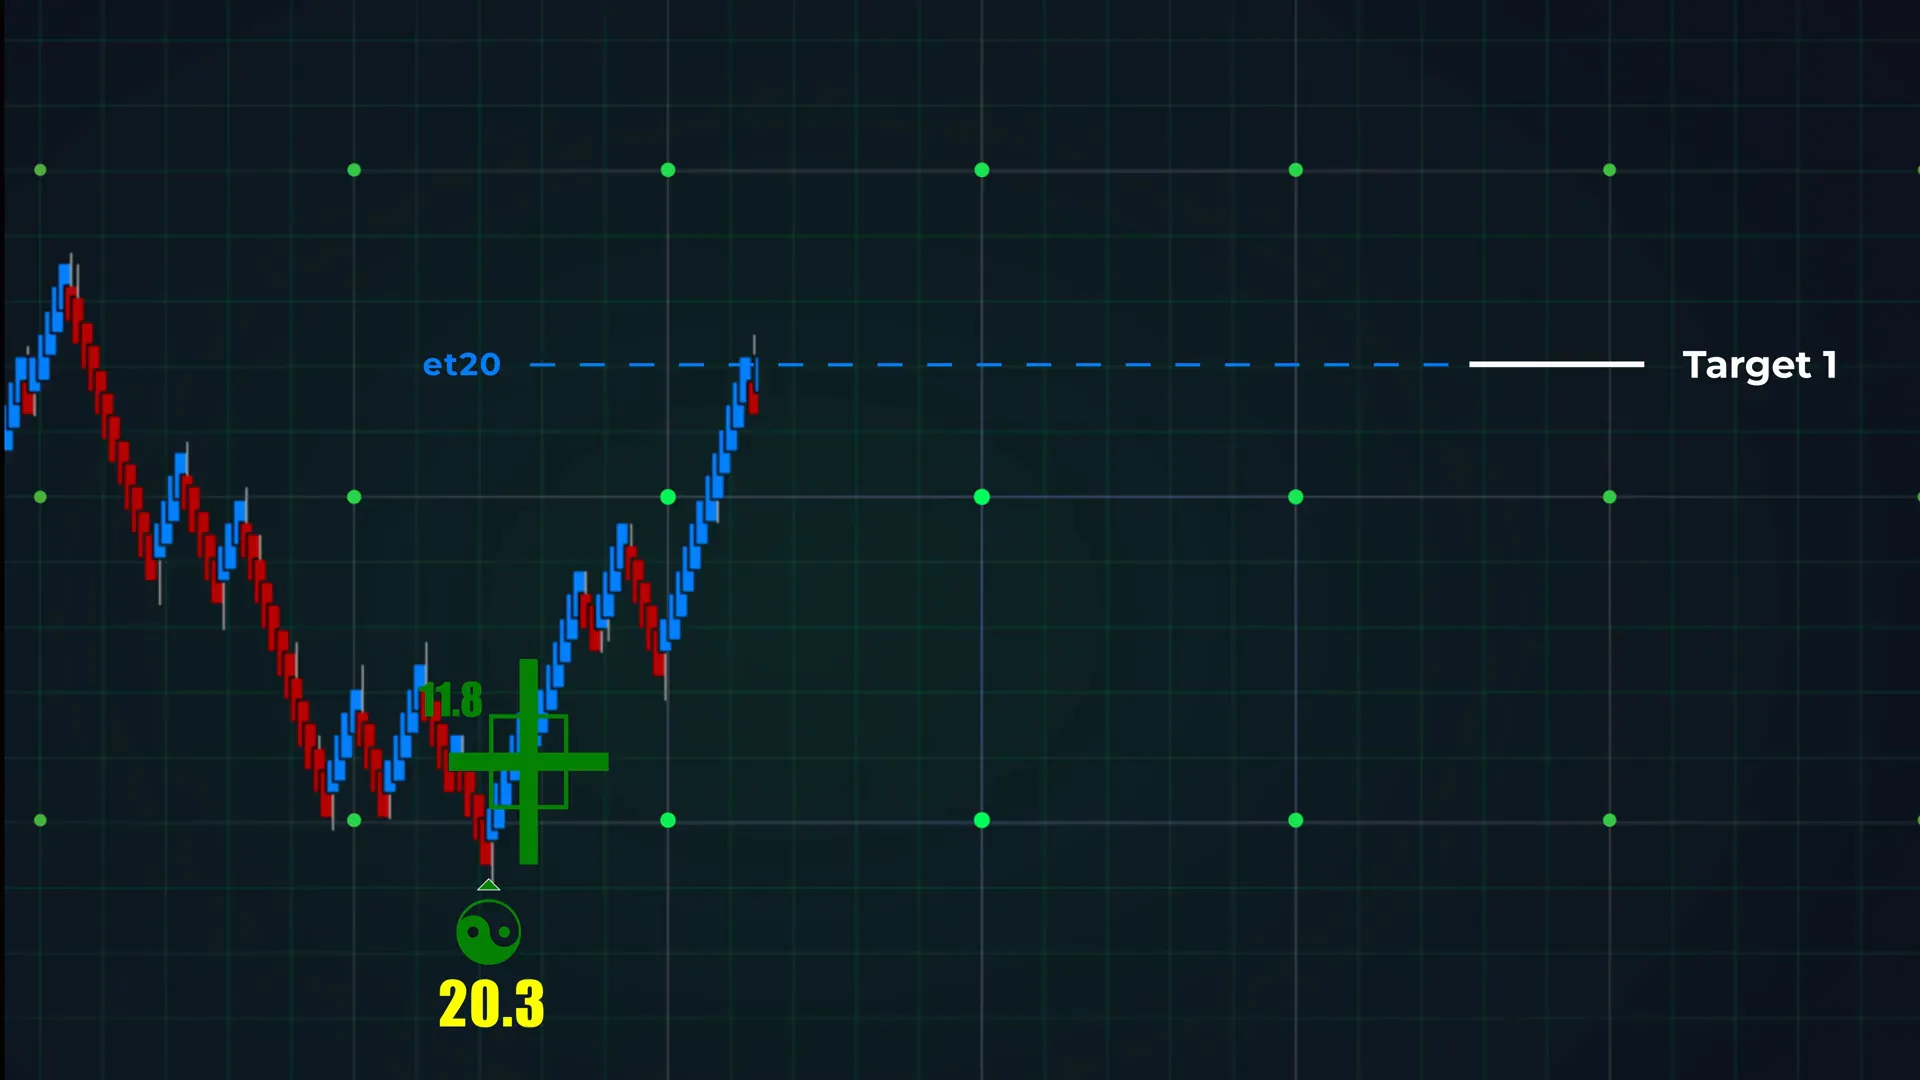
- The Enigma creates a visual anchor on the chart, and it automatically plots an Enigma target line (ET) for potential target zones.
Flowmaster Cross — what it tracks
The Flowmaster Cross complements the Enigma by tracking shifts in order flow momentum through specific event types we call bubbles and alpha/omega crosses. These events show when order flow flips direction or when there’s a burst in buying or selling intensity. In practice, I watch for alpha/omega crosses and bubbles because they tell me there’s active participation in the direction suggested by the Enigma.
Key points about the Cross:
- It identifies real-time micro-structure shifts in order flow.
- Alpha/omega crosses and bubbles indicate potential momentum changes.
- They are fast events; proximity in time to the Enigma is crucial for confluence.
“The Flowmaster Enigma uses proprietary real time order flow analysis to highlight significant market dynamics.”
That quote sums up the Enigma’s role — it’s the attention-grabber. But alone it’s not a full trade signal for me; I want confirmation. That confirmation often comes from the Flowmaster Cross events.
Step 2: Recognize the confluence rules (timing and direction)
The MOONSHOT philosophy hinges on confluence. I require a Flowmaster Enigma and a Flowmaster event (an alpha/omega cross or bubble) to appear within a tight time window of each other — typically within ten to fifteen algo bars. When both signals align and point in the same direction, I consider that a strong directional bias and a higher-probability setup. This “close together” timing implies market participants are coordinating (or that liquidity is concentrated) in a way that often produces sharp directional moves.
Why ten to fifteen algo bars?
- Algo bars are compact, information-rich bars that capture order flow behavior. Ten to fifteen of these means the events are clustered, not hours apart.
- Too wide a gap weakens confluence: a market can change behavior quickly, and a signal from an hour ago is less relevant.
- This window balances responsiveness with noise reduction — close enough to be meaningful, wide enough to allow for sequential signals.
How to interpret same-direction alignment:
- Both Enigma and Cross bullish: likely bullish momentum building; I bias for long entries.
- Both bearish: likely increased selling pressure; I bias for shorts or protection of longs.
- Conflicting directions: treat setup as weaker; consider waiting for more confirmation or taking a scaled approach with reduced size.
Confluence isn’t a guarantee — it’s a probabilistic edge. It stacks two independent order flow-derived signals to tilt the odds in our favor. In markets, that’s the practical route to finding trades that can run sharply — moonshots.
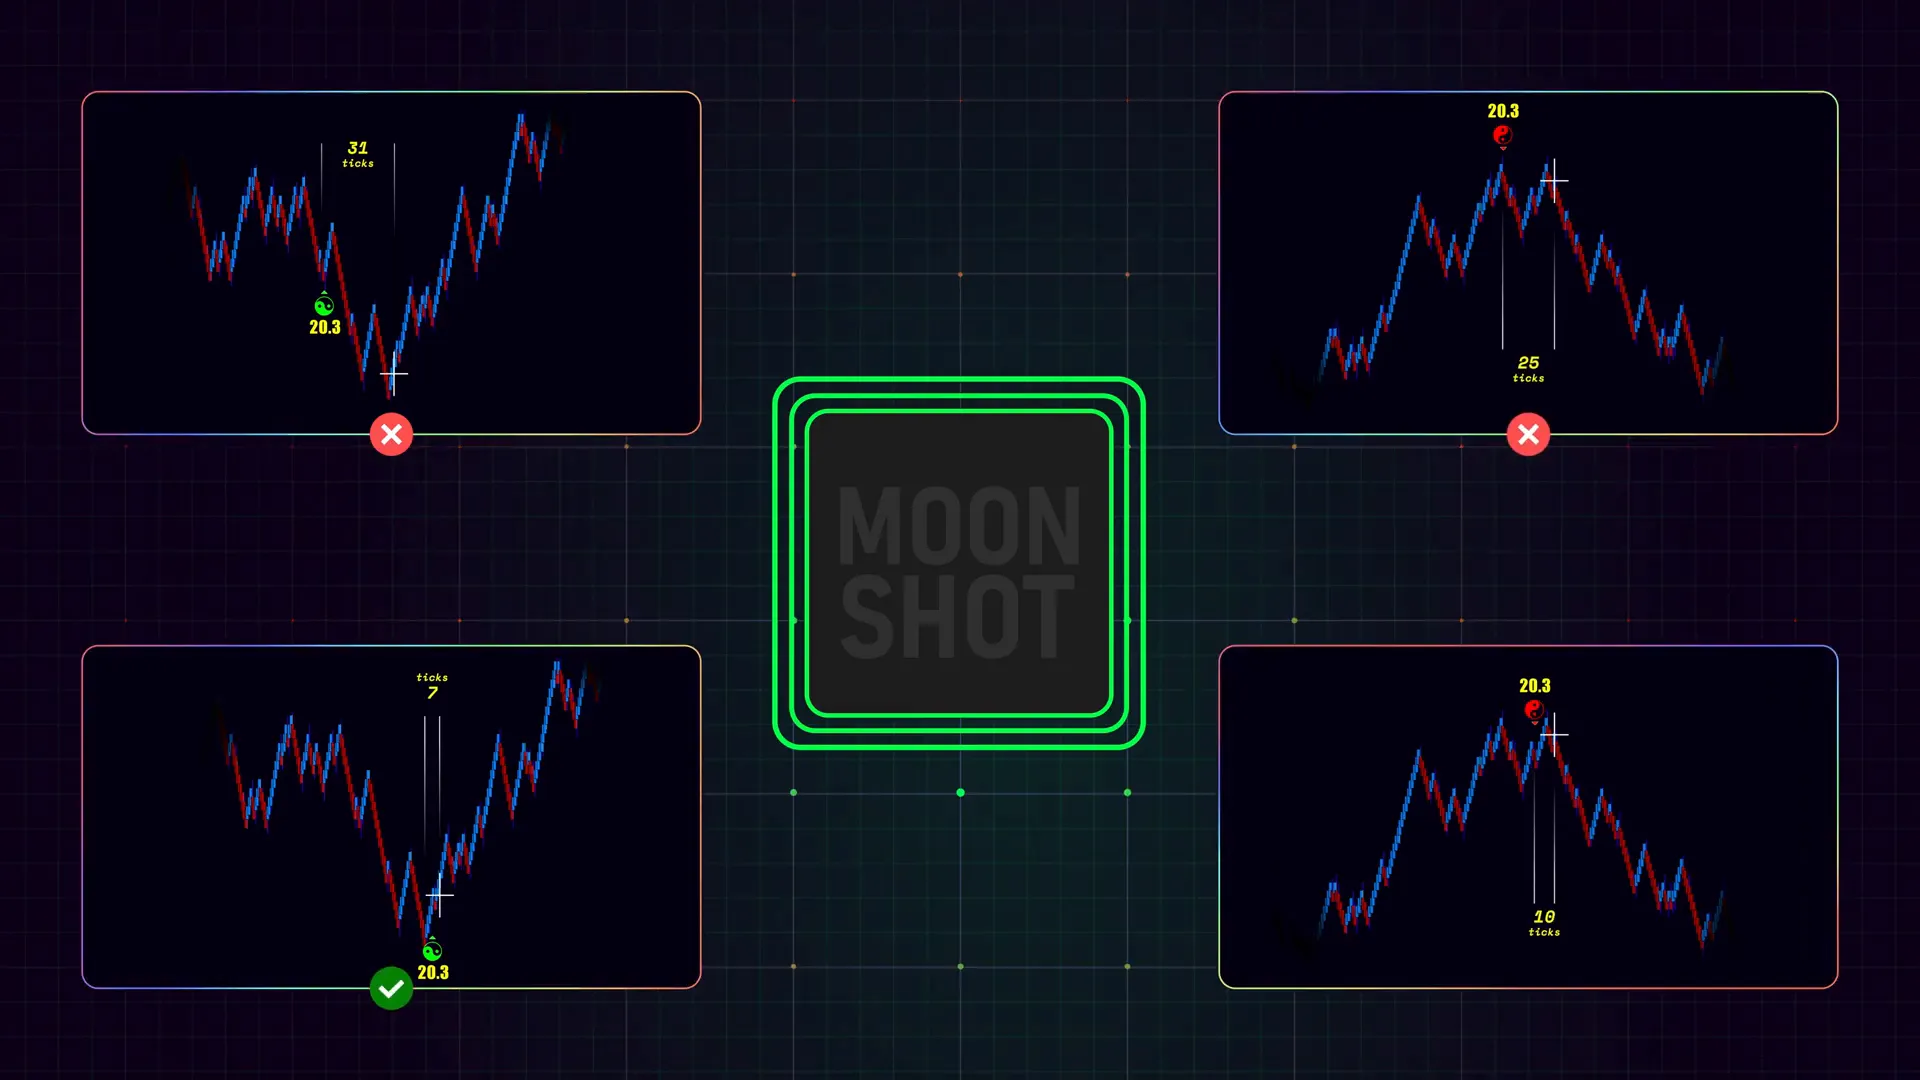
Step 3: Spot a live MOONSHOT setup on your chart
When I’m scanning for setups I look for the Enigma first because it’s the higher information-density signal. The Enigma visually marks the bar where meaningful order flow behavior occurred. Once I see it, I immediately watch the next several algo bars for a Flowmaster Cross event or a bubble that aligns with the Enigma’s direction.
Typical visual progression of a MOONSHOT setup:
- Enigma appears and marks a bar with elevated order flow activity.
- Price reacts around that area — sometimes briefly stalls, sometimes briefly spikes.
- Within 10–15 algo bars, I look for an alpha/omega cross or bubble coming up that points the same way as the Enigma.
- If these conditions are met, I consider the confluence valid and begin preparing my entry and risk plan.
There are variations. Sometimes the Cross precedes a visible price move and the Enigma appears after the fact — that can still be useful if the signals align and freshness (ten to fifteen bars) holds. I focus less on a rigid order of events and more on their temporal clustering and directional agreement.
Practical checklist when a potential setup appears
- Confirm time proximity: Enigma and Cross within ~10–15 algo bars.
- Confirm directional alignment: both bullish or both bearish.
- Check the broader context: is the market in a trending day, a range, or post-news volatility?
- Verify liquidity and spread: thin instruments can produce noisy signals.
- Note any support/resistance clusters visible on higher timeframes.
When all items check out, I move into planning my entry and position size — never before.
Step 4: Entry planning — where and when to enter
My entry philosophy with the MOONSHOT confluence is simple: align with the combined directional bias and look for an entry near the Enigma or on the first reasonable pullback after the signals occur. The idea is to join the early phase of the move, not to chase after extended action.
Common entry approaches I use:
- Immediate entry near the Enigma: when the Enigma appears and the Cross confirms within the 10–15 bar window, I may enter right around the Enigma bar if price structure and liquidity permit.
- Pullback entry: if price spikes and then retraces slightly, I prefer entering on a shallow pullback that holds above the Enigma (for longs) or below it (for shorts).
- Breakout entry: if price consolidates after the confluence and then breaks in the direction of the signals, I use the breakout as the entry trigger.
Which entry I choose depends on the market’s aggression and my read of momentum. If the cross and enigma appear and price is aggressive, an immediate small-sized entry is reasonable. If the action is choppy, I’ll wait for a clean pullback or breakout to reduce the chance of false starts.
Order types and execution
- Limit orders near key levels (Enigma or pullback low/high) can secure better fills, but risk missing the trade in fast moves.
- Market orders guarantee entry but increase slippage; for very aggressive moves I prefer smaller market entries and scale in.
- Scaled entries: enter a partial position at signal and add on confirmation or as price moves toward the ET line.
I always predefine my size based on risk parameters (more on sizing below). If a market is moving quickly I’ll choose quicker execution with smaller size, then add if momentum confirms and liquidity supports further entries.
Step 5: Targeting — the Enigma target line and visual guides
One of the benefits of the Enigma is that it automatically plots an Enigma Target line (ET). I use this as an initial visual guide for where the early move might reasonably reach. The ET is not a guaranteed price target — it’s a calculated reference based on the conditions the Enigma detected.
How I use the ET in practice:
- As a first target: I often take partial profits near the ET to lock in gains while letting the remainder run.
- As a reference for scaling: if price reaches ET with strong order flow behind it, I might add a little and move stops to breakeven or a small profit.
- As a validation tool: if price moves through ET quickly with strong follow-through, it can indicate a larger move; if it stalls at ET, consider tightening stops.
I like to pair the ET with price structure and higher timeframe reference points (daily pivot, recent support/resistance). If the ET sits near a confluence zone on higher timeframes, that strengthens its credence as a realistic target.
Targeting is always probabilistic. A sensible goal is to secure an initial gain quickly (ET or partial) and allow a portion of the trade to capture momentum extensions while protecting capital via trailing stops or structural invalidation points.
Step 6: Risk management — stops, invalidation, and sizing
Risk management is the backbone of any repeatable strategy. For MOONSHOT trades I use tight, logical stops that tie directly to the Enigma and price structure. If an Enigma signals and price breaks the Enigma’s reference point in the opposite direction, the setup is invalidated. That’s my exit.
Where I place stops
My general rule: place a stop behind the Enigma. For longs this is a few ticks or ATR-based buffer below the Enigma point; for shorts it’s above. The exact distance depends on the instrument’s tick size, volatility, and session context.
Stop placement rationale:
- The Enigma marks significant order flow; a breach often means the logic behind the trade no longer exists.
- Tying the stop to the Enigma keeps your risk objective and clean — you don’t move the stop unless the trade structure changes in a way that reason dictates.
- Avoid arbitrary stops far away; if you need a large stop to keep a trade open, the trade likely doesn’t fit your risk profile.
Position sizing
I size every trade so that the maximum potential loss (distance from entry to stop × position size) equals a predefined percentage of my trading capital — typically a small, consistent fraction. This keeps single-trade losses tolerable and allows for consistent compounding of gains.
- Define risk per trade: choose X% of your account (commonly 0.25–1.0% for active traders).
- Calculate number of contracts/shares so that stop loss equals that dollar risk limit.
- Adjust size dynamically for higher volatility instruments or sessions with low liquidity.
Example: If I’m willing to risk $200 and my stop would be 4 ticks at $25 per tick, I trade 2 contracts (200 / (4 ticks × $25) = 2 contracts). Keep the math disciplined and automated when possible.
Trade invalidation and re-entry
When price breaks the Enigma and the stop is hit, the original setup is invalidated. A clean rule reduces emotional decision-making. However, the market often retests and offers new setups. If new Enigma/Cross confluence appears after an invalidation, reassess according to the same rules and treat it as a new trade — not a repeat of the prior one.
For re-entry I look for fresh order flow confluence, not wishful thinking. If the market shows clear rejection of the breakout and new order flow supports my original bias, I might re-enter with a fresh plan. Otherwise, I step back.
Step 7: Practice routine — how to use NinjaTrader market replay
Developing comfort with MOONSHOT setups requires repetition. NinjaTrader’s market replay lets you relive live order flow conditions and practice entries and exits without the pressure of live risk. I recommend a routine that combines focused study and active replay sessions.
Daily practice checklist
- Choose a block of historical intraday data and set the replay speed to real-time or 2x for learning.
- Scan for Enigma occurrences and mark those bars on the chart.
- Watch the following 10–15 algo bars for Cross confirmations; annotate your observations.
- Execute hypothetical trades with defined entries, stops, and targets. Track fills, slippage, and emotion.
- Repeat with different instruments, sessions, and volatility regimes to broaden experience.
Practice metrics to track:
- Win rate and average reward-to-risk ratio
- Average time in trade
- Common reasons for losing trades (late entry, too big size, ignoring invalidation)
- Execution quality (slippage, partial fills)
Market replay is the safest way to develop muscle memory for timing, execution, and recognition of order flow signals. It allows you to practice the exact MOONSHOT sequence without risking real capital while you learn how the Enigma and Cross behave in live conditions.
Step 8: Tools, resources, and next steps (trial & bootcamp)
If you want to run the MOONSHOT strategy exactly as I teach, use the full AlgoBox package with Flowmaster Enigma and Flowmaster Cross installed in NinjaTrader. I provide a free two-week trial so you can load the indicators, connect to market replay, and start practicing immediately.
Resources I recommend:
- AlgoBox download and setup guide — get the indicators into NinjaTrader and configure algo bars.
- AlgoBox 8-session Bootcamp — structured training that walks you from basics to advanced order flow tactics.
- Discord traderoom — live trading sessions and community feedback.
- Supplemental readings on order flow: footprint charts, time & sales, and order book basics.
When you begin the trial, start by replicating my practice routine in market replay and then gradually add small live trades once performance stabilizes in demo conditions. Use the bootcamp to shorten your learning curve — you’ll get structured lessons, exercises, and examples that reinforce what I describe here.
Conclusion: Summary, common pitfalls, and habits for success
Summary of the MOONSHOT process:
- Watch for a Flowmaster Enigma — a high-information order flow signal.
- Seek a Flowmaster Cross event (alpha/omega or bubble) within ~10–15 algo bars for confluence.
- If both signals align directionally, prepare to enter in the direction of the confluence.
- Prefer entries near the Enigma or on a clean pullback; scale in if appropriate.
- Use the Enigma Target (ET) as an initial target reference; take partial profits and trail stops.
- Place a stop behind the Enigma; if it breaks, the setup is invalidated.
- Practice extensively in NinjaTrader market replay; use the AlgoBox trial and bootcamp to accelerate learning.
Common pitfalls and how to avoid them
- Chasing trades: Don’t jump in after a big leg has already run. Look for confluence and freshness.
- Ignoring invalidation: If price breaks your Enigma stop, accept the loss and move on. Holding out hoping for a reversal is capital destruction.
- Over-sizing: Size based on risk math, not conviction. Over-sized positions compound mistakes.
- Trading noise: In extremely thin markets or outside primary sessions, signals can be noisy. Either reduce size or avoid trading those conditions.
- Poor execution: Practice execution in replay so you know how the entries, stops, and fills will feel in real time.
Habits for success
- Consistent journaling: Record every MOONSHOT you take (or don’t take), why you did it, and what happened.
- Daily replay drills: Even 20–30 minutes per day builds pattern recognition quickly.
- Review losing trades: Identify whether the issue was signal quality, execution, or size.
- Stay disciplined on stops: The market is unpredictable; your job is to survive and compound gains over time.
- Keep a small, consistent edge: MOONSHOT setups are about increasing probability, not guaranteeing outcomes.
Final thoughts: MOONSHOT trades are exciting because they can produce big, fast moves when executed with discipline. The key is confluence — the Enigma flags significant order flow, the Cross confirms directional momentum, and the ET provides a reasonable first target. When these elements align within a tight window and you manage risk properly, you give yourself the best chance to catch moves that matter to your account P&L.
If you want to try what I teach, download the free two-week AlgoBox trial, join the eight-session bootcamp, and use NinjaTrader’s market replay to build confidence. Keep your risk tight, practice relentlessly, and treat every trade as a learning opportunity.
See you in the live streams and in the bootcamp. Good trading.