
Welcome to an in-depth tutorial on live day trading using advanced algorithmic strategies, brought to you by ALGOBOX Trading. In this comprehensive guide, we’ll walk through the afternoon trading session that generated over $10,000 in profits, revealing the step-by-step approach to mastering precision entries, defense legs, and swing trades in the futures market.
Whether you’re a seasoned trader or just starting out, this tutorial will equip you with actionable insights on how to automate your trades, identify key market structures, and use proprietary tools like the AlgoBox to optimize your trading performance. Let’s dive right in!
Table of Contents
- Step 1: Setting the Stage – Understanding the Market Context
- Step 2: Analyzing Defense Legs and Market Battles
- Step 3: Spotting Recent Market Activity and Preparing for the Big Move
- Step 4: Identifying Traps and Safe Play Zones
- Step 5: Using Crosses and Enigma Signals for Entry Timing
- Step 6: Navigating the Fiddle Zone – Why Patience Matters
- Step 7: Recognizing Split Cross Reversals and Shark Patterns
- Step 8: Position Management – Full vs. Partial Entries
- Step 9: Tracking Divergence and Bull Trap Setups
- Step 10: Sweeper Strategy – How to Capture 50 to 100 Tick Moves
- Step 11: Handling Market Noise and Trolls in the Chat
- Step 12: Watching for Final Hour Moves and Big Bears
- Step 13: Utilizing Community and Documentation Resources
- Step 14: Managing Risk and Knowing When to Exit
- Step 15: Reflecting on the Session and Preparing for Tomorrow
- Conclusion: Mastering Day Trading with AlgoBox
Step 1: Setting the Stage – Understanding the Market Context
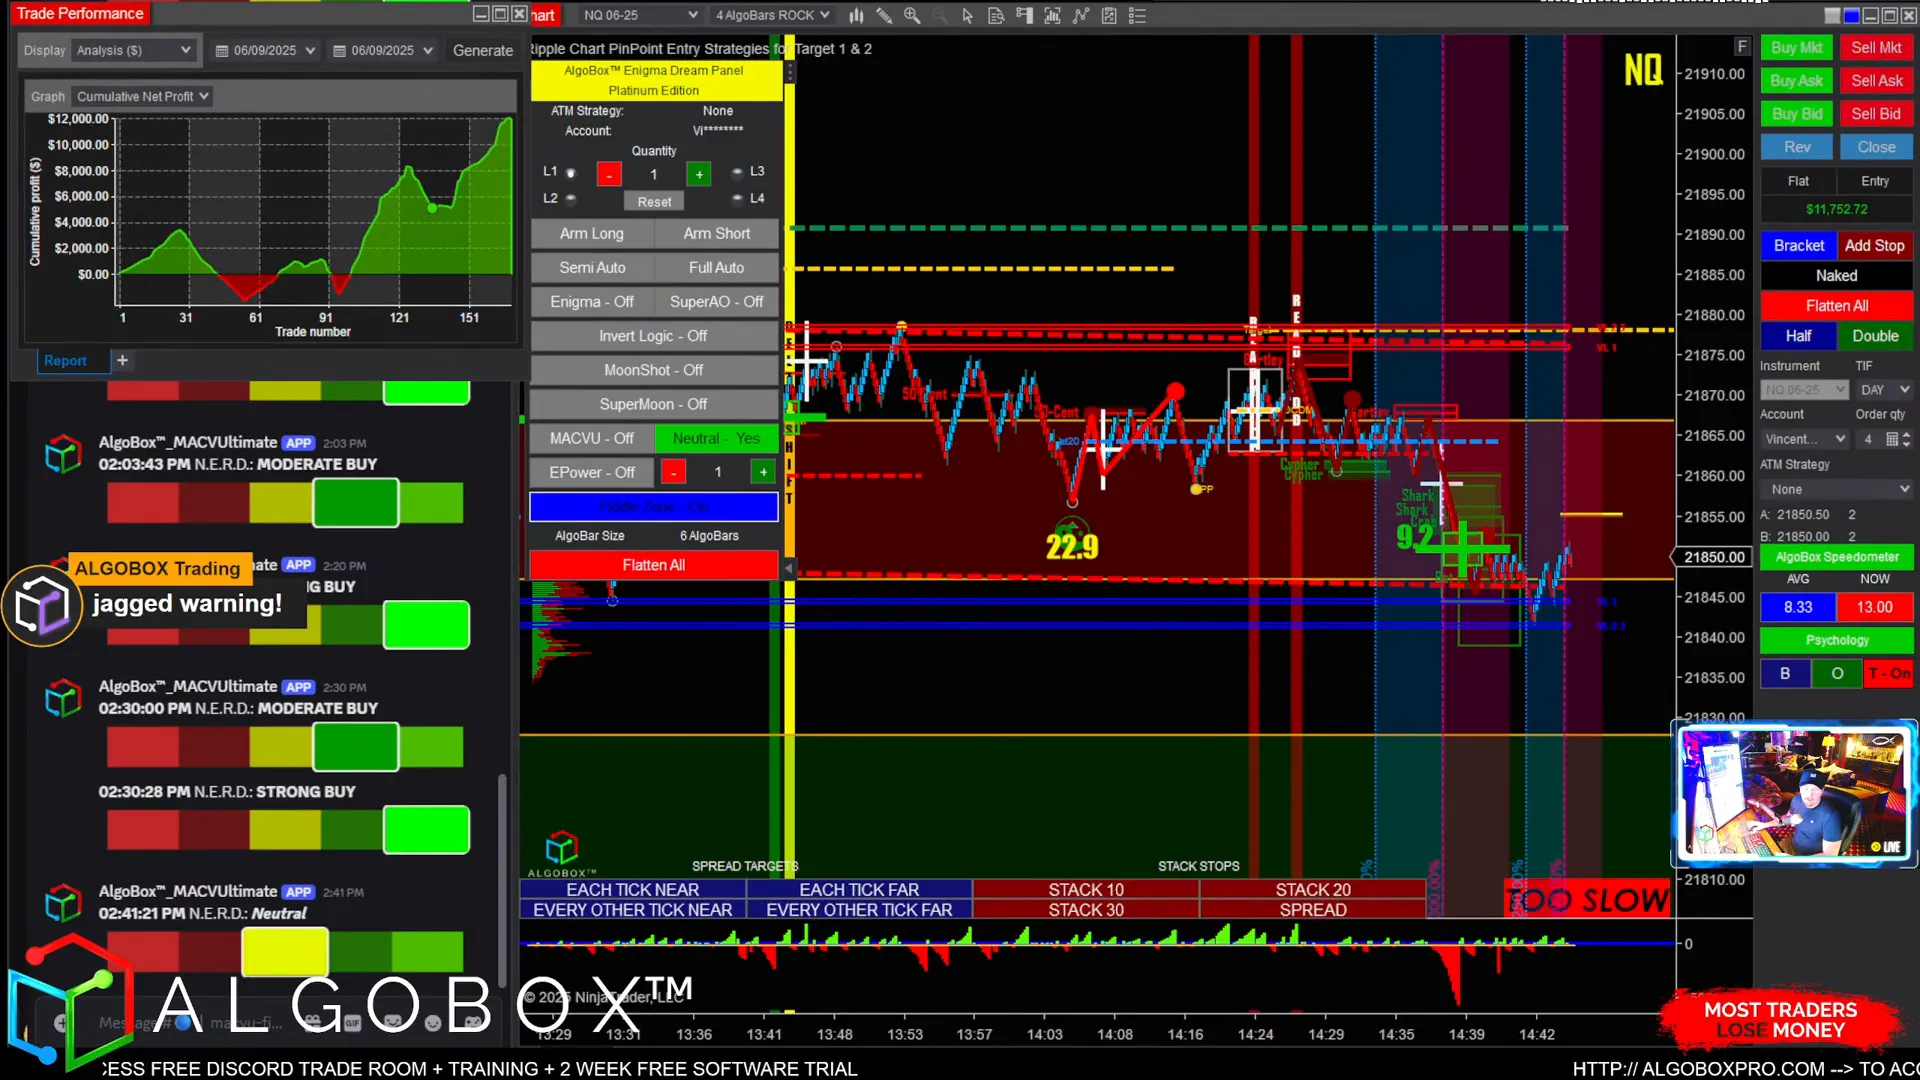
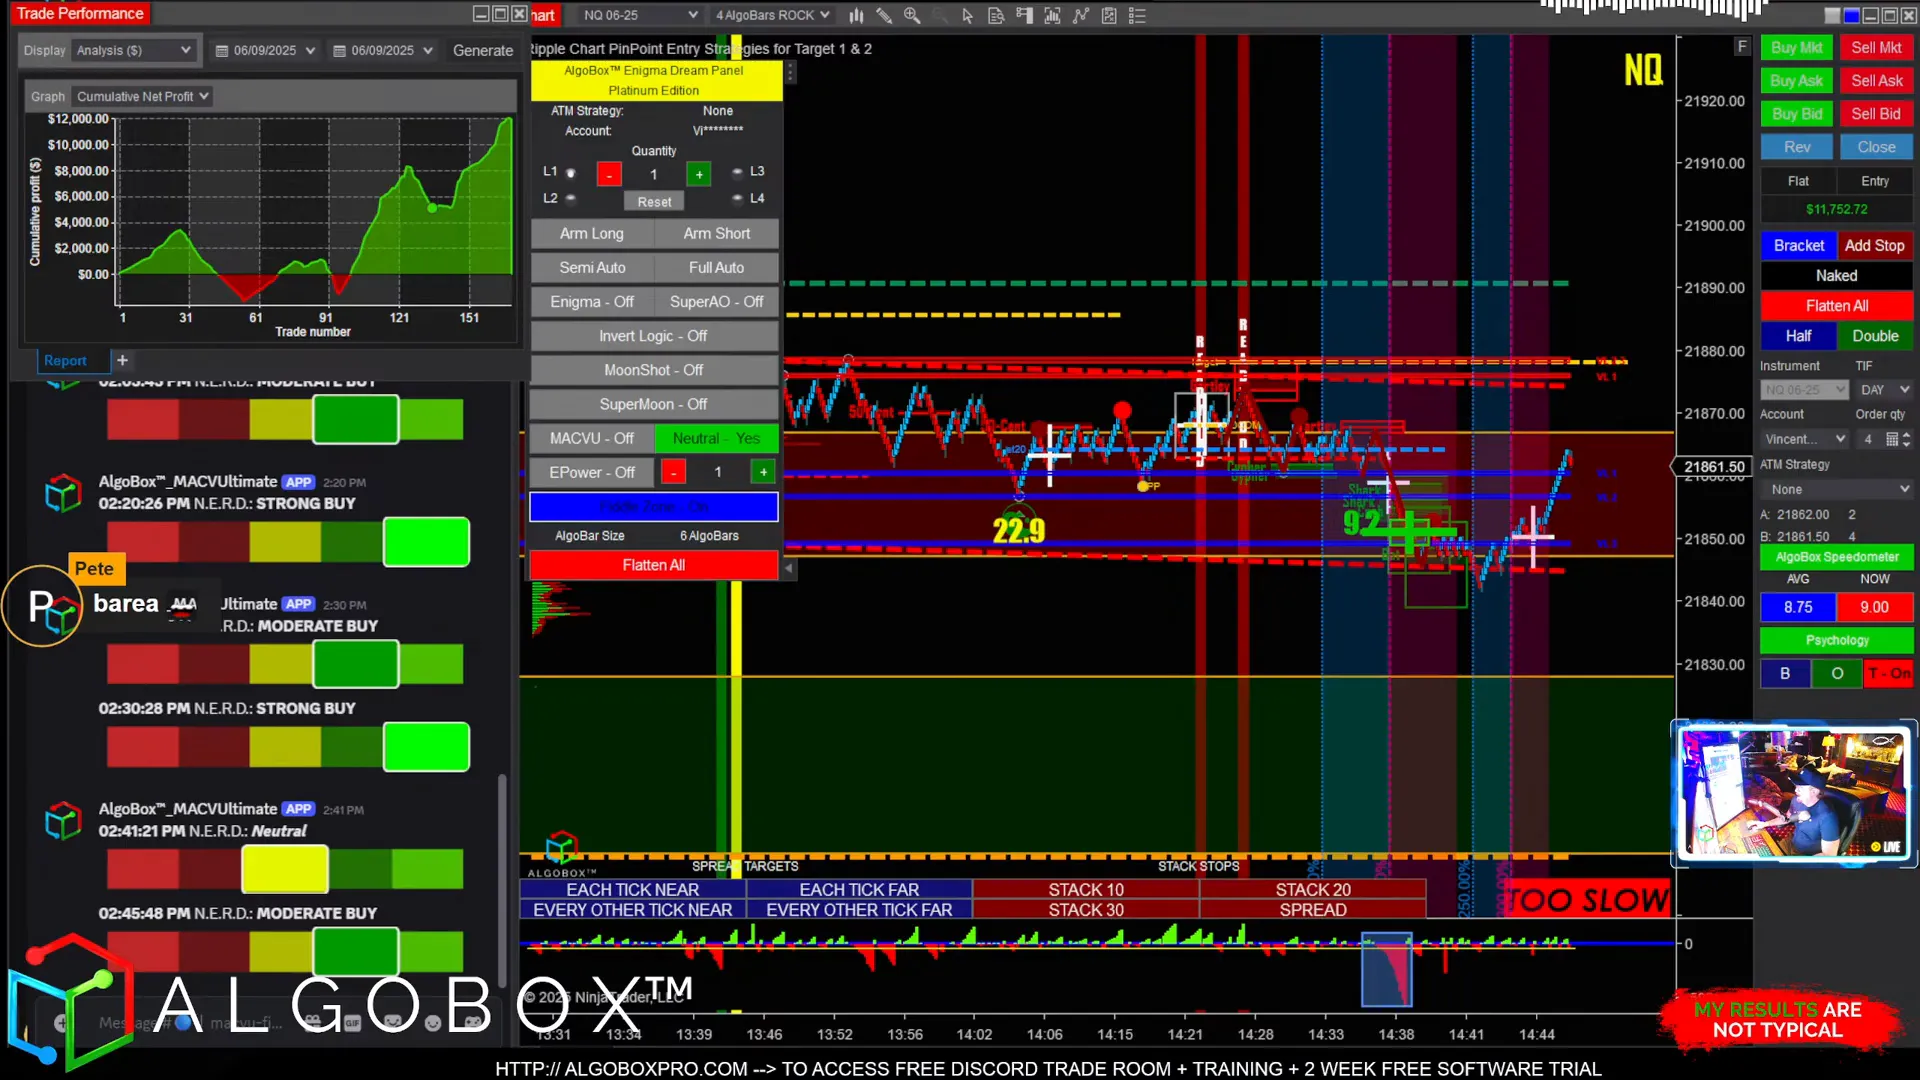
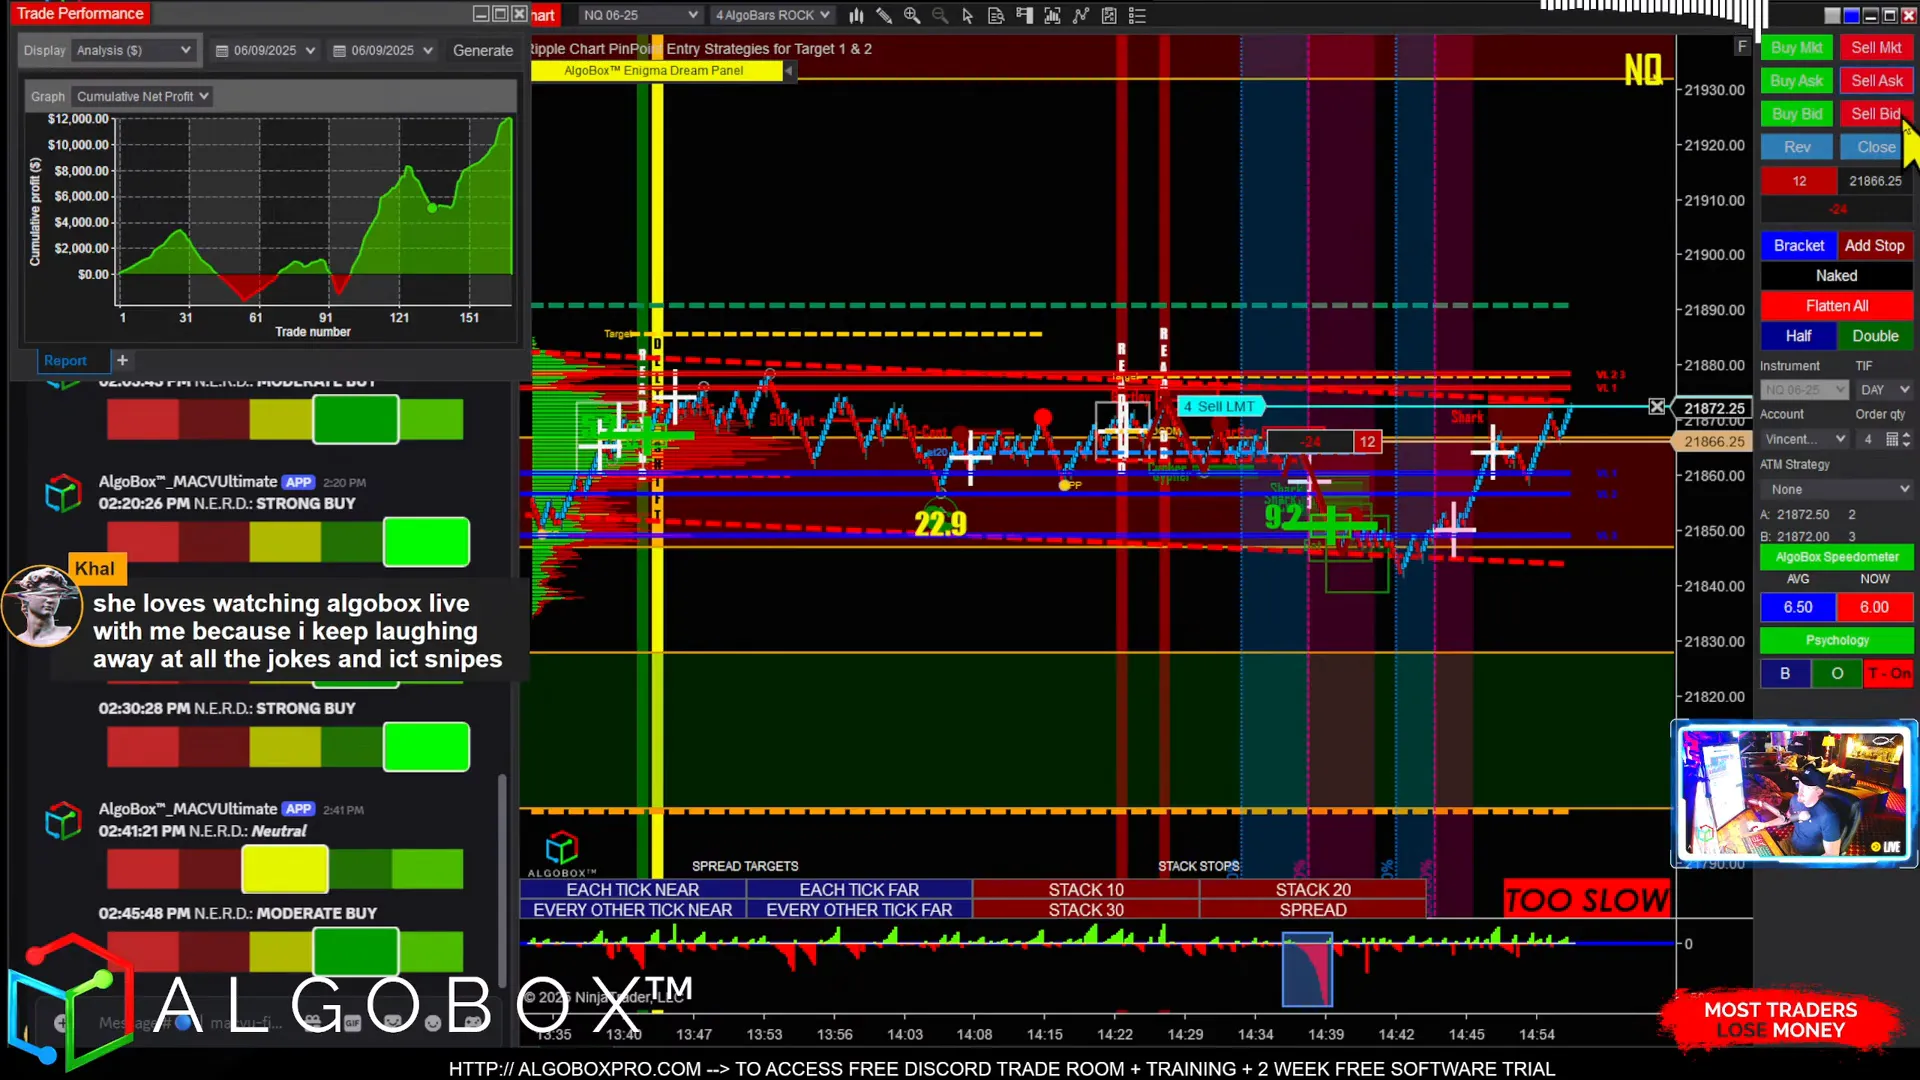
Before diving into any trade, it’s critical to understand the market’s current state and the context you’re trading within. As we transitioned into the afternoon session, we were already up $11,752 from the morning trades. This gave us a solid buffer to work with, but also required us to maintain discipline and precision.
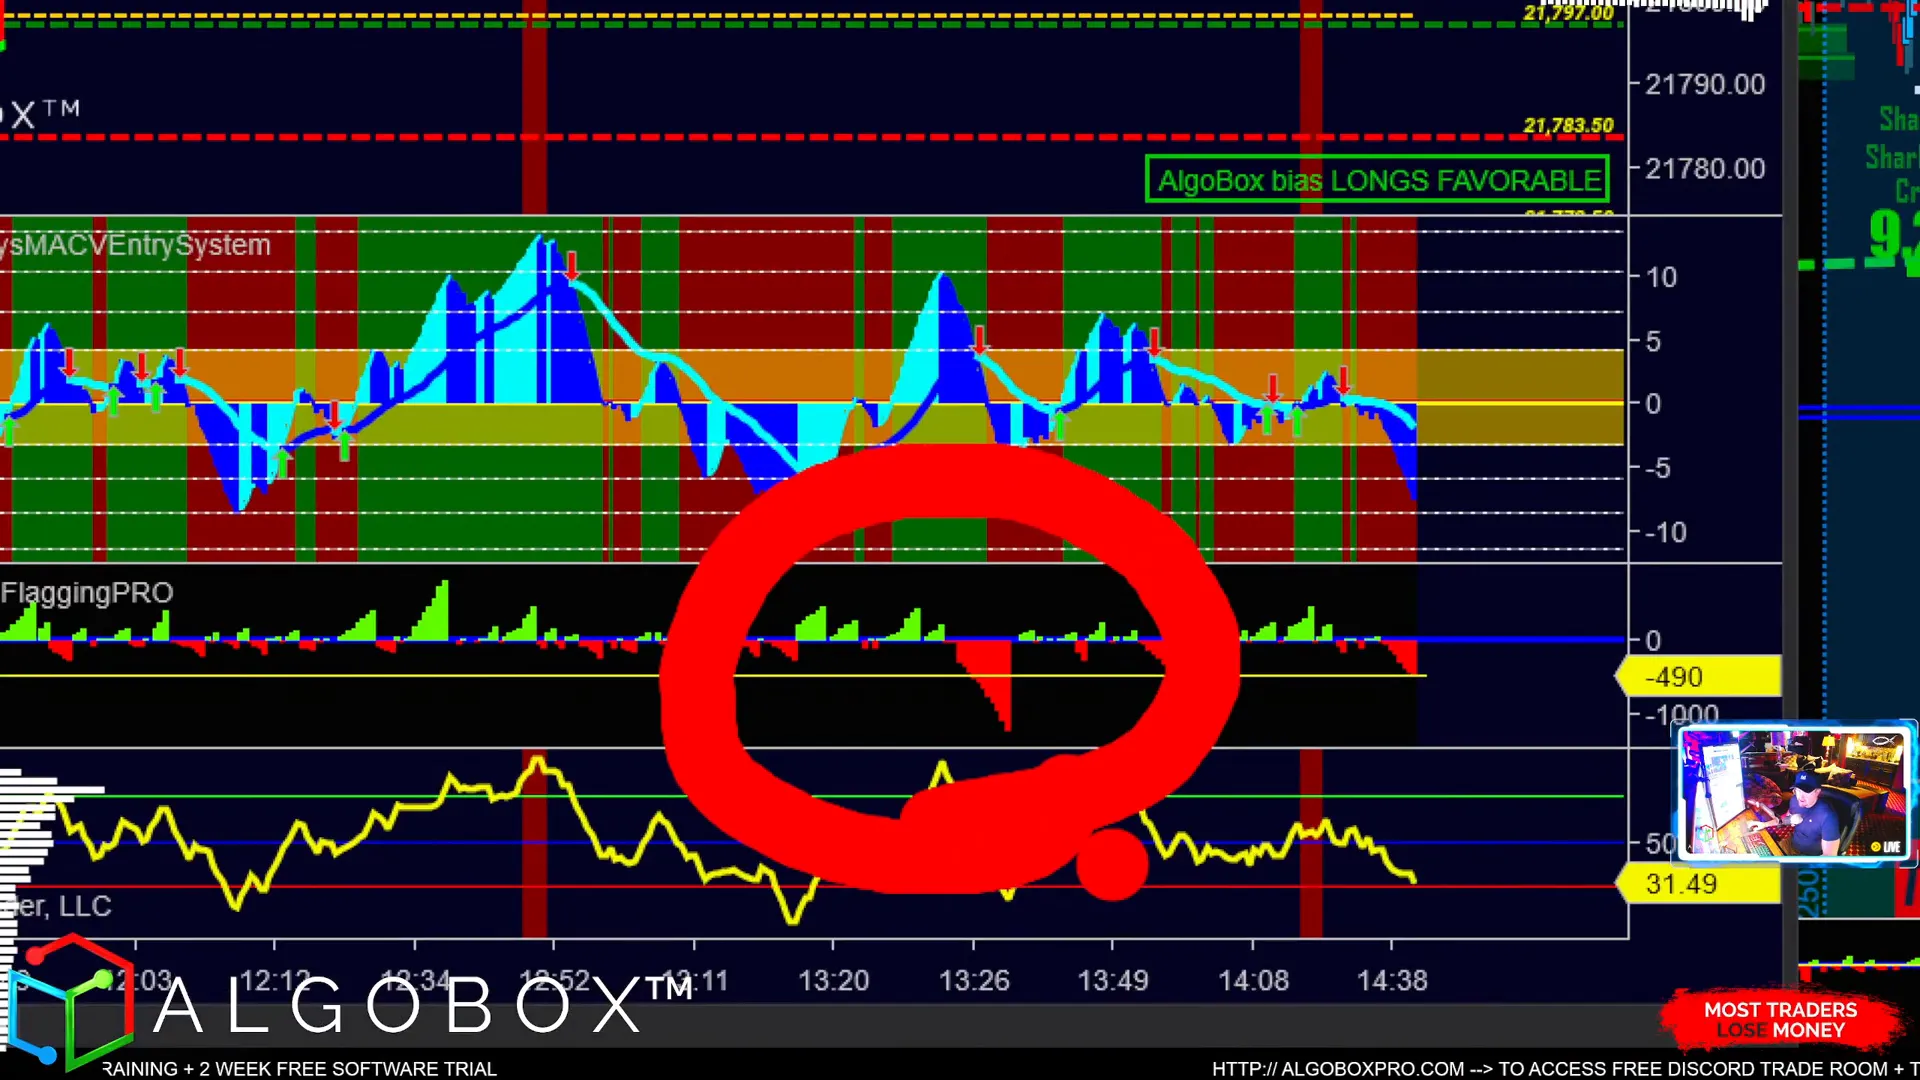
We began by analyzing the lower time frames to identify new market structures that had formed since the morning. One of the first things I noticed was a significant red defense leg that wasn’t present earlier. This leg is crucial because it represents a zone where sellers stepped in aggressively to defend their position.
Marking this defense leg helps us anticipate where price may react or reverse, setting the stage for potential trade entries or exits.
Step 2: Analyzing Defense Legs and Market Battles
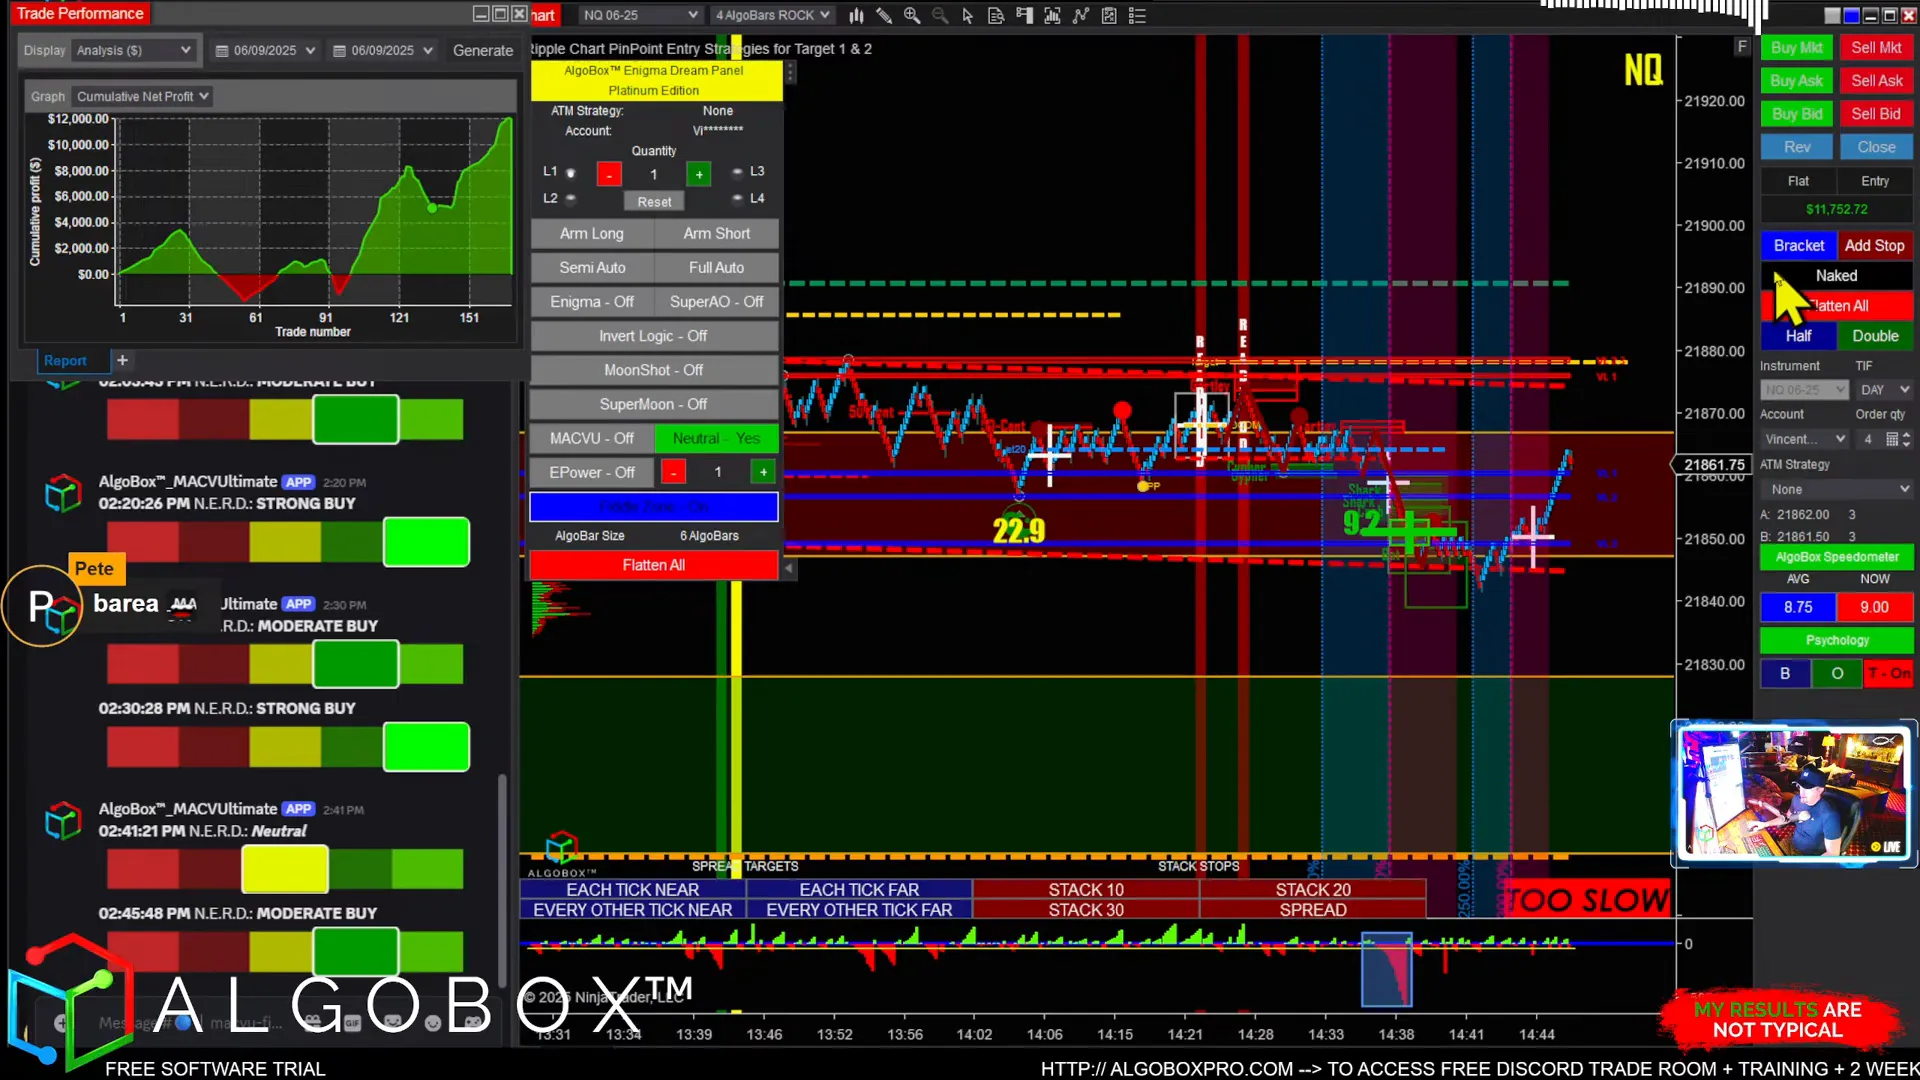
Defense legs are foundational to our trading strategy. They represent areas where buyers or sellers have previously shown strength and are likely to defend their positions. In this session, we scrutinized the red defense leg on the NQ (Nasdaq futures) 4-minute chart and compared it to the defense leg from the morning session on a slightly higher time frame.
Interestingly, the market was oscillating between these levels, creating what I call a “battleground.” This area, often referred to as the “ropes area,” is where market participants are undecided, handing the price back and forth as they jockey for control.
Our expectation, based on the morning’s activity, was that if the bulls wanted to run the price higher, their favorite take-profit zone would be around 21,950. However, the price only chipped away at this level, indicating hesitation and a possible setup for a reversal.

Step 3: Spotting Recent Market Activity and Preparing for the Big Move
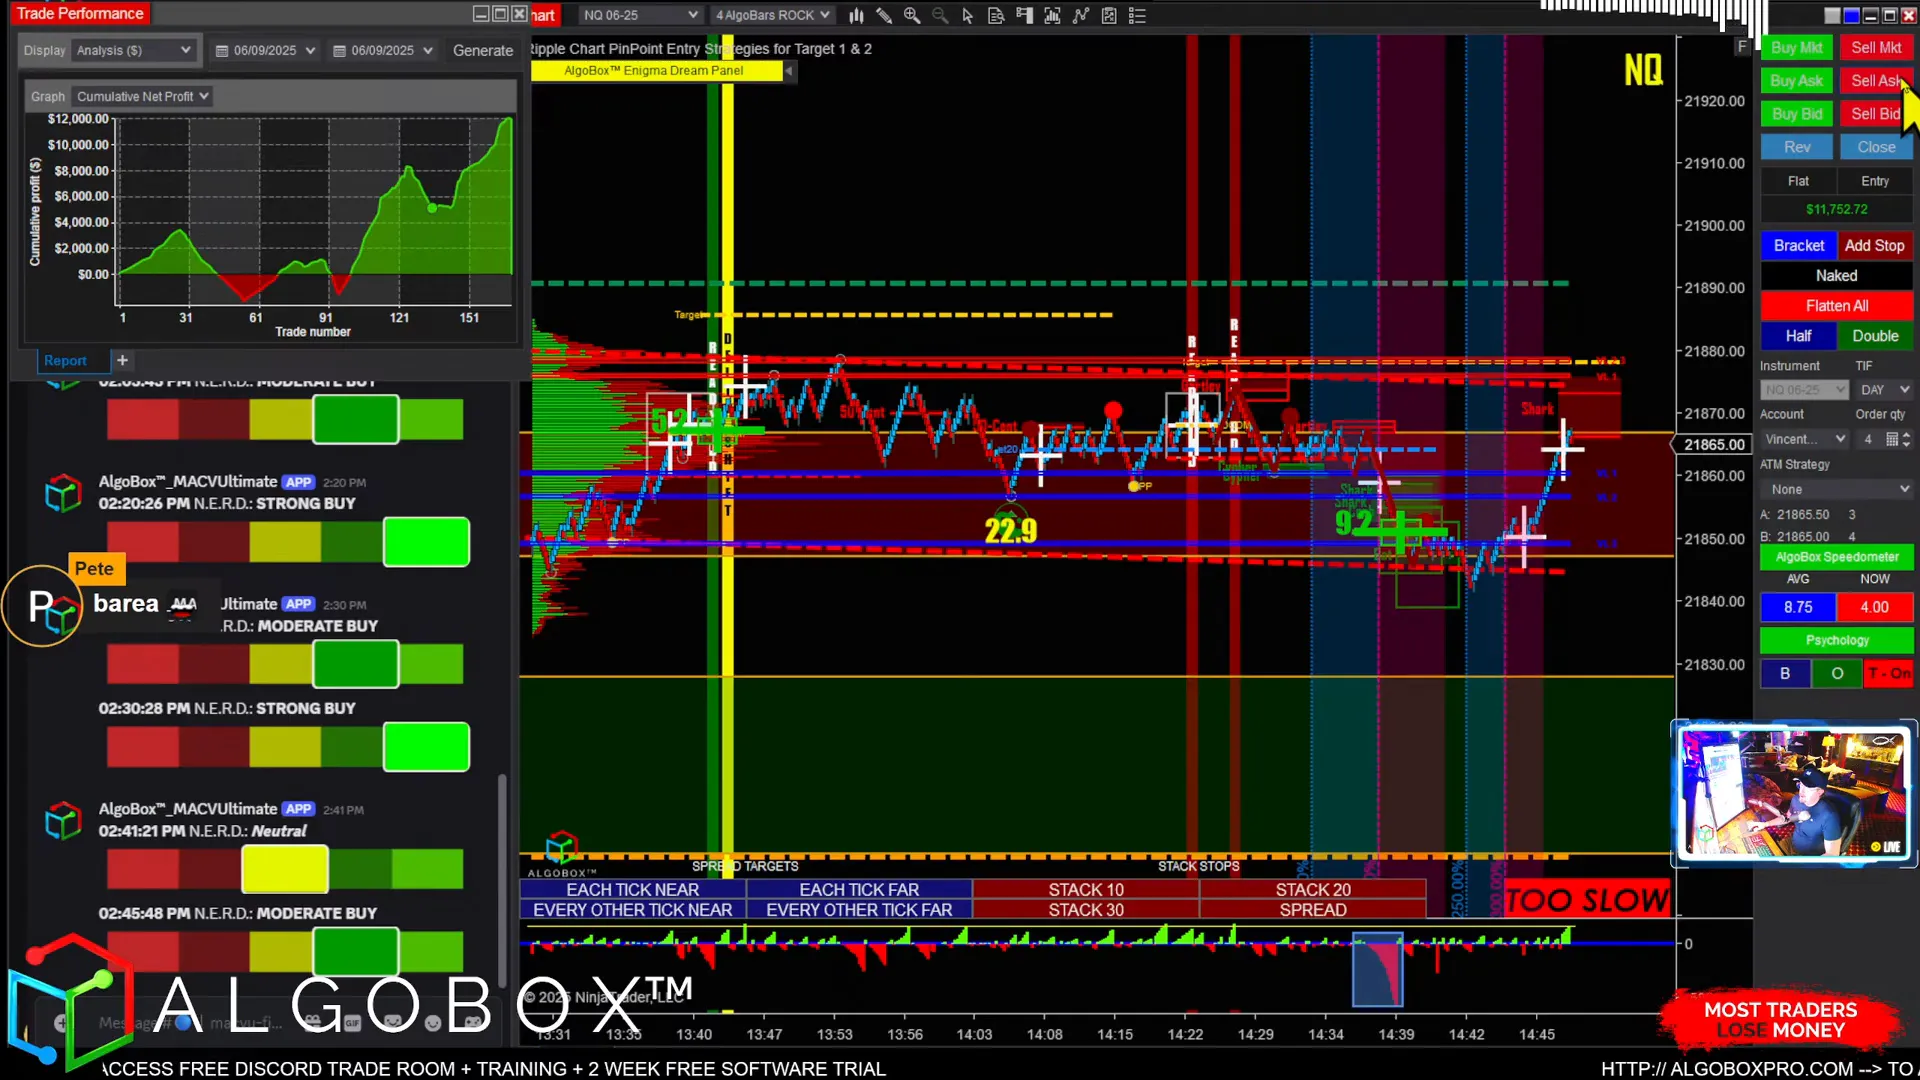
Recency is key in trading. The most recent market structures tell us where the current battle lines are drawn. In the afternoon, we observed bears stepping in between key levels, creating a new defense leg on a lower time frame. This signaled a fresh area of seller interest that could be defended aggressively.
At this point, I issued a “jagged warning” to the community in the chat. Jagged patterns on the tape often precede significant moves, so it’s essential to stay alert. The jagged warning serves as a heads-up that a big play is coming, and we need to be ready to act with precision.
Step 4: Identifying Traps and Safe Play Zones
One of the advanced concepts we use is spotting traps, such as the “dog trap,” which can be a setup where the market lures traders into false moves before reversing sharply. In the session, we identified a potential three-legged dog trap forming in the popcorn zone—a term we use to describe a certain price cluster or congestion area.
This trap began at a specific point, and recognizing it allowed us to consider a safe long play up to the top of the barrier, which is a resistance level where bears may defend. Understanding these traps enables us to enter trades with less risk and higher probability setups.
Step 5: Using Crosses and Enigma Signals for Entry Timing
Precision entries are everything in trading. We use specific signals called “crosses” and “enigma” patterns to time our entries. The first red cross is a cautious entry point where I “dip my toe in the water,” testing the market’s reaction.
The second cross is the real commitment point where I “slam it,” going full position because it confirms the trade’s validity. Sometimes these crosses occur right next to each other, allowing for quick entries, while other times the second cross follows after a delay, requiring patience.
In addition to crosses, the Enigma indicator, combined with an audio alert system called the AudioBox, helps confirm trade setups, especially when trading inside what we call the “fiddle zone”—a range where price tends to oscillate and requires careful timing.
Step 6: Navigating the Fiddle Zone – Why Patience Matters
Inside the fiddle zone, market conditions are often indecisive. Here, I only look for long setups when we have green signals, such as green arrows and green crosses, and avoid shorts until clear signals emerge.
This disciplined approach prevents premature entries and helps us capitalize on the most favorable moves while avoiding unnecessary heat or losses.
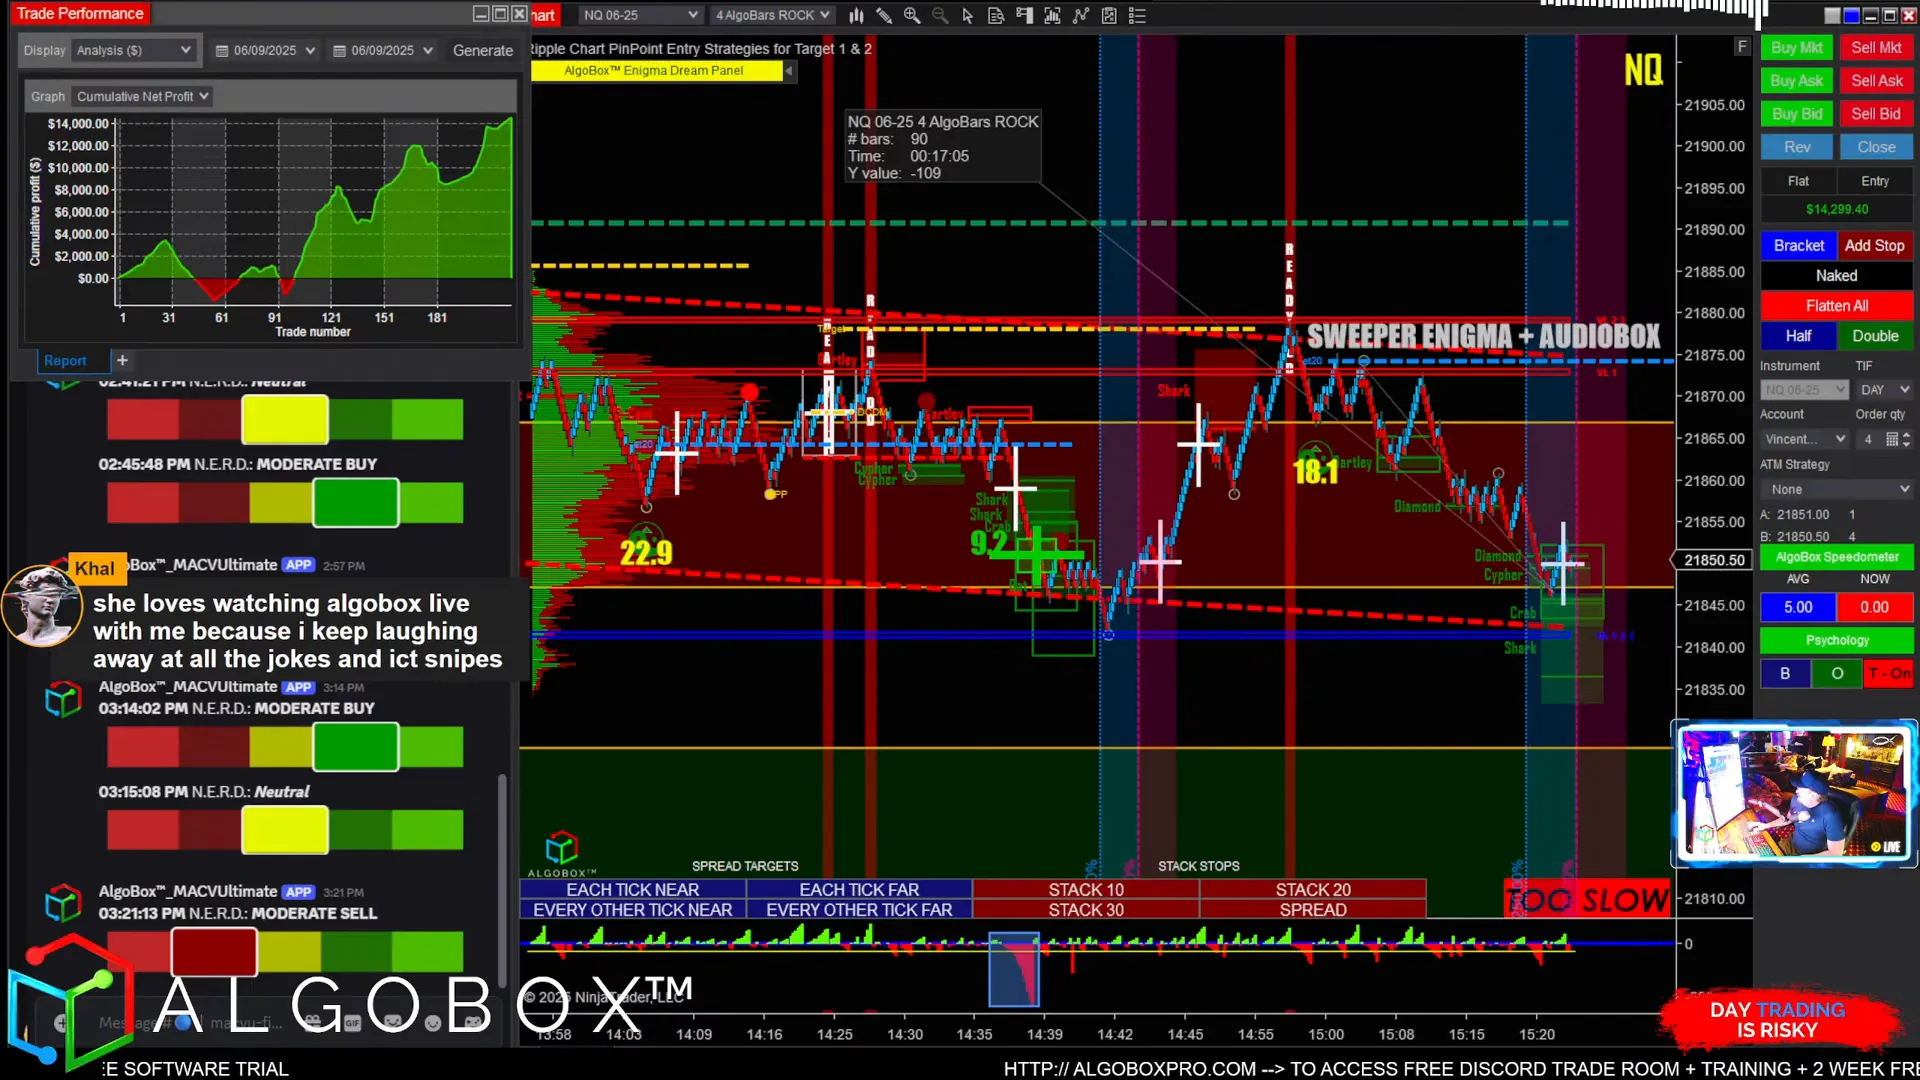
Step 7: Recognizing Split Cross Reversals and Shark Patterns
As the session progressed, we spotted a potential split cross reversal at the top of a barrier, accompanied by a shark structure and an RTOFA event. These formations signal a high likelihood of a reversal or retracement.
Additionally, the price touched the Bollinger Bands on the 9-minute chart, which often acts as dynamic support or resistance. Combining these signals gave us the confidence to prepare for a trade entry, anticipating a fill of the reversal.
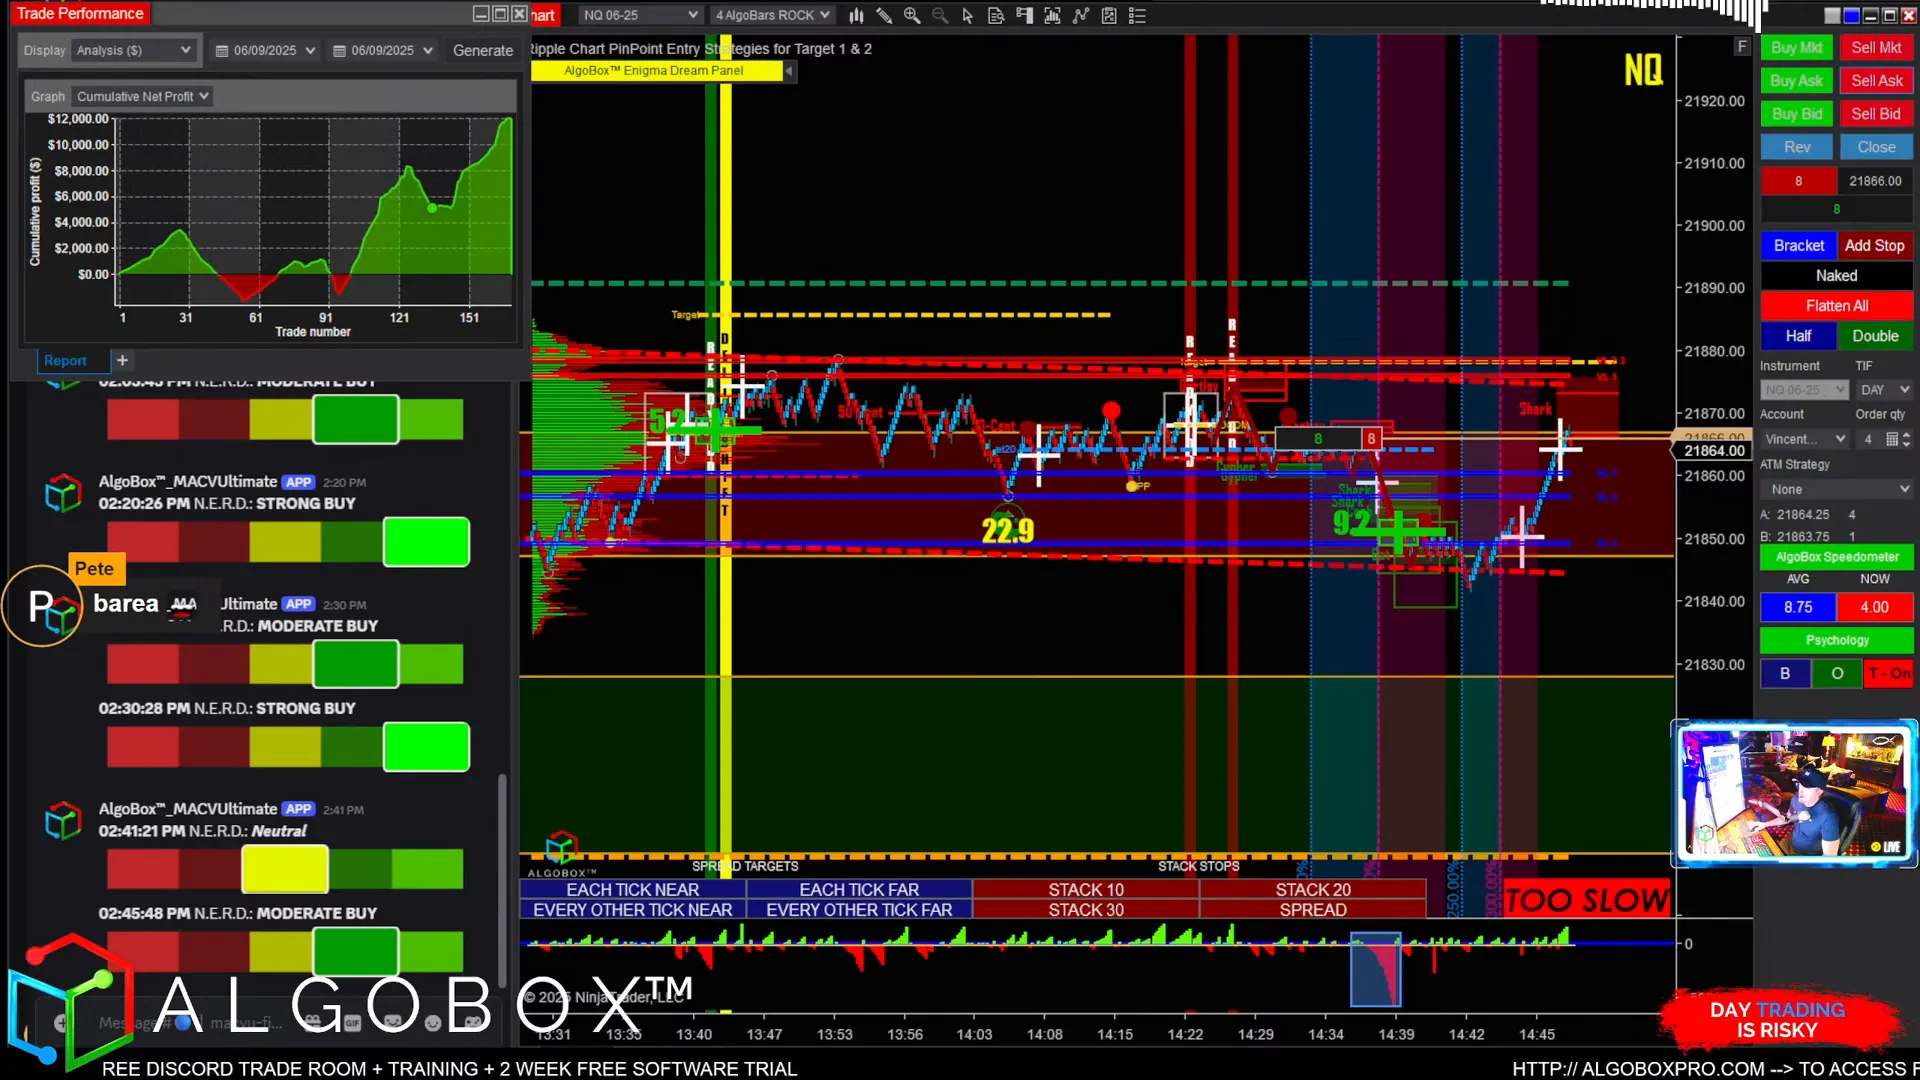
Step 8: Position Management – Full vs. Partial Entries
While I am not typically a fan of partial entries like three-quarter positions, sometimes the market dictates a more cautious approach. In this session, I initially took a three-quarter position but aimed to get full exposure for maximum profit potential.
Understanding when to scale into a position versus going full bore is a critical skill that balances risk and reward effectively.
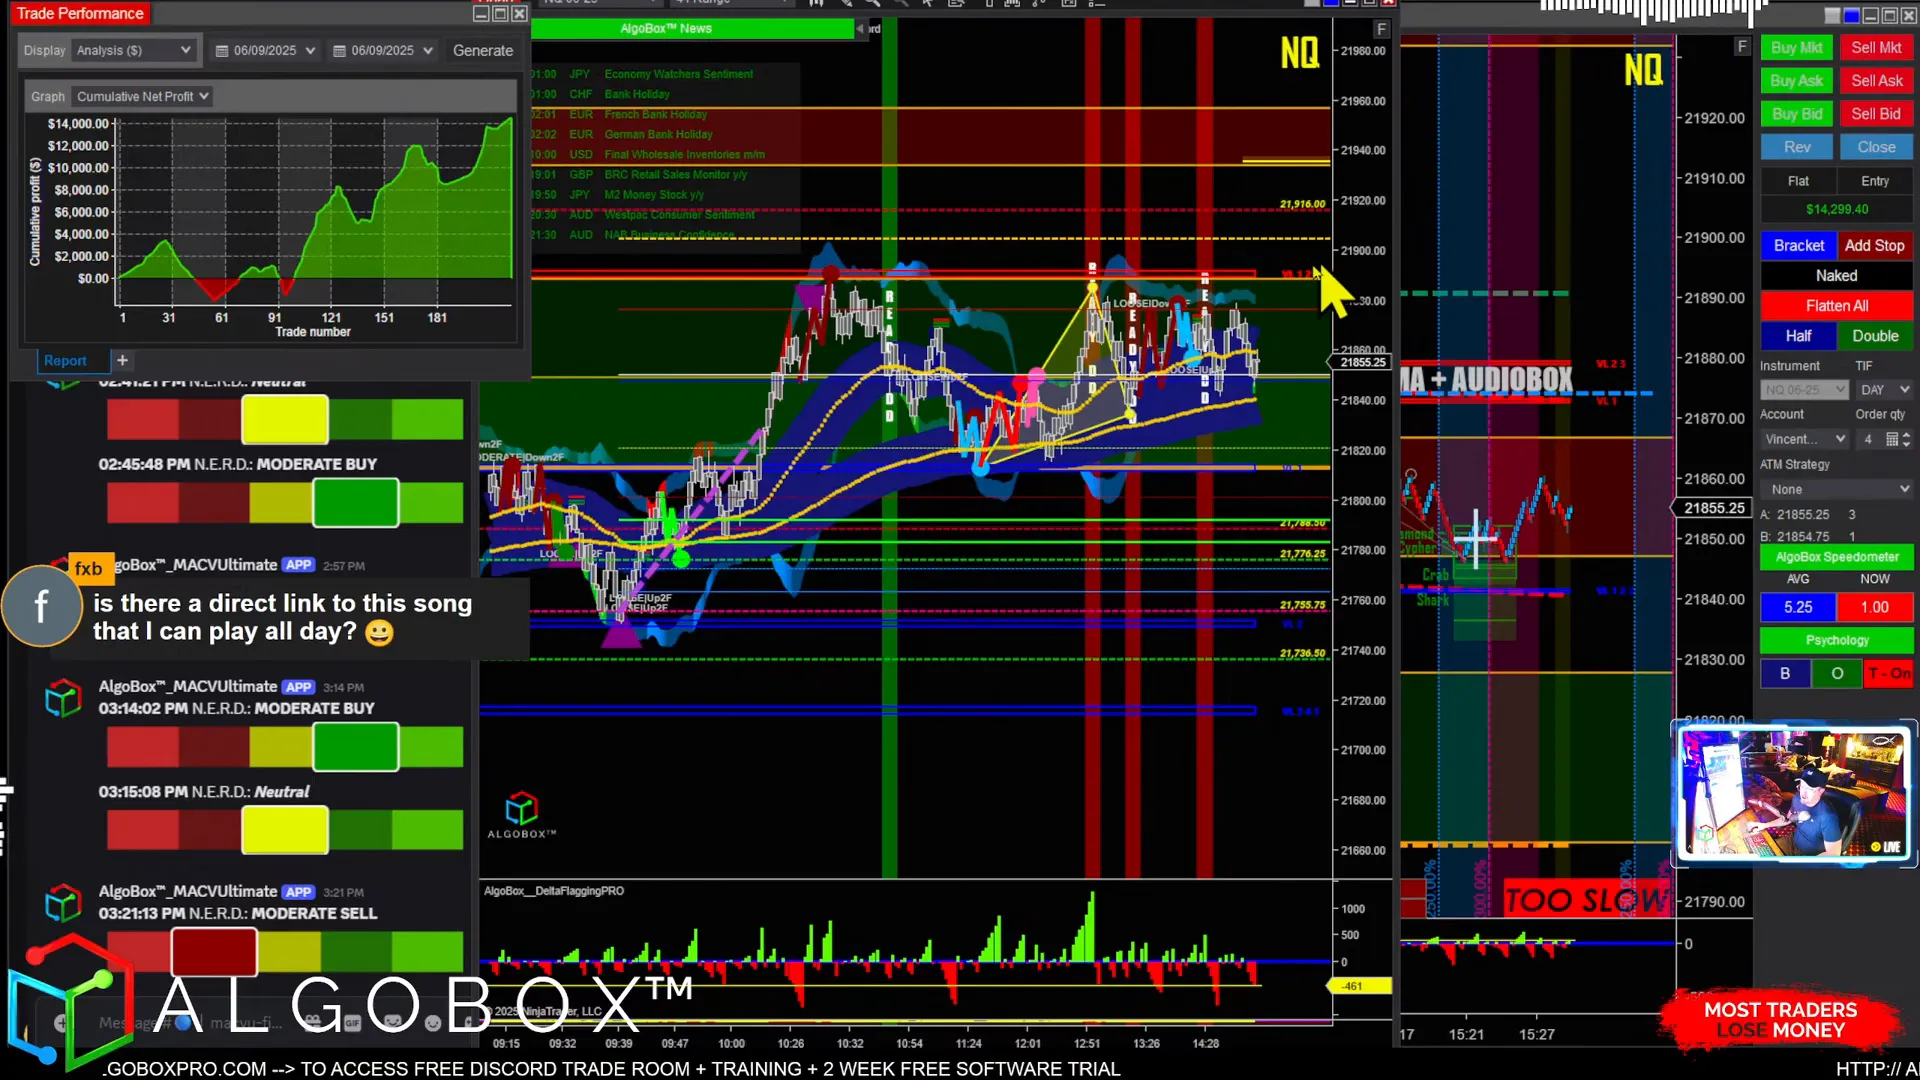
Step 9: Tracking Divergence and Bull Trap Setups
Divergence on the 9-minute NQ chart gave us clues about weakening momentum. This, combined with a shark back pattern, indicated a potential bull trap—a scenario where bulls are lured into buying before the market reverses down.
We also looked for AO (Awesome Oscillator) crosses as ideal initiators to confirm the trap and signal entry points for a short trade.
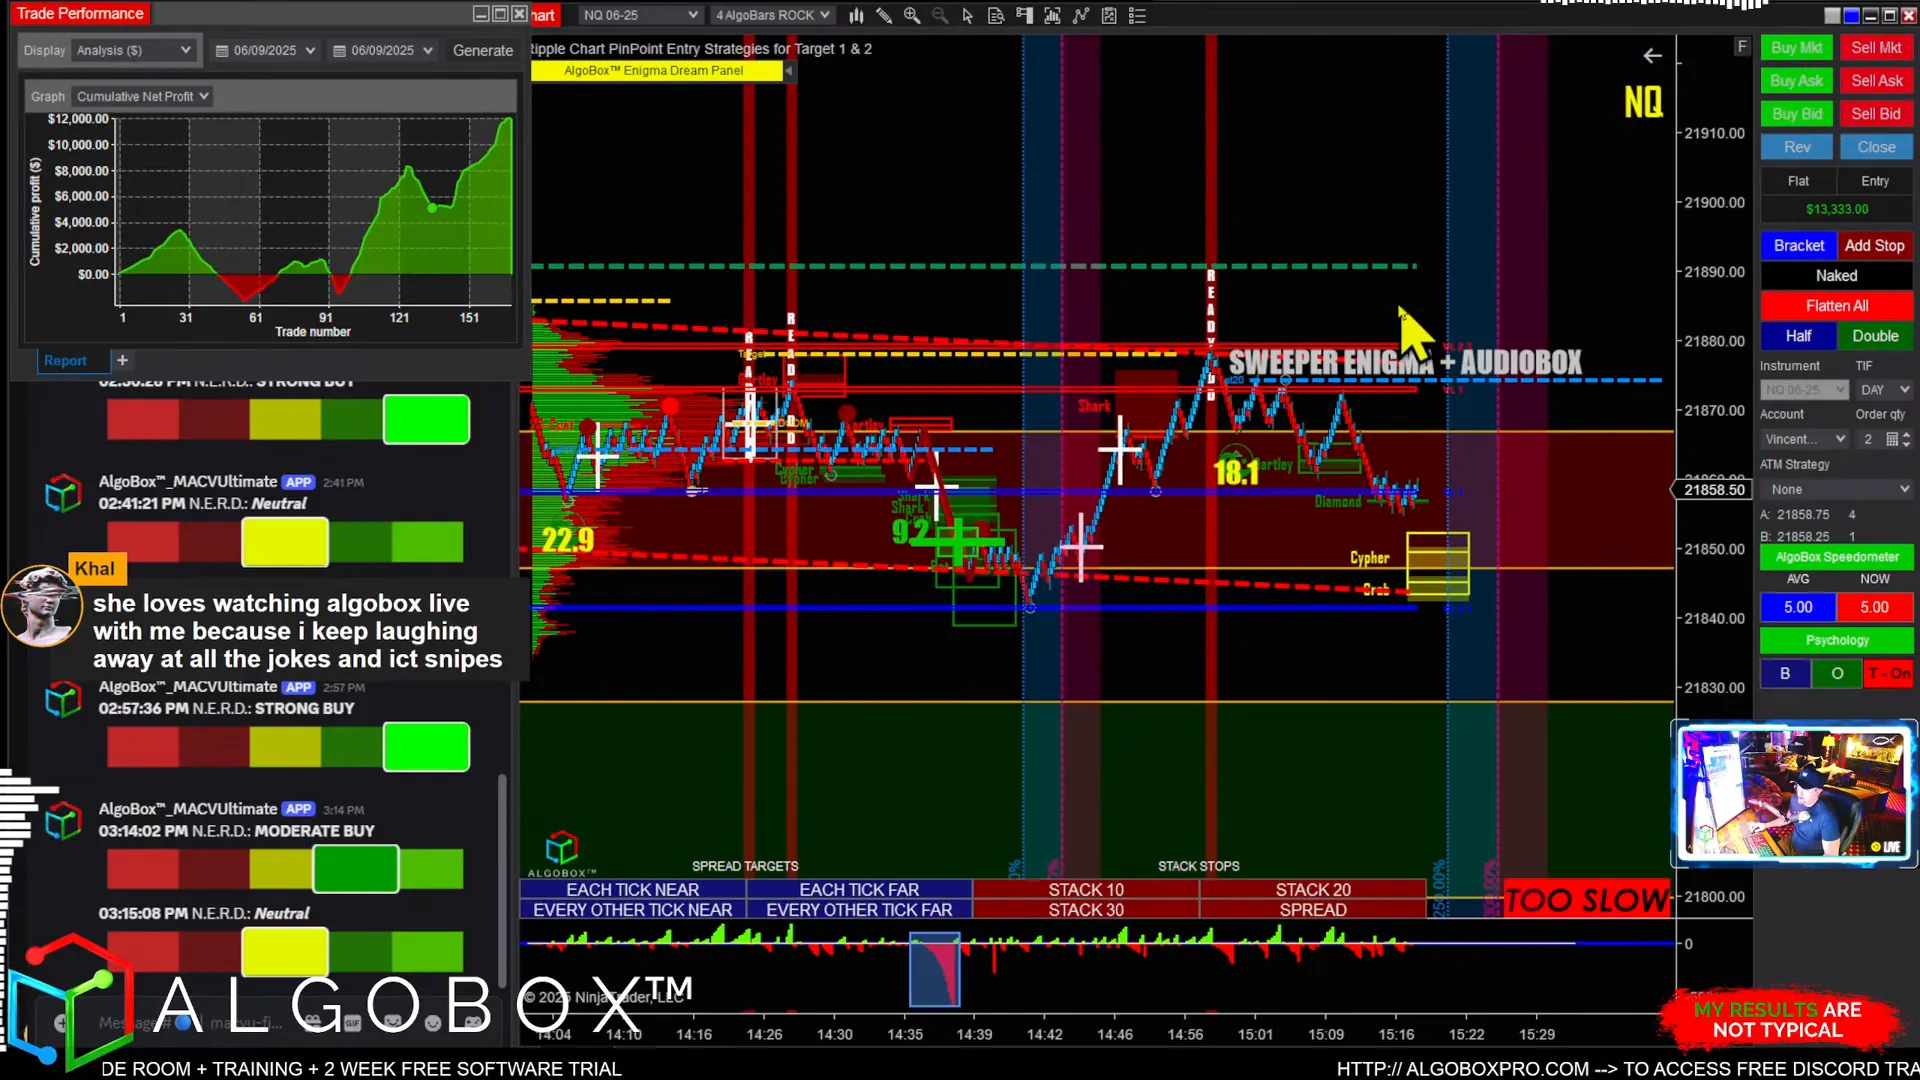
Step 10: Sweeper Strategy – How to Capture 50 to 100 Tick Moves
The sweeper is one of my favorite setups because it can yield between 50 to 100 ticks in profit. It involves entering a position at a sharp price rejection or sweep of stops, then riding the momentum as it unfolds.
In this session, I executed a sweeper combined with AudioBox confirmation, which resulted in a beautiful 100-tick move. Even though I got shaken out at 50 ticks initially, the full move played out, reinforcing the importance of patience and letting profits run.
Step 11: Handling Market Noise and Trolls in the Chat
Trading live can sometimes bring distractions, including trolls or doubters in the chat. I’ve embraced this with humor by sharing catchy jingle songs that lighten the mood and keep the community positive and focused.
Maintaining a strong mental game and not letting external noise affect your decisions is paramount for consistent trading success.
Step 12: Watching for Final Hour Moves and Big Bears
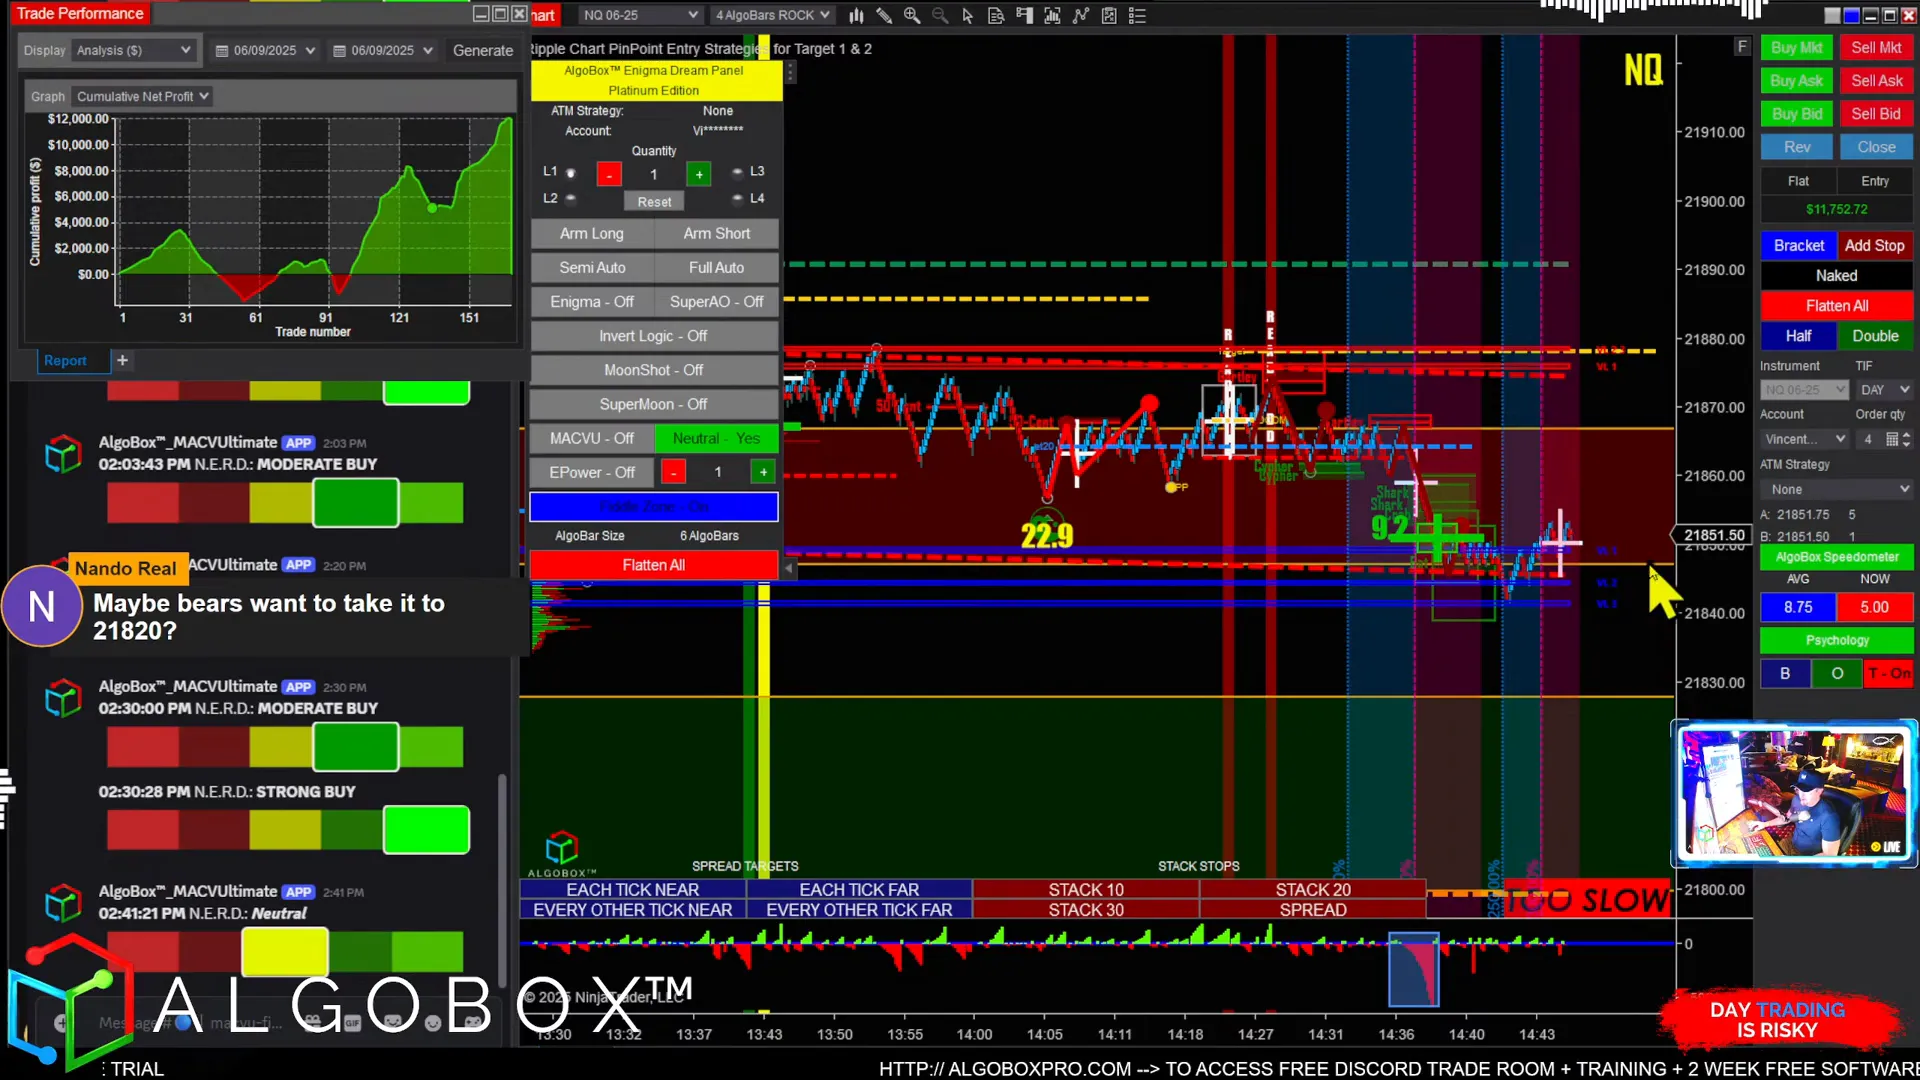
The final hour of trading often brings increased volatility and decisive moves. In this session, we observed a smaller bear stepping in, contrasting with a bigger bear from the morning. This dynamic set up a potential end-of-day scenario where bears take profits, and bulls prepare to ride the reversal.
My play call was to watch for two green crosses signaling a shift in momentum, allowing us to capitalize on both the bear’s profit-taking and the bull’s subsequent push higher.
Step 13: Utilizing Community and Documentation Resources
Trading with AlgoBox is supported by a rich ecosystem of resources. For those wanting to deepen their understanding, I highly recommend exploring the defense leg video created by Eddie, available in the AlgoBox documentation. This video visually explains defense legs and targeting strategies, which are crucial for mastering the system.
Additionally, the AlgoBox GPT tool is a fantastic resource to get explanations on specific concepts in simple terms, making learning accessible and effective.
Step 14: Managing Risk and Knowing When to Exit
Risk management is woven into every step of the trading process. For instance, when a second green cross confirms a trade, I go full position, but I always have exit strategies ready, including brackets and stops, to protect against unexpected moves.
Sometimes, despite the best entry, the market moves against you, and it’s crucial to accept losses gracefully and move on. This discipline ensures long-term profitability.
Step 15: Reflecting on the Session and Preparing for Tomorrow
The afternoon session wrapped up with a modest drawdown from the morning’s gains, closing at around $10,208 in profits. While the afternoon didn’t produce as many big moves, it was a solid day overall.
Remember, trading is a marathon, not a sprint. Each session builds on the last, and consistent application of these strategies will compound your success over time.
Don’t forget to grab the AlgoBox boot camp if you haven’t already, as it’s a comprehensive training tool that will accelerate your learning and mastery of algorithmic trading.
Conclusion: Mastering Day Trading with AlgoBox
Trading the futures market live and profitably takes discipline, strategy, and the right tools. Throughout this tutorial, we’ve covered everything from identifying defense legs and traps to timing entries with crosses and enigma signals, managing positions, and executing high-probability sweeper trades.
By incorporating these steps and leveraging the AlgoBox platform, you can automate smarter trades, reduce emotional decision-making, and increase your consistency in the market.
Remember, no one is perfect. The key is to be profitable over time, manage your risk, and keep learning. I look forward to seeing you in the next session, where we’ll continue to sharpen our skills and grow our trading accounts.
Happy trading!